
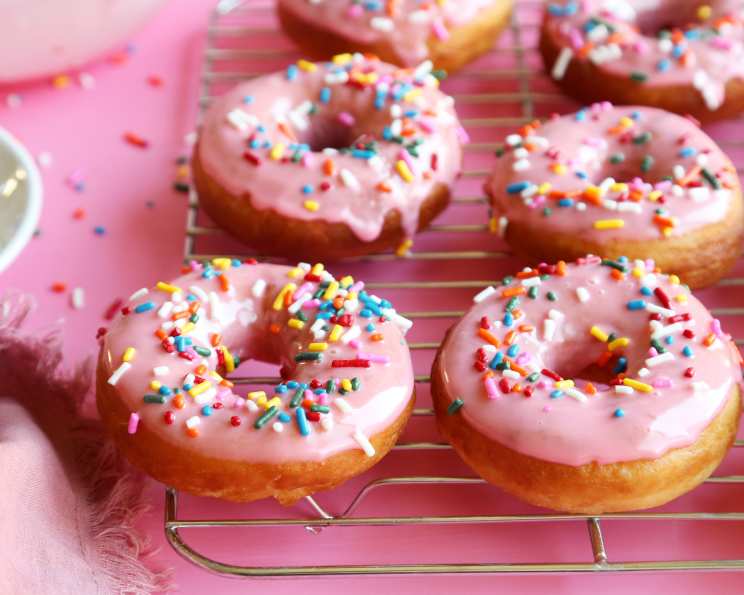
The Buttermilk Doughnut of My Childhood Dreams
The scent of hot oil and sweet glaze always transports me back to my grandmother’s kitchen. Every Saturday morning, without fail, she would be standing at her well-worn counter, a cloud of flour dusting her apron, patiently coaxing these very doughnuts to life. It wasn’t just the taste, though those were undeniably divine, but the warmth of her presence, the rhythmic clatter of her utensils, and the shared anticipation that made those doughnuts more than just a treat – they were pure, unadulterated love, fried golden brown. Now, I’m excited to share the recipe she passed down, so you can make the same memories with your loved ones.
Recipe Overview
- Prep Time: 45 minutes (including rise time)
- Cook Time: 4 minutes
- Total Time: 49 minutes
- Servings: 14 doughnuts
- Yield: 14 doughnuts
- Dietary Type: Not Gluten-Free
Ingredients
- 1 tablespoon dry active yeast
- 1/2 cup warm water
- 1/2 cup buttermilk
- 3 tablespoons shortening, melted (DO NOT use oil)
- 3 tablespoons sugar
- 2 1/2 – 3 cups flour
- 3 teaspoons baking powder
- 1 teaspoon salt
- Vegetable oil, for frying
- 2 1/2 cups sifted powdered sugar
- 1/4 cup milk
Equipment Needed
- Large bowl
- Measuring cups and spoons
- Floured surface
- Rolling pin
- 2 1/2 inch doughnut cutter
- Fryer or large, heavy-bottomed pot
- Thermometer
- Slotted spoon or spider
- Paper towels
- Wire rack
Instructions
-
Begin by activating the yeast. In a large bowl, dissolve 1 tablespoon of dry active yeast in 1/2 cup of warm water. Let it stand for about 5 minutes, until it becomes foamy. This is how you ensure your yeast is alive and ready to work its magic.
-
Next, add the wet ingredients. To the yeast mixture, add 1/2 cup of buttermilk, 3 tablespoons of melted shortening, and 3 tablespoons of sugar. Remember, don’t substitute oil for shortening here; it affects the final texture. Mix everything together thoroughly.
-
It’s time to incorporate the dry ingredients. Add 1 1/2 cups of flour, 3 teaspoons of baking powder, and 1 teaspoon of salt to the wet ingredients. Mix well until combined.
-
Gradually add the remaining flour. Continue to add the remaining flour, a little at a time, until you form a soft dough that is not too sticky. You may not need all of the flour, so add it gradually.
-
Knead the dough. Turn the dough out onto a lightly floured surface. Knead the dough several times until it becomes smooth and elastic. This develops the gluten and gives the doughnuts their structure.
-
Roll and cut the doughnuts. Roll the dough out to about 1/2 inch thick. Use a 2 1/2 inch doughnut cutter to cut out the doughnuts. If you don’t have a doughnut cutter, you can use two different-sized round cookie cutters, or even a knife to cut out squares or rectangles.
-
Let the doughnuts rise. Place the cut doughnuts on a lightly floured surface. Cover them with a clean kitchen towel and let them rise for about 45 minutes, or until they have doubled in bulk. This is a crucial step for achieving light and airy doughnuts.
-
Heat the oil. While the doughnuts are rising, heat 2-3 inches of vegetable oil in a deep fryer or a large, heavy-bottomed pot to 375°F (190°C). Use a thermometer to monitor the oil temperature for consistent cooking. If you have a Fry Daddy, this is the perfect time to use it!
-
Fry the doughnuts. Carefully drop 4 or 5 doughnuts at a time into the hot oil. Avoid overcrowding the pot, as this will lower the oil temperature.
-
Cook the doughnuts. Cook the doughnuts for about 2 minutes per side, or until they are lightly golden brown in color, turning them once during cooking.
-
Drain the doughnuts. Use a slotted spoon or spider to remove the doughnuts from the oil and place them on paper towels to drain excess oil.
-
Make the glaze. While the doughnuts are cooling slightly, prepare the glaze. In a bowl, combine 2 1/2 cups of sifted powdered sugar with 1/4 cup of milk. Stir until smooth.
-
Glaze the doughnuts. Dip each doughnut in the glaze while it’s still warm, allowing the excess glaze to drip off.
-
Cool and serve. Place the glazed doughnuts on a wire rack to cool completely, or serve them warm for the ultimate indulgence.
Expert Tips & Tricks
- Don’t overmix the dough: Overmixing develops too much gluten, resulting in tough doughnuts. Mix just until the ingredients are combined.
- Temperature is key: Maintaining the oil temperature at 375°F is crucial for even cooking. If the oil is too hot, the doughnuts will burn on the outside and remain raw inside. If the oil is too cool, they will absorb too much oil and become greasy.
- Use fresh oil: Fresh oil ensures a clean flavor. If the oil has been used before, strain it to remove any food particles that could burn and affect the taste.
- For extra flavor: Add a teaspoon of vanilla extract to the glaze for a richer, more complex flavor.
- Make ahead: You can prepare the dough ahead of time and store it in the refrigerator for up to 24 hours. Let it come to room temperature before rolling and cutting.
Serving & Storage Suggestions
These buttermilk doughnuts are best enjoyed fresh and warm, preferably within a few hours of making them. However, if you have leftovers, you can store them in an airtight container at room temperature for up to 2 days. They will soften slightly, but they will still be delicious. You can also freeze the unglazed doughnuts for up to 2 months. To reheat, thaw them completely and warm them in a low oven (around 200°F) for a few minutes before glazing. To serve, consider pairing these doughnuts with a cup of hot coffee or a glass of cold milk.
Nutritional Information
| Nutrient | Amount per Serving | % Daily Value |
|---|---|---|
| Calories | 208.9 kcal | N/A |
| Calories from Fat | 29 g | 14% |
| Total Fat | 3.3 g | 5% |
| Saturated Fat | 0.9 g | 4% |
| Cholesterol | 1 mg | 0% |
| Sodium | 256.8 mg | 10% |
| Total Carbohydrate | 42.3 g | 14% |
| Dietary Fiber | 0.8 g | 3% |
| Sugars | 24.1 g | 96% |
| Protein | 3.1 g | 6% |
Note: Nutritional information is an estimate and may vary based on specific ingredients and preparation methods.
Variations & Substitutions
- Cinnamon Sugar Doughnuts: Instead of glaze, toss the warm doughnuts in a mixture of cinnamon and sugar.
- Chocolate Glaze: Add cocoa powder to the powdered sugar glaze for a chocolatey twist.
- Maple Glaze: Substitute maple syrup for some of the milk in the glaze for a warm, comforting flavor.
- Gluten-Free: While it requires significant adjustments, you can try using a gluten-free flour blend specifically designed for baking. Be prepared to experiment with the amount of liquid needed, as gluten-free flours absorb moisture differently.
- Vegan: Substitute the buttermilk with a plant-based alternative like almond or soy milk mixed with a tablespoon of lemon juice or apple cider vinegar. Use vegan shortening in place of regular shortening.
FAQs (Frequently Asked Questions):
Q: Why is shortening recommended over oil?
A: Shortening provides a more tender and less greasy texture compared to oil. Oil can sometimes seep into the dough during frying, leading to a heavier doughnut.
Q: Can I use a different type of yeast?
A: While dry active yeast is preferred, you can use instant yeast. If using instant yeast, you can skip the initial blooming step and add it directly to the dry ingredients.
Q: How do I prevent the doughnuts from becoming too greasy?
A: Maintaining the correct oil temperature is crucial. Also, don’t overcrowd the pot, and ensure the doughnuts are properly drained on paper towels after frying.
Q: Can I bake these instead of frying?
A: While frying is traditional, you can try baking them. However, the texture will be different, resulting in a more cake-like doughnut. Bake at 375°F (190°C) for about 10-12 minutes, or until golden brown.
Q: What if my dough doesn’t rise properly?
A: Ensure your yeast is fresh and active. Also, make sure the room temperature is warm enough, as cold temperatures can inhibit rising.
Final Thoughts
There’s something truly special about biting into a warm, homemade doughnut, especially when it’s one made with love and a little bit of patience. Don’t be intimidated by the frying process – once you get the hang of it, it’s incredibly rewarding. I encourage you to gather your ingredients, dust off your apron, and give this recipe a try. Share your creations with loved ones, and perhaps start a doughnut tradition of your own. And please, let me know how they turn out! I always love hearing about your baking adventures. Happy frying!