
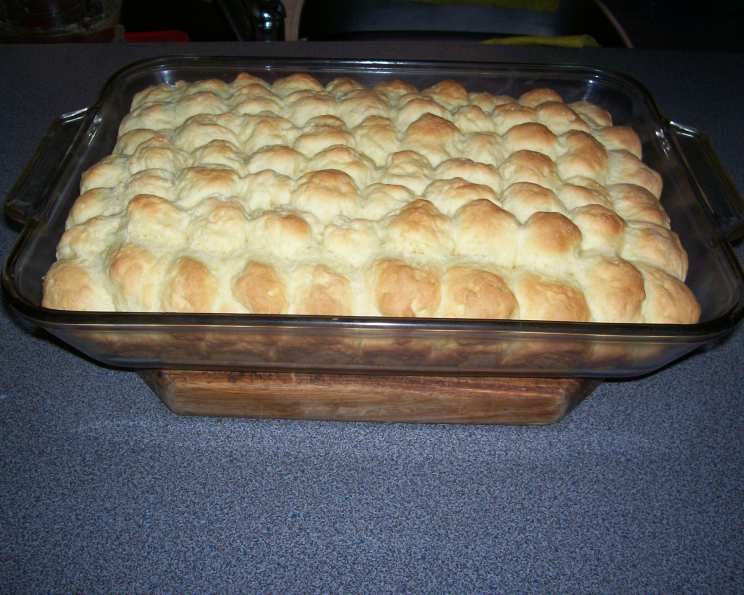
Buttermilk Rusks: A Taste of Home
The scent of buttermilk rusks baking always transports me back to my grandmother’s kitchen. I remember standing on a wobbly stool, mesmerized as she expertly cut in the butter, her hands working with a practiced ease honed over decades. The warmth from the oven, the yeasty aroma mingling with the tang of buttermilk – it was pure comfort, a tangible expression of love baked into every golden, crunchy bite. These rusks weren’t just food; they were stories, traditions, and a legacy I’m honored to continue.
Recipe Overview
- Prep Time: 20 minutes
- Cook Time: 60 minutes
- Total Time: 1 hour 20 minutes
- Servings: 40
- Yield: Approximately 40 rusks
- Dietary Type: Not specified, contains gluten, dairy, and eggs
Ingredients
- 1 kg flour
- 12 ½ ml baking soda
- 25 ml cream of tartar
- 10 ml salt
- 250 ml sugar
- 250 g butter, cold and cubed
- 350 ml buttermilk
- 1 egg
- Oil, for greasing
- Milk, for glaze
Equipment Needed
- Large mixing bowl
- Measuring cups and spoons
- Pastry blender or food processor (optional)
- Two 30cm x 36cm x 7cm loaf pans
- Cooling rack
- Baking sheet
Instructions
-
Preheat your oven to 240°C (464°F). This initial high heat is crucial for the initial rise.
-
In a large mixing bowl, sift together the flour, baking soda, cream of tartar, and salt. This ensures even distribution and a lighter texture. Stir the dry ingredients until well mixed.
-
Cut in the cold butter using a pastry blender or your fingertips. Alternatively, you can pulse the dry ingredients and butter in a food processor until the mixture resembles coarse cornmeal. The goal is to have small pieces of butter evenly distributed throughout the flour. This creates pockets of fat that will steam during baking, resulting in a flaky, tender rusk.
-
In a separate bowl, beat together the buttermilk and egg.
-
Add the buttermilk mixture to the dry ingredients and mix until just combined. Be careful not to overmix, as this will develop the gluten and result in tough rusks. You’re aiming for a firm, slightly sticky dough.
-
Pinch off pieces of dough, approximately the size of golf balls. Press each piece lightly into a rectangular shape, about 2cm thick.
-
Place the shaped dough pieces close together in two greased loaf pans (30cm x 36cm x 7cm). Pack them snugly, but not so tightly that they can’t expand slightly during baking.
-
Brush the sides of each row of dough pieces with oil. This will help the rusks break apart easily after baking. Without this step, they tend to fuse together.
-
Brush the tops of the dough pieces with diluted milk. This will give them a lovely golden-brown color.
-
Bake in the preheated oven at 240°C (464°F) for 10 minutes. Then, reduce the heat to 190°C (374°F) and bake for a further 50 minutes, or until the rusks are golden brown and cooked through. To check for doneness, insert a toothpick into the center of a rusk; it should come out clean.
-
Turn out the baked rusks onto a cooling rack. While they are still warm, break the loaf in two or three places to allow them to cool more quickly. This also prevents them from becoming soggy.
-
Once completely cool, break the loaf neatly into individual rusks.
-
To dry out the rusks and achieve that characteristic crunchy texture, place them on a baking sheet and bake in a very low oven (120°C / 250°F) for several hours, or until they are completely dry and crisp. The drying time will depend on the humidity in your environment.
Expert Tips & Tricks
- Cold Butter is Key: Using cold butter is essential for creating a flaky texture. If the butter gets too soft, the rusks will be dense and greasy. You can even chill the dry ingredients for 15-20 minutes before adding the butter.
- Don’t Overmix: Overmixing the dough develops the gluten and results in tough rusks. Mix just until the ingredients are combined.
- Even Baking: If your oven has hot spots, rotate the loaf pans halfway through baking to ensure even browning.
- Drying Time: The drying time can vary depending on your oven and the humidity. Check the rusks periodically and remove them when they are completely dry and crisp.
- Flavor Boost: Add a teaspoon of vanilla extract or a pinch of ground cinnamon to the buttermilk mixture for added flavor.
Serving & Storage Suggestions
Buttermilk rusks are delicious served with a cup of coffee or tea. They are perfect for dipping or dunking! Store cooled rusks in an airtight container at room temperature. Properly stored, they will last for up to 2 weeks. You can also freeze them for longer storage; thaw them at room temperature before serving. They do not typically need reheating.
Nutritional Information
(Estimated values, will vary based on specific ingredient brands and portion sizes)
| Nutrient | Amount per Serving | % Daily Value |
|---|---|---|
| Calories | 150 kcal | 8% |
| Total Fat | 6g | 9% |
| Saturated Fat | 4g | 20% |
| Cholesterol | 20mg | 7% |
| Sodium | 250mg | 11% |
| Total Carbohydrate | 20g | 7% |
| Dietary Fiber | 1g | 4% |
| Sugars | 1g | 2% |
| Protein | 3g | 6% |
Variations & Substitutions
- Gluten-Free: Substitute the all-purpose flour with a gluten-free flour blend. You may need to adjust the liquid content slightly.
- Dairy-Free: Use a plant-based butter alternative and a dairy-free buttermilk substitute (such as a mixture of almond milk and lemon juice).
- Sweetener: Replace the sugar with honey or maple syrup for a different flavor profile.
- Add-ins: Mix in dried fruit, nuts, or chocolate chips for added texture and flavor.
FAQs (Frequently Asked Questions)
Q: Why are my rusks not as crunchy as they should be?
A: This is likely due to insufficient drying time. Ensure the rusks are baked in a very low oven until completely dry and crisp. Humidity can also affect the drying process, so you may need to extend the drying time.
Q: Can I use self-raising flour instead of all-purpose flour, baking soda, and cream of tartar?
A: While you could, the texture might be slightly different. It’s best to stick to the recipe for optimal results.
Q: Can I freeze these rusks?
A: Yes, you can freeze them after they have completely cooled and dried. Store them in an airtight container or freezer bag for up to 3 months. Thaw at room temperature before serving.
Q: What is cream of tartar and can I omit it?
A: Cream of tartar is an acid that helps activate the baking soda, resulting in a lighter texture. While you can omit it, the rusks might not rise as much.
Q: Why do I need to brush the sides with oil?
A: Brushing the sides with oil ensures that the rusks will easily break apart from each other after baking. Without it, they will likely fuse together.
Final Thoughts
Buttermilk rusks are more than just a simple baked treat; they are a connection to the past, a taste of home, and a perfect accompaniment to your favorite warm beverage. Don’t be intimidated by the steps—the process is simpler than it seems, and the reward is a batch of golden, crunchy rusks that will fill your kitchen with warmth and nostalgia. I encourage you to try this recipe, make it your own, and share the love with friends and family. I’d love to hear your feedback and any variations you create!