
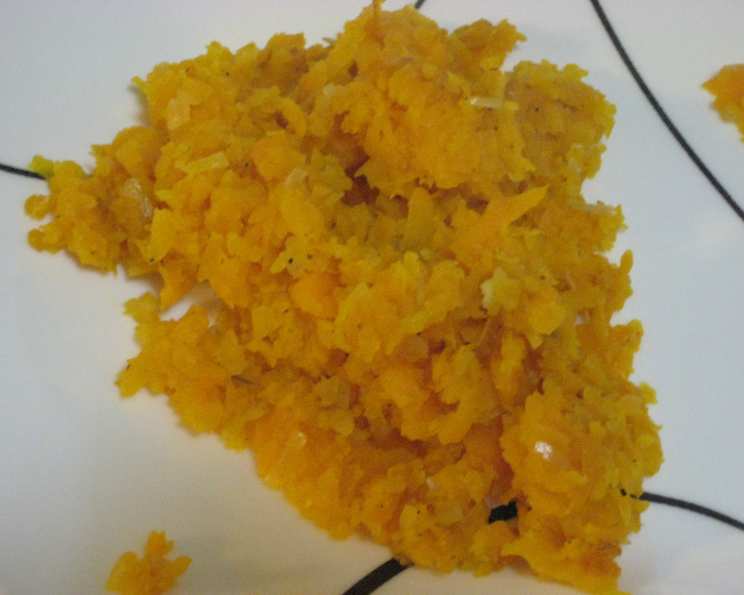
Butternut Hash Browns: A Deliciously Healthy Twist
Every year, as the leaves begin to turn and the air grows crisp, I find myself craving the warm, comforting flavors of autumn. For me, nothing quite captures that feeling like the humble hash brown. But instead of relying on the usual potatoes, I decided to give this classic breakfast staple a seasonal makeover. The result? These incredible butternut squash hash browns! I still remember the first time I made them, my kitchen filled with the sweet aroma of roasting squash and spices. They were so good, I ended up making them two more times that week!
Recipe Overview
- Prep Time: 15 minutes
- Cook Time: 6 minutes
- Total Time: 21 minutes
- Servings: 2
- Dietary Type: Gluten-Free, Vegetarian, Vegan
Ingredients
- 2 cups butternut squash, uncooked, shredded
- 4 tablespoons onions, chopped
- ½ teaspoon onion powder
- ½ teaspoon garlic powder
- 1 dash ground cumin
- 1 dash salt
- 1 dash pepper
- Nonstick cooking spray
Equipment Needed
- Box grater
- Paper towels
- Small to medium pan
- Spatula
Instructions
-
Begin by preparing the butternut squash. The key to perfect hash browns is to remove as much moisture as possible. Spread the shredded squash out between 2 layers of paper towels.
-
Press down firmly to absorb the moisture from the squash. Repeat this process if necessary, using fresh paper towels each time, until no more water can be removed. This step is crucial for achieving crispy, non-mushy hash browns.
-
In a bowl, toss the drained squash shreds with the chopped onions, onion powder, garlic powder, cumin, salt, and pepper. Ensure the squash is evenly coated with the spices.
-
Bring a small to medium pan to high heat. Generously spray the pan with nonstick cooking spray. A 1 to 2 second spray should suffice. The pan needs to be hot before adding the squash mixture.
-
Add the seasoned squash mixture to the hot pan. Spread it out evenly in a thin layer.
-
Cook the squash for 3 minutes without stirring. This allows the bottom layer to brown properly.
-
Using a spatula, carefully flip the squash shreds. Try to flip large sections at a time to keep the hash browns intact.
-
Cook for another 3 minutes or so, until the squash is cooked through and nicely browned on both sides. The exact cooking time may vary depending on the heat of your stove and the thickness of the squash layer.
-
Remove from heat and season to taste with more salt and pepper, if desired.
-
Serve immediately and enjoy!
Expert Tips & Tricks
-
Moisture is the enemy: Don’t skimp on drying the shredded squash. This is the single most important step for achieving crispy hash browns.
-
Hot pan, hot results: Make sure your pan is properly heated before adding the squash. A hot pan ensures the squash browns quickly and doesn’t steam.
-
Don’t overcrowd the pan: If you’re making a larger batch, cook the squash in batches to avoid overcrowding the pan. Overcrowding will lower the pan temperature and result in soggy hash browns.
-
Spice it up: Feel free to experiment with different spices. A pinch of smoked paprika or a dash of chili powder can add a delicious depth of flavor.
-
Get creative with the veggies: Add other shredded vegetables like carrots or parsnips for a colorful and flavorful twist.
Serving & Storage Suggestions
Serve these butternut squash hash browns immediately for the best flavor and texture. They make a fantastic side dish for breakfast, brunch, lunch, or dinner. Consider topping them with a fried egg, avocado slices, or a dollop of Greek yogurt for a complete meal.
Leftovers can be stored in an airtight container in the refrigerator for up to 3 days. To reheat, spread the hash browns on a baking sheet and bake at 350°F (175°C) until heated through and crispy, or reheat in a skillet over medium heat. Reheating in a skillet with a little oil can help restore some of the original crispness. Microwaving is not recommended as it can make them soggy.
Nutritional Information
| Nutrient | Amount per Serving | % Daily Value* |
|---|---|---|
| Calories | 76.2 kcal | N/A |
| Calories from Fat | 1 g | N/A |
| Total Fat | 0.2 g | 0% |
| Saturated Fat | 0 g | 0% |
| Cholesterol | 0 mg | 0% |
| Sodium | 84.3 mg | 3% |
| Total Carbohydrate | 19.4 g | 6% |
| Dietary Fiber | 3.2 g | 12% |
| Sugars | 4.3 g | N/A |
| Protein | 1.8 g | 3% |
- Percent Daily Values are based on a 2,000 calorie diet.
Variations & Substitutions
- Sweet and Spicy: Add a pinch of cayenne pepper or a drizzle of maple syrup for a sweet and spicy twist.
- Herbed Hash Browns: Incorporate fresh herbs like thyme, rosemary, or sage for an aromatic variation.
- Potato Power: Add a shredded potato to the mix for a more traditional hash brown flavor.
- Add Cheese: Sprinkle a little parmesan cheese for a delicious flavor and textural change.
- Different Squash: Consider using other types of squash like acorn or delicata.
FAQs (Frequently Asked Questions)
Q: Can I use pre-shredded butternut squash?
A: Yes, you can use pre-shredded butternut squash to save time, but make sure to dry it thoroughly with paper towels as it may contain more moisture than freshly shredded squash.
Q: How do I know when the hash browns are cooked through?
A: The hash browns are cooked through when the squash is tender and easily pierced with a fork, and the edges are golden brown and crispy.
Q: Can I bake these instead of cooking them in a pan?
A: While you can bake them, the texture will be different. For baked hash browns, spread the mixture on a baking sheet and bake at 400°F (200°C) for about 20-25 minutes, flipping halfway through. They may not be as crispy as pan-fried hash browns.
Q: Can I make these ahead of time?
A: You can shred the squash and mix it with the spices ahead of time, but it’s best to cook the hash browns just before serving for optimal crispness.
Q: What are some good toppings for these hash browns?
A: Consider toppings like a fried egg, salsa, avocado, sour cream, or a sprinkle of fresh herbs.
Final Thoughts
These butternut squash hash browns are a simple yet satisfying way to enjoy the flavors of fall. They’re easy to make, healthy, and incredibly versatile. So, the next time you’re looking for a delicious and nutritious side dish, give this recipe a try. I’m confident you’ll love them as much as I do! And once you’ve tried them, don’t hesitate to share your own variations and feedback – I’m always eager to hear about your culinary creations!