
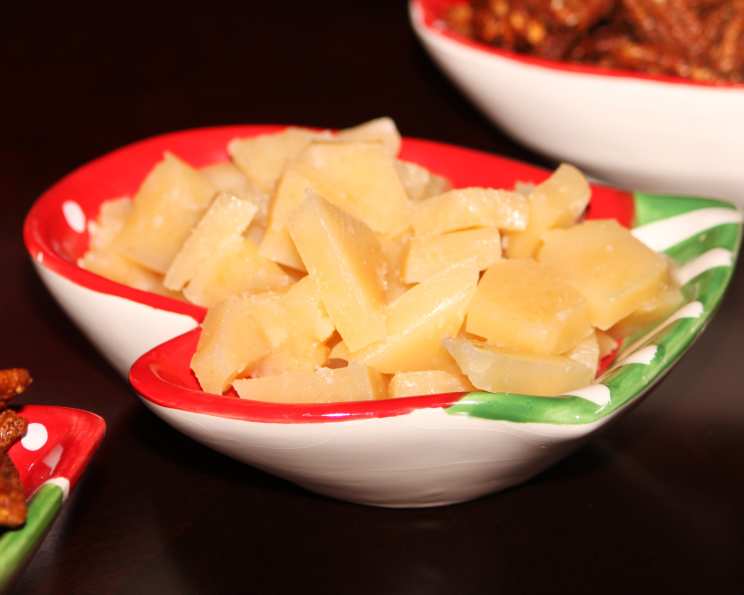
The Irresistible Allure of Homemade Butterscotch Candy
My grandmother, a woman whose kitchen was a symphony of delightful smells and comforting warmth, always had a candy dish brimming with butterscotch. Each little golden square was a treasure. As a child, I would sneak them when she wasn’t looking, letting the smooth, buttery sweetness slowly melt on my tongue. The memory of those moments, the quiet joy of savoring that simple candy, is a taste of childhood I can still conjure with perfect clarity. Now, I carry on her tradition, filling my own candy dish and heart with the same sweet nostalgia.
Recipe Overview
- Prep Time: 10 minutes
- Cook Time: 20 minutes
- Total Time: 30 minutes
- Servings: 36
- Yield: About 3 pounds
- Dietary Type: Vegetarian
Ingredients
- 2 cups granulated sugar
- 2⁄3 cup heavy cream
- 2⁄3 cup water
- 1⁄8 teaspoon cream of tartar
- 6 tablespoons butter, cut into small pieces
- 1⁄2 teaspoon vanilla extract
Equipment Needed
- Saucepan
- Candy thermometer
- 7-inch square pan
- Butter knife
- Wax paper
- Airtight container
Instructions
- For optimal results, make this candy on a dry, low-humidity day. Humidity can interfere with the candy’s setting process.
- In a heavy-bottomed saucepan, combine the granulated sugar, heavy cream, and water. Stir gently until the sugar is completely dissolved. Ensure there are no lingering sugar crystals on the bottom of the pan.
- Using a wet cloth or pastry brush dipped in water, carefully wipe down the inside walls of the saucepan to remove any sugar crystals that may have splashed up during the initial mixing. This helps prevent unwanted crystallization later on in the cooking process.
- Add the cream of tartar to the mixture. The cream of tartar helps prevent the sugar from crystalizing and contributes to a smoother final product.
- Place the saucepan over medium heat and bring the mixture to a boil. It is crucial to boil the mixture very slowly and evenly.
- Insert a candy thermometer into the saucepan, ensuring it doesn’t touch the bottom. Continue to boil the mixture, without stirring, until it reaches the soft-ball stage — 240 degrees F (116 degrees C) on the candy thermometer.
- Once the mixture reaches 240°F, carefully add the butter, one piece at a time, allowing each piece to melt before adding the next. This helps to incorporate the butter evenly into the mixture.
- Continue boiling the mixture, without stirring, until it reaches the soft-crack stage — 280 degrees F (138 degrees C) on the candy thermometer. Maintaining a consistent temperature is key to achieving the correct texture.
- Remove the saucepan from the heat. Immediately stir in the vanilla extract. Be careful, as the hot candy mixture can splatter.
- Pour the hot butterscotch mixture into a deep, buttered 7-inch square pan. Buttering the pan thoroughly will prevent the candy from sticking and make it easier to remove once it has cooled and set.
- Allow the butterscotch to cool slightly. When the butterscotch is nearly cold, but still pliable, use the point of a buttered or oiled knife to mark it into bars or squares. This step is easier to accomplish while the candy is still slightly warm.
- Allow the butterscotch to cool completely and set fully. Once the butterscotch is quite cold and firm, carefully break it along the scored lines into individual pieces.
- Wrap each piece of butterscotch individually in wax paper to prevent sticking.
- Store the wrapped butterscotch candy in an airtight container at room temperature.
Expert Tips & Tricks
- Temperature is Key: A candy thermometer is essential for accurate results. Clip it to the side of your pan, making sure it doesn’t touch the bottom.
- No Stirring: Resist the urge to stir the mixture once it comes to a boil. Stirring can cause sugar crystals to form, resulting in grainy candy.
- Humidity Alert: High humidity can prevent the butterscotch from setting properly, resulting in a soft or sticky candy. Choose a dry day for best results. If that’s not possible, consider adding a tablespoon of corn syrup to the recipe to help stabilize the sugar.
- Butter Adds Flavor: Don’t skimp on the butter. It’s what gives butterscotch its signature rich, buttery flavor. Using high-quality butter will result in even better-tasting candy.
- Soft-Crack Stage: If you don’t have a candy thermometer, you can test for the soft-crack stage by dropping a small amount of the hot candy into a bowl of ice water. If it separates into hard, brittle threads that crack easily, it has reached the soft-crack stage.
- Adding Nuts: For a nutty variation, stir in chopped pecans or walnuts after removing the pan from the heat, before pouring into the pan.
Serving & Storage Suggestions
Serve your homemade butterscotch candy in a decorative bowl or candy dish for an inviting display. It’s a perfect treat to offer guests or to enjoy yourself with a cup of coffee or tea.
Store the wrapped butterscotch candy in an airtight container at room temperature. Properly stored, it will last for up to 2 weeks.
Do not refrigerate the candy, as this can cause it to become sticky. Freezing is also not recommended, as it can alter the texture.
Nutritional Information
| Nutrient | Amount per Serving | % Daily Value |
|---|---|---|
| Calories | 75.4 kcal | N/A |
| Calories from Fat | 31 kcal | N/A |
| Total Fat | 3.5 g | 5% |
| Saturated Fat | 2.2 g | 11% |
| Cholesterol | 11.1 mg | 3% |
| Sodium | 15.4 mg | 0% |
| Total Carbohydrate | 11.2 g | 3% |
| Dietary Fiber | 0 g | 0% |
| Sugars | 11.1 g | N/A |
| Protein | 0.1 g | 0% |
Note: Nutritional information is an estimate and may vary based on specific ingredients and portion sizes.
Variations & Substitutions
- Salted Butterscotch: Use salted butter instead of unsalted butter for a salted butterscotch variation. The touch of salt enhances the sweetness and adds depth of flavor.
- Maple Butterscotch: Substitute 1/4 cup of the granulated sugar with maple syrup for a subtle maple flavor.
- Spiced Butterscotch: Add 1/4 teaspoon of ground cinnamon or nutmeg to the mixture along with the vanilla extract for a warm, spiced butterscotch.
- Chocolate Butterscotch: Drizzle melted chocolate over the cooled and set butterscotch for a chocolate-covered treat.
- Brown Butter Butterscotch: Brown the butter before adding it to the mixture for a deeper, nuttier flavor. Be careful not to burn the butter.
FAQs (Frequently Asked Questions):
Q: Why is my butterscotch grainy?
A: Grainy butterscotch is usually caused by sugar crystals forming during the cooking process. Avoid stirring after the mixture comes to a boil and ensure you wipe down the sides of the pan with a wet cloth to remove any sugar crystals.
Q: How do I know when the butterscotch is done without a thermometer?
A: If you don’t have a thermometer, you can test for the soft-crack stage by dropping a small amount of the hot candy into a bowl of ice water. If it separates into hard, brittle threads that crack easily, it has reached the soft-crack stage.
Q: Can I use margarine instead of butter?
A: While margarine can be used, it will affect the flavor and texture of the butterscotch. Butter provides the rich, buttery flavor that is characteristic of butterscotch.
Q: Why didn’t my butterscotch harden?
A: If your butterscotch didn’t harden, it may not have reached the correct temperature. Make sure to use a candy thermometer to ensure accuracy. High humidity can also prevent the butterscotch from setting properly.
Q: How long does homemade butterscotch last?
A: Properly stored in an airtight container at room temperature, homemade butterscotch will last for up to 2 weeks.
Final Thoughts
There’s something truly special about making candy from scratch. The alchemy of simple ingredients transforming into a delicious treat is incredibly rewarding. This butterscotch recipe, with its rich, buttery flavor, is a classic for a reason. I encourage you to try it and experience the joy of homemade candy. Feel free to experiment with different variations and share your creations with friends and family. Pair it with a warm cup of coffee or a scoop of vanilla ice cream for the ultimate indulgence!