
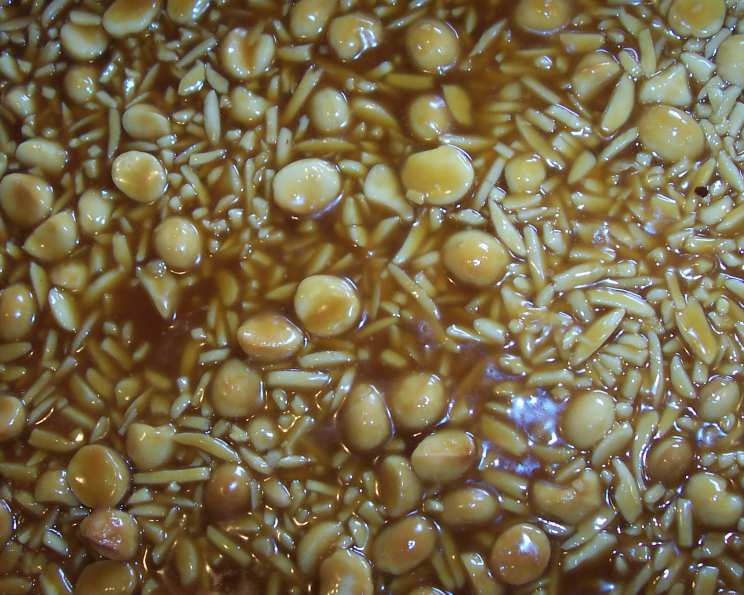
Butterscotch Nut Slice: A Symphony of Sweetness and Crunch
The first time I tasted a butterscotch nut slice, I was at a summer bake sale, the kind where every auntie brings her “secret weapon” dessert. The air hung thick with the scent of melting butter and caramelized sugar, a siren song to my sweet tooth. But amidst the colorful cupcakes and towering layer cakes, one unassuming tray stood out: golden-brown bars studded with glistening nuts. One bite, and I was hooked. The buttery, chewy base, the rich butterscotch, the satisfying crunch of the nuts – it was pure alchemy. Years later, I still strive to recapture that perfect balance of flavors and textures in my own kitchen, and this recipe comes pretty darn close.
Recipe Overview
- Prep Time: 30 minutes (includes resting time)
- Cook Time: 27 minutes
- Total Time: 57 minutes
- Yields: 16 fingers
- Dietary Type: Not specified
Ingredients
For the Base:
- Butter, for greasing the pan
- 2 tablespoons superfine sugar
- 1/4 cup butter, cut into cubes and at room temperature
- 1 egg, whisked lightly
- 1 cup plain flour
- 2 tablespoons self-rising flour
- 1 pinch salt
For the Topping:
- 4 ounces macadamia nuts
- 4 ounces brazil nuts
- 1 cup dark brown sugar, firmly packed
- 3/4 cup butter, cut into cubes and at room temperature
- 1/4 cup heavy cream
- 2 tablespoons plain flour
Equipment Needed
- 8” x 12” x 2” slab pan
- Non-stick baking paper
- Medium-sized bowl
- Electric beater
- Thick glass or rolling pin
- Fork
- Plastic wrap
- Medium-sized saucepan
- Hand-held whisk
- Board
- Knife
Instructions
-
Preheat your oven to 350°F (175°C). Accuracy is key for even baking.
-
Grease an 8” x 12” x 2” slab pan with butter, then line it with non-stick baking paper. This step is crucial to prevent sticking and ensure easy removal of the finished slice. Overhanging paper makes lifting the slice out a breeze.
-
In a medium-sized bowl, beat the superfine sugar and butter together with an electric beater for 3 to 4 minutes, or until the mixture is creamy in texture and paler in color. This incorporates air, creating a lighter, more tender base. Make sure your butter is truly at room temperature – not melted, but soft enough to easily blend.
-
Next, add the whisked egg and beat until well combined. The egg acts as a binder, holding the dough together. Ensure the egg is fully incorporated for a smooth, even texture.
-
Sift the plain flour, self-rising flour, and salt together over the butter mixture. Sifting aerates the flour, preventing lumps and creating a more delicate crumb. The salt enhances the sweetness.
-
Working quickly, use your hands to bring the ingredients together to form a ball. Don’t overwork the dough, as this can develop the gluten and result in a tough base. Don’t worry if it’s still a bit crumbly at this stage.
-
Place the pastry in the prepared pan and press out to cover the base. This can be done easily by rolling over the pastry with a thick glass or rolling pin, and then using your fingers to maneuver the pastry into the corners and to the edges of the pan. Aim for an even thickness throughout the base for uniform baking.
-
Prick the pastry all over with a fork. This prevents the pastry from puffing up during baking.
-
Cover with plastic wrap and rest in the fridge for 10 minutes. Resting the dough allows the gluten to relax, resulting in a less tough base.
-
Bake the pastry in the preheated oven for 12 minutes, or until firm and a light golden color. Keep a close eye on it – you want it lightly golden, not browned.
-
Put the baked base to one side and leave to cool. This is essential to prevent the butterscotch topping from melting and soaking into the base, resulting in a soggy slice.
-
Cut the macadamia nuts in half, and roughly chop the brazil nuts to a comparable size. Aim for a consistent size for even distribution and a more appealing texture.
-
Place the dark brown sugar and butter in a medium-sized saucepan and cook, stirring constantly, until the butter melts and the mixture comes to a boil. The dark brown sugar adds a rich, molasses-like flavor that complements the nuts perfectly.
-
Remove the saucepan from the heat and stir in the heavy cream and plain flour. The cream adds richness and moisture, while the flour helps to thicken the butterscotch. Be careful, as the mixture may bubble and spit when the cream is added.
-
Mix with a hand-held whisk until smooth. This ensures there are no lumps and the butterscotch is perfectly emulsified.
-
Add the nuts and stir in well. Make sure the nuts are evenly distributed throughout the butterscotch.
-
Return the pan to medium heat and stir until the mixture comes to the boil again. This further thickens the butterscotch and ensures the nuts are coated evenly.
-
Pour the butterscotch nut mixture over the cooled pastry base, and smooth the surface to cover the base evenly. This is your opportunity to create a visually appealing slice.
-
Bake in the pre-heated oven for 12 to 15 minutes, until the topping is bubbling and becoming dark around the edges. The mixture starts bubbling fairly soon after placing it in the oven – don’t worry, but check frequently to ensure the edges are not burning.
-
Cool completely in the pan. This allows the butterscotch to set and firm up, making it easier to cut.
-
Turn the cooled slice out onto a board, remove the baking paper, and cut into fingers or square pieces.
-
Serve warm with ice cream, or cool with tea or coffee. Can be stored in a container in the freezer.
Expert Tips & Tricks
- For a richer flavor, use brown butter in the base. Simply melt the butter in a saucepan over medium heat, continuing to cook until it turns a nutty brown color and emits a fragrant aroma. Let it cool slightly before using in the recipe.
- If your butterscotch topping starts to burn around the edges while baking, tent the pan with foil to slow down the browning.
- To get clean, even cuts, use a warm knife. Dip the knife in hot water, dry it thoroughly, and then slice the butterscotch nut slice. Repeat as needed.
- You can add a pinch of sea salt to the topping for a salty-sweet contrast.
- If you are finding the dough too crumbly, add a teaspoon of cold water at a time until it comes together.
Serving & Storage Suggestions
This Butterscotch Nut Slice is delicious served warm with a scoop of vanilla ice cream, or chilled with a cup of coffee or tea. It can be stored at room temperature in an airtight container for up to 3 days, or in the refrigerator for up to a week. For longer storage, freeze the slices individually wrapped for up to 2 months. To reheat, simply warm in the oven at 300°F (150°C) for a few minutes, or microwave in short bursts.
Nutritional Information
| Nutrient | Amount per Serving | % Daily Value |
|---|---|---|
| Calories | 312.7 kcal | N/A |
| Calories from Fat | 213 g | 68% |
| Total Fat | 23.7 g | 36% |
| Saturated Fat | 10.2 g | 51% |
| Cholesterol | 48.8 mg | 16% |
| Sodium | 115.2 mg | 4% |
| Total Carbohydrate | 24.4 g | 8% |
| Dietary Fiber | 1.4 g | 5% |
| Sugars | 15.4 g | 61% |
| Protein | 3.2 g | 6% |
Note: Nutritional information is an estimate and may vary based on specific ingredients and portion sizes.
Variations & Substitutions
- Gluten-Free: Substitute the plain flour and self-rising flour with a gluten-free blend. You may need to add a binding agent like xanthan gum to help hold the dough together.
- Nut-Free: Replace the macadamia and brazil nuts with sunflower seeds, pumpkin seeds, or chopped dried fruit.
- Dairy-Free: Use a dairy-free butter alternative and substitute the heavy cream with coconut cream or another plant-based cream.
- Different Nuts: Feel free to experiment with different types of nuts, such as pecans, walnuts, or almonds. Toasting the nuts before adding them to the topping can enhance their flavor.
FAQs (Frequently Asked Questions)
Q: Can I use a different size pan?
A: Yes, but you may need to adjust the baking time accordingly. A smaller pan will require a longer baking time, while a larger pan will require a shorter baking time.
Q: Can I make this ahead of time?
A: Absolutely! The Butterscotch Nut Slice can be made a day or two in advance and stored in an airtight container at room temperature or in the refrigerator.
Q: Why is my base soggy?
A: Make sure the base is completely cooled before pouring the butterscotch topping over it. Also, ensure that the butterscotch is thick enough before pouring it over the base.
Q: Can I freeze this?
A: Yes, this freezes very well. Cut into individual portions and wrap well before freezing.
Q: How do I prevent the topping from burning?
A: Keep a close eye on the topping while it’s baking and tent the pan with foil if it starts to brown too quickly.
Final Thoughts
This Butterscotch Nut Slice is a truly irresistible treat that is perfect for any occasion. With its buttery base, rich butterscotch topping, and crunchy nuts, it’s a symphony of flavors and textures that will delight your taste buds. Don’t be afraid to experiment with different variations and substitutions to create your own unique version. I encourage you to give this recipe a try – and please, share your feedback! I’d love to hear about your creations and any tips you might have. Pair this slice with a strong black coffee for a delightful afternoon treat or serve warm with a scoop of vanilla ice cream for a truly decadent dessert. Happy baking!