
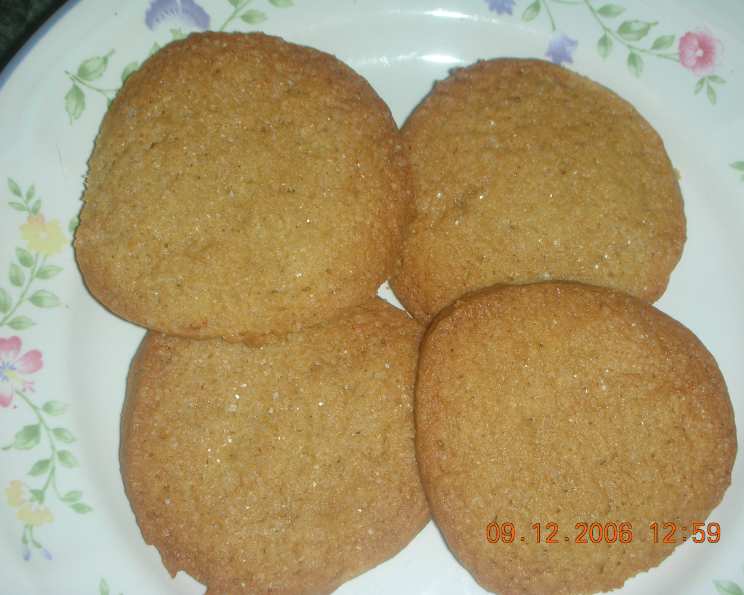
Butterscotch Refrigerator Cookies: A Slice of Nostalgia
The aroma of butterscotch always transports me back to my grandmother’s kitchen. I can almost see her now, her hands dusted with flour, humming a gentle tune as she carefully sliced and baked these very cookies. They weren’t fancy, but they were perfect—crisp around the edges, chewy in the middle, and bursting with that warm, comforting butterscotch flavor. She always made a double batch, knowing they wouldn’t last long, and the joy they brought to our family is a memory I deeply cherish.
Recipe Overview
- Prep Time: 20 minutes
- Cook Time: 10-12 minutes
- Total Time: At least 8 hours (includes chilling)
- Yields: Approximately 72 cookies
- Dietary Type: Not specified (contains gluten, dairy, eggs, and nuts)
Ingredients
- 3 1⁄2 cups flour
- 1 teaspoon salt
- 1 teaspoon cinnamon
- 1 teaspoon baking soda
- 1⁄2 cup shortening
- 1⁄2 cup butter, softened
- 2 cups brown sugar, firmly packed
- 2 eggs, well beaten
- 2 tablespoons warm water
- 1 teaspoon vanilla extract
- 1 cup chopped nuts (walnuts, pecans, or your favorite)
Equipment Needed
- Mixing bowls (large and medium)
- Measuring cups and spoons
- Electric mixer (handheld or stand mixer)
- Sifter or fine-mesh sieve
- Waxed paper or plastic wrap
- Baking sheets
- Cooling racks
- Sharp knife
Instructions
-
Prepare the Dry Ingredients: In a medium mixing bowl, sift together the flour, salt, cinnamon, and baking soda. Sifting ensures that the ingredients are evenly distributed and helps create a lighter, more tender cookie.
-
Cream the Fats and Sugar: In a large mixing bowl, cream together the shortening and butter using an electric mixer until light and fluffy. Gradually add the brown sugar, beating until the mixture is light and well combined. This step is crucial for incorporating air into the dough, which contributes to the cookies’ texture. Don’t rush it!
-
Incorporate the Wet Ingredients: Add the eggs, warm water, and vanilla extract to the creamed mixture. Mix well until everything is thoroughly combined. Make sure the eggs are well beaten before adding them to the batter to ensure even distribution.
-
Combine Wet and Dry: Gradually add the sifted dry ingredients to the creamed mixture, mixing on low speed until just combined. Be careful not to overmix, as this can result in tough cookies. Mix until the flour disappears into the batter.
-
Add the Nuts: Stir in the chopped nuts. Distribute evenly throughout the dough.
-
Shape the Dough: Divide the dough in half. On a lightly floured surface, shape each portion of dough into a log approximately 2 inches in diameter. You can also use a large spoon to drop dough onto a large piece of plastic wrap and shape that way.
-
Wrap and Chill: Wrap each log tightly in waxed paper or plastic wrap. Chill the dough thoroughly in the refrigerator for at least 8 hours, or preferably overnight. This chilling time is essential for firming up the dough, making it easier to slice, and preventing the cookies from spreading too much during baking.
-
Prepare for Baking: Preheat your oven to 400°F (200°C). Line baking sheets with parchment paper or leave them ungreased.
-
Slice and Bake: Remove one roll of dough from the refrigerator at a time. Slice the dough into 1/4-inch thick rounds. Place the cookie slices 1 1/2 inches apart on the prepared baking sheets.
-
Bake: Bake in the preheated oven for 10 to 12 minutes, or until the edges are golden brown. Watch them carefully to avoid burning.
-
Cool: Remove the baking sheets from the oven and let the cookies cool on the sheets for a few minutes before transferring them to wire cooling racks to cool completely.
Expert Tips & Tricks
- For the Best Butterscotch Flavor: Using dark brown sugar will enhance the butterscotch flavor even further. The molasses content in dark brown sugar adds richness and depth.
- Freezing the Dough: This recipe is perfect for making ahead. The dough can be frozen for up to 2 months. Wrap the logs tightly in plastic wrap and then in a freezer bag. Thaw in the refrigerator overnight before slicing and baking.
- Preventing Spreading: If your cookies tend to spread too much, try chilling the dough for a longer period or adding a tablespoon or two of flour.
- Baking Evenly: Ensure your oven is properly calibrated for even baking. A simple oven thermometer can help monitor the temperature accurately.
- Nut-Free Alternative: For those with nut allergies, you can omit the nuts entirely or substitute them with chocolate chips, toffee bits, or dried cranberries.
Serving & Storage Suggestions
These Butterscotch Refrigerator Cookies are delicious served warm or at room temperature. They pair perfectly with a glass of cold milk, a cup of hot coffee, or a scoop of vanilla ice cream.
- Storage: Store the cooled cookies in an airtight container at room temperature for up to 5 days. To keep them fresh for longer, store them in the freezer for up to 2 months.
- Reheating: If desired, you can reheat the cookies in a preheated oven at 350°F (175°C) for a few minutes to restore their crispness.
Nutritional Information
| Nutrient | Amount per Serving | % Daily Value* |
|---|---|---|
| Calories | 83 kcal | 4% |
| Total Fat | 3.9 g | 5% |
| Saturated Fat | 1.4 g | 7% |
| Cholesterol | 9.3 mg | 3% |
| Sodium | 76.1 mg | 3% |
| Total Carbohydrate | 11.1 g | 4% |
| Dietary Fiber | 0.3 g | 1% |
| Sugars | 6 g | 24% |
| Protein | 1.1 g | 2% |
*Percent Daily Values are based on a 2,000 calorie diet. Your daily values may be higher or lower depending on your calorie needs.
Variations & Substitutions
- Gluten-Free Option: Substitute the all-purpose flour with a gluten-free flour blend. Ensure the blend contains xanthan gum or add it separately to help bind the dough.
- Dairy-Free Option: Replace the butter with a dairy-free butter substitute or coconut oil. Be sure to use a dairy-free shortening as well.
- Spice Variations: Experiment with different spices such as nutmeg, cloves, or ginger to add a unique twist to the flavor profile.
- Chocolate Butterscotch: Add 1/2 cup of semi-sweet chocolate chips to the dough for a delightful chocolate butterscotch combination.
- Citrus Zest: Add the zest of an orange or lemon to the dough for a bright, refreshing flavor.
FAQs (Frequently Asked Questions)
Q: Why do I need to chill the dough?
A: Chilling the dough allows the fats to solidify, which prevents the cookies from spreading too much during baking. It also helps to develop the flavors and makes the dough easier to slice.
Q: Can I use a different type of nut?
A: Absolutely! Feel free to substitute walnuts or pecans with your favorite type of nut, such as almonds, macadamia nuts, or even sunflower seeds.
Q: Can I make the dough in advance?
A: Yes, this recipe is perfect for making ahead. The dough can be stored in the refrigerator for up to 3 days or frozen for up to 2 months.
Q: My cookies are burning on the bottom. What should I do?
A: Try placing a second baking sheet underneath the first one to insulate the cookies from the direct heat. You can also lower the oven temperature slightly and bake the cookies for a longer period.
Q: Can I double the recipe?
A: Yes, you can easily double the recipe. Just make sure to use a large enough mixing bowl to accommodate all of the ingredients.
Final Thoughts
These Butterscotch Refrigerator Cookies are more than just a recipe; they’re a slice of comfort, a taste of nostalgia, and a reminder of simpler times. Whether you’re baking them for a special occasion or just a quiet afternoon treat, I encourage you to give this recipe a try. Share them with loved ones, savor each bite, and let the warm, butterscotch flavor transport you to a place of sweet memories. I’d love to hear about your baking experience, so please share your thoughts and feedback! Happy baking!