
The Cake Decorator’s Dream: Mastering Ultra-Creamy Frosting
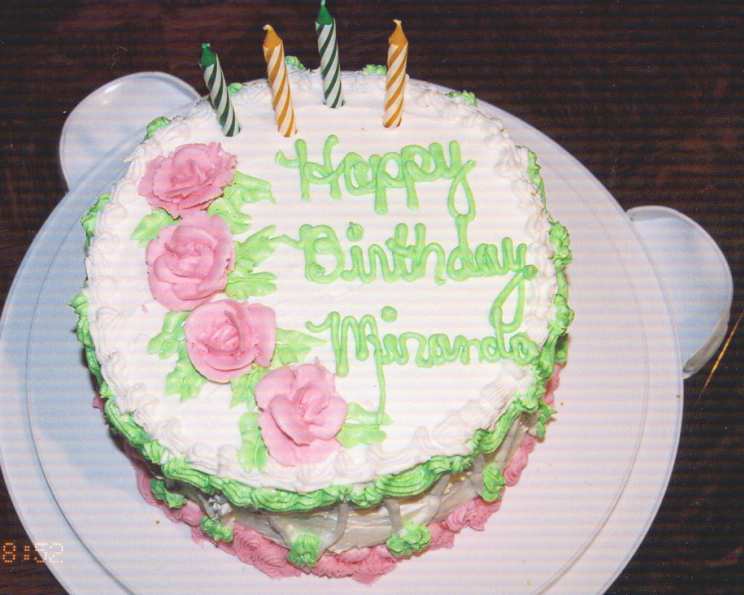
My grandmother, bless her heart, was the undisputed queen of frosted creations in our family. Every birthday, every holiday – even a random Tuesday that needed a little lift – was an excuse for one of her elaborately decorated cakes. The secret, she always whispered with a twinkle in her eye, was the frosting. It had to be perfectly smooth, perfectly sweet, and sturdy enough to hold even the most ambitious floral arrangement crafted from sugary petals. I remember being mesmerized by the way she could coax life-like roses out of a pastry bag, the creamy frosting swirling into delicate, edible masterpieces. This recipe, inspired by those memories, aims to capture that same magic.
Recipe Overview
- Prep Time: 20 minutes
- Total Time: 20 minutes
- Yield: Enough to frost a 2-layer cake, plus extra for decorations
- Dietary Type: Vegetarian
Ingredients
- 1 1/2 cups shortening (such as Crisco)
- 1/2 cup hot water
- 2 boxes confectioner’s powdered sugar
- 1/8 teaspoon salt
- 1 teaspoon butter flavoring (colorless preferred)
- 2 teaspoons colorless vanilla flavoring (regular will work, but icing won’t be bright white)
Equipment Needed
- Electric mixer (stand mixer preferred, but a handheld mixer will work)
- Mixing bowls
- Measuring cups and spoons
- Pastry bag and tips (optional, for decorating)
- Plastic wrap
- Cookie sheet
Instructions
-
Begin by creaming the shortening in your electric mixer. It’s essential that the shortening is very soft. Beat it on medium speed until it’s light and fluffy. This can take several minutes, so be patient and scrape down the sides of the bowl occasionally to ensure even mixing.
-
Add the salt and a portion of the powdered sugar (about a quarter of the total amount) along with the butter flavoring and vanilla flavoring. Mix on medium speed until combined. The mixture will seem dry at first, but it will come together as you continue to mix.
-
Now, alternately add the hot water and the remaining powdered sugar. Start with a small amount of water, followed by a small amount of sugar, and continue alternating until all the ingredients are incorporated. Be sure to scrape down the sides of the bowl between additions to ensure everything is mixed evenly.
-
Continue beating on medium speed until the frosting is smooth and creamy. It’s absolutely crucial that you do not mix on high speed, as this will incorporate air into the frosting and create bubbles, which will result in a less-than-perfect final product. The frosting should be thick enough to hold its shape but still spreadable.
-
If you plan to make decorations such as roses or leaves, divide the frosting into separate bowls and add tasteless food coloring paste (Wilton is a popular brand) to each bowl. Mix well until the color is evenly distributed.
-
To create decorations, use a pastry bag fitted with the appropriate tip. Pipe the decorations onto a sheet of plastic wrap placed on a cookie sheet. Gently cover the decorations with another sheet of plastic wrap.
-
Freeze the decorations for up to one month. This will make them easier to handle when you’re ready to decorate your cake.
-
Important Note: If you plan to freeze your frosted cake, do not put the decorations on it until after you have thawed both the cake and the decorations. The colored decorations will bleed into the cake frosting when they thaw, creating an undesirable effect.
-
Defrost the cake and decorations separately, then place the decorations on the cake once both are fully thawed.
Expert Tips & Tricks
- Achieving the Perfect Consistency: If the frosting is too thick, add a tiny bit more hot water, a teaspoon at a time, until you reach the desired consistency. If it’s too thin, add a bit more powdered sugar.
- Colorless Flavorings are Key: While regular vanilla extract will work, using colorless vanilla and butter flavoring will ensure a bright white frosting, perfect for showcasing your colorful decorations.
- Preventing Air Bubbles: As mentioned earlier, avoid high speeds when mixing. If you do notice air bubbles, gently tap the bowl on the counter several times to release them.
- Make-Ahead Magic: This frosting can be made a day or two in advance and stored in an airtight container in the refrigerator. Before using, let it come to room temperature and then re-whip it to restore its smooth consistency.
Serving & Storage Suggestions
This frosting is perfect for frosting cakes, cupcakes, cookies, and more! For an elegant presentation, use a pastry bag and tips to create intricate designs.
- Storage: Frosted cakes can be stored at room temperature for up to 2 days or in the refrigerator for up to a week. Cover loosely to prevent the frosting from drying out.
- Freezing: As mentioned earlier, freeze frosted cakes and decorations separately to prevent color bleeding. Thaw completely before serving.
- Leftover Frosting: Store leftover frosting in an airtight container in the refrigerator for up to a week. Re-whip before using.
Nutritional Information
Please note that these are estimated values and can vary based on specific ingredient brands and measurements.
| Nutrient | Amount per Serving | % Daily Value |
|---|---|---|
| Calories | 354 kcal | 18% |
| Total Fat | 19g | 29% |
| Saturated Fat | 5g | 24% |
| Cholesterol | 0mg | 0% |
| Sodium | 19mg | 0% |
| Total Carbohydrate | 47g | 15% |
| Dietary Fiber | 0g | 0% |
| Sugars | 46g | 184% |
| Protein | 0g | 0% |
Variations & Substitutions
- Chocolate Frosting: Add 3 tablespoons of powdered cocoa to the sugar mixture for a classic chocolate flavor.
- Lemon Frosting: Omit the butter and vanilla flavorings and add 3 teaspoons of lemon extract for a bright, citrusy twist. You can also add a teaspoon of lemon zest for extra flavor and texture.
- Peppermint Frosting: Add 1/2 teaspoon of peppermint extract for a festive holiday flavor.
- Maple Frosting: Substitute 2 tablespoons of the hot water with pure maple syrup for a warm, comforting flavor.
- For a dairy-free option: While the standard recipe uses shortening which is naturally dairy-free, ensure your other flavorings are also dairy-free.
FAQs (Frequently Asked Questions)
Q: Can I use butter instead of shortening?
A: While you can substitute some of the shortening with butter for added flavor, using all butter will result in a softer frosting that may not hold its shape as well, especially for decorations.
Q: Why is my frosting grainy?
A: Grainy frosting is usually caused by undissolved powdered sugar. Make sure to sift the powdered sugar before adding it to the mixture and mix thoroughly on medium speed until smooth.
Q: How do I fix frosting that is too sweet?
A: If your frosting is too sweet, add a pinch of salt or a teaspoon of lemon juice to balance the flavors.
Q: Can I use this frosting to cover a fondant cake?
A: Yes, this frosting can be used as a base layer under fondant. It provides a smooth surface for the fondant to adhere to.
Q: How far in advance can I make the decorations?
A: You can make the decorations up to a month in advance and store them in the freezer. Just make sure to wrap them well in plastic wrap to prevent freezer burn.
Final Thoughts
There’s something truly special about creating a beautiful cake, adorned with delicate frosting flowers and intricate designs. This recipe is your starting point for mastering the art of cake decorating, allowing you to create stunning desserts that will impress your friends and family. Don’t be afraid to experiment with different flavors, colors, and decorating techniques. The possibilities are endless! So, grab your mixing bowl, unleash your creativity, and let the frosting magic begin. And please, share your creations and feedback – I can’t wait to see what you bake!