
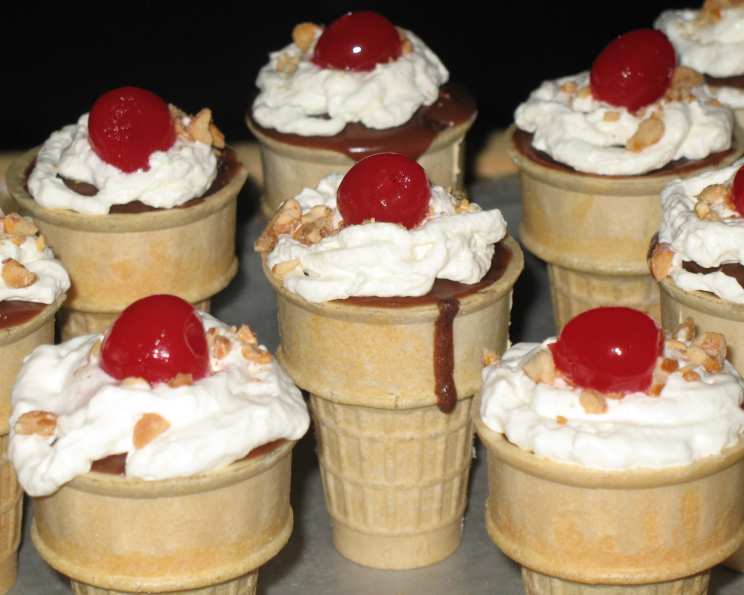
Cakes in a Cone: A Fun Twist on Classic Baking
The first time I saw Cakes in a Cone, it was at a chaotic summer birthday party, sticky-fingered children sprinting across the lawn. I remember thinking, “That’s genius!” A single, perfectly portioned treat, individually wrapped in edible goodness, minimizing mess and maximizing fun. The cones themselves were perched jauntily in a muffin tin, each sporting a swirl of bright frosting and a crown of rainbow sprinkles, a tiny, edible castle just waiting to be devoured. Those little cone cakes sparked pure joy, and I’ve been making them ever since.
Recipe Overview
- Prep Time: 15 minutes
- Cook Time: 15-18 minutes
- Total Time: 30-33 minutes
- Yields: 24 cone cakes
- Dietary Type: Vegetarian
Ingredients
- 1 (18 1/4 ounce) box chocolate cake mix (or flavor of your choice) or (19 7/8 ounce) box brownie mix
- 24 flat-bottomed ice cream cones
- 1 can frosting, of your choice (I prefer cream cheese frosting)
- Chocolate sprinkles (or any type of sprinkles you desire)
Equipment Needed
- Large Mixing Bowl
- Measuring Cups and Spoons
- Cupcake Pan or Cookie Sheet
- Ice Cream Scoop or Spoon
- Oven
- Cooling Rack
Instructions
- Begin by preparing your cake mix or brownie mix according to the package directions. This usually involves combining the mix with ingredients like eggs, oil, and water. Be sure to whisk thoroughly to eliminate any lumps and create a smooth batter. Remember, the consistency of the batter is crucial for even baking, so follow the package instructions precisely.
- Now, carefully fill each ice cream cone about 3/4 full of batter, going up to the first ridge in the cones. Avoid overfilling, as the batter will rise during baking and could overflow. Using an ice cream scoop or a spoon makes this task easier and less messy.
- Next, place the filled cones in the cups of a cupcake pan or arrange them evenly spaced on a cookie sheet. Using a cupcake pan is ideal because it keeps the cones upright and prevents them from tipping over during baking. If you’re using a cookie sheet, try nesting the cones closely together for stability.
- Bake at 400 degrees F (200 degrees C) for 15-18 minutes, or until a toothpick inserted into the center of a cone cake comes out clean. Keep a close watch, as baking times can vary slightly depending on your oven. The cakes are done when they spring back lightly when touched and the tops are golden brown.
- Once baked, carefully remove the cone cakes from the oven and let them cool completely before frosting. Cooling on a cooling rack helps prevent the bottoms from becoming soggy. Patience is key here – frosting warm cakes can lead to a melted, messy disaster!
- Finally, frost the cooled cone cakes with your favorite frosting and decorate with chocolate sprinkles or any other toppings you desire. Get creative! Consider using different colored frostings, edible glitter, or even small candies to personalize each cone cake.
Expert Tips & Tricks
- Prevent soggy cones: To prevent the cones from becoming soggy during baking, you can lightly brush the inside of the cones with melted chocolate before filling them with batter. The chocolate acts as a barrier, keeping the cone crisp.
- Even baking: Ensure even baking by rotating the cupcake pan or cookie sheet halfway through the baking time. This helps to distribute heat evenly and prevents any one cone cake from browning too quickly.
- Batter consistency: If your cake mix batter seems too thick, add a tablespoon or two of milk until you reach the desired consistency. Conversely, if the batter is too thin, add a tablespoon of flour.
- Frosting tips: For a smooth, professional-looking frosting job, use a piping bag fitted with a decorative tip. If you don’t have a piping bag, you can simply use a zip-top bag with the corner snipped off.
- Mix-ins: Fold in some chocolate chips, nuts, or chopped fruit into the batter for added flavor and texture.
Serving & Storage Suggestions
Serve these delightful cone cakes immediately for the best taste and texture. They’re perfect for parties, picnics, or as a fun after-school treat.
To store leftovers, wrap each cone cake individually in plastic wrap or place them in an airtight container. They can be stored at room temperature for up to 2 days or in the refrigerator for up to 5 days. Keep in mind that refrigeration may slightly dry out the cakes, so it’s best to consume them as soon as possible.
Freezing is not recommended, as the frosting and cone may become soggy upon thawing.
Nutritional Information
(Note: Nutritional information is an estimate and will vary based on specific ingredients and quantities used.)
| Nutrient | Amount per Serving | % Daily Value |
|---|---|---|
| Calories | 150 kcal | 8% |
| Total Fat | 5g | 8% |
| Saturated Fat | 2g | 10% |
| Cholesterol | 0mg | 0% |
| Sodium | 150mg | 7% |
| Total Carbohydrate | 25g | 8% |
| Dietary Fiber | 1g | 4% |
| Sugars | 15g | 30% |
| Protein | 2g | 4% |
Variations & Substitutions
- Gluten-Free: Use a gluten-free cake mix and ensure all other ingredients are gluten-free as well.
- Dairy-Free: Opt for a dairy-free frosting and ensure the cake mix is dairy-free.
- Different Flavors: Experiment with different cake mix flavors, such as vanilla, strawberry, or lemon.
- Brownie Cones: Use brownie mix for a richer, chocolatey treat.
- Seasonal Toppings: Decorate with seasonal toppings like chopped nuts for fall, candy canes for winter, or fresh berries for summer.
- Vegan: Use a vegan cake mix and frosting alternative.
FAQs (Frequently Asked Questions)
Q: Can I use waffle cones instead of flat-bottomed cones?
A: While waffle cones can be used, they are more prone to tipping over during baking. Flat-bottomed cones provide a more stable base.
Q: Can I make these ahead of time?
A: Yes, you can bake the cones a day in advance and store them in an airtight container at room temperature. Frost them just before serving.
Q: My cones are browning too quickly. What should I do?
A: Tent the cones with aluminum foil during the last few minutes of baking to prevent them from browning too much.
Q: What if I don’t have a cupcake pan?
A: You can use a cookie sheet, but be sure to nestle the cones closely together to prevent them from tipping over.
Q: Can I use homemade cake batter instead of a mix?
A: Absolutely! Just ensure the batter is of a similar consistency to cake mix batter.
Final Thoughts
Cakes in a Cone are more than just a dessert; they’re a delightful experience that brings joy and smiles to everyone who tries them. Whether you’re baking for a birthday party, a casual get-together, or simply a fun afternoon treat, these cone cakes are sure to be a hit. So, gather your ingredients, preheat your oven, and let the baking adventure begin! Don’t hesitate to experiment with different flavors and decorations to create your own unique cone cake creations. And please, share your creations – and your experiences – with me! Happy Baking!