
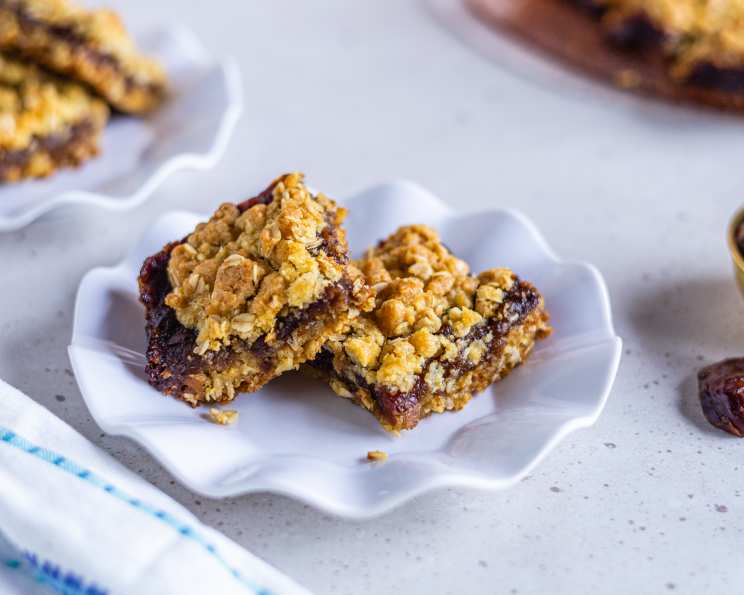
Canadian Date Squares: A Taste of Home
The scent of warm dates and buttery oats baking always transports me back to my grandmother’s cozy kitchen in rural Manitoba. I remember sneaking squares still warm from the oven, the sticky-sweet filling clinging to my fingers. They were a staple at every family gathering, a symbol of comfort, love, and the simple joys of home. These squares, a true taste of Canada, are perfect with a cup of tea on a chilly afternoon or as a sweet ending to any meal.
Recipe Overview
- Prep Time: 20 minutes
- Cook Time: 25 minutes
- Total Time: 45 minutes
- Servings: 16
- Yield: 1 8×8-inch pan
- Dietary Type: Vegetarian
Ingredients
- 8 ounces dates, cut up
- 1 tablespoon brown sugar
- 1/2 cup water
- 1 cup all-purpose flour
- 1/2 teaspoon baking soda
- 1/8 teaspoon salt
- 3/4 cup butter (1 1/2 sticks), softened
- 1 cup packed brown sugar
- 2 cups oats (not instant)
Equipment Needed
- Small saucepan
- Mixer bowl
- Mixer (electric or stand)
- Lightly buttered 8×8-inch pan
- Measuring cups and spoons
- Fork
Instructions
- Begin by preparing the date filling. In a small saucepan, combine the 8 ounces of chopped dates, 1 tablespoon of brown sugar, and 1/2 cup of water.
- Bring the mixture to a boil over medium heat. Then, reduce the heat to low and cook, stirring frequently, until the dates are soft enough to be mashed with a fork. This usually takes about 5-7 minutes. The mixture should be thick and jam-like. Set the date filling aside to cool slightly.
- Preheat your oven to 350 degrees Fahrenheit (175 degrees Celsius). Ensure the rack is positioned in the center of the oven for even baking.
- In a mixer bowl, blend together the 1 cup of all-purpose flour, 1/2 teaspoon of baking soda, and 1/8 teaspoon of salt. This ensures that the baking soda is evenly distributed throughout the flour.
- Cut in the 3/4 cup of softened butter into the flour mixture using a pastry blender or your fingertips. Work the butter in until the mixture resembles coarse crumbs. It’s important that the butter remains cold for the best texture.
- Stir in the 1 cup of packed brown sugar and 2 cups of oats (not instant) into the crumb mixture.
- Do not over mix the mixture at this stage. You want it to remain crumbly, not form a dough. Overmixing will result in a tougher crust.
- Press half of the crumb mixture firmly and evenly over the bottom of your lightly buttered 8×8-inch pan to form the bottom crust. Use the back of a spoon or your fingers to ensure it is packed tightly. This will provide a solid base for the date filling.
- Gently spread the prepared date filling evenly over the bottom crust. Be careful not to press too hard, as this could cause the crust to crumble.
- Sprinkle the remaining oat mixture evenly over the date filling.
- Lightly pat the top with the palm of your hand to even out the surface. This will help the topping adhere to the filling during baking.
- Bake in the preheated oven for 25 minutes, or until the top is golden brown. Keep a close eye on the squares during the last few minutes of baking to prevent burning.
- Cool completely in the pan on a wire rack before cutting into squares. Cooling completely is essential for the date squares to set properly and prevent them from falling apart when cut. This can take several hours, or even overnight.
Expert Tips & Tricks
- For a richer flavor, use brown butter in the crust. Simply melt the butter in a saucepan over medium heat, swirling occasionally, until it turns golden brown and has a nutty aroma. Let it cool slightly before adding it to the flour mixture.
- If your dates are very dry, you may need to add a little more water to the filling to achieve the desired consistency.
- To prevent the date filling from sticking to the pan, line the baking pan with parchment paper, leaving an overhang on the sides to easily lift the finished squares out of the pan.
- For a chewier texture, use quick-cooking oats instead of rolled oats.
- Add a pinch of cinnamon or nutmeg to the date filling for extra warmth and spice.
Serving & Storage Suggestions
These Canadian Date Squares are delicious served warm or at room temperature. They pair perfectly with a scoop of vanilla ice cream, a dollop of whipped cream, or a simple cup of coffee or tea.
To store, keep the date squares in an airtight container at room temperature for up to 3 days, in the refrigerator for up to a week, or in the freezer for up to 2 months. If freezing, wrap the squares individually in plastic wrap before placing them in a freezer-safe container. To reheat, thaw frozen squares at room temperature and warm them slightly in the oven or microwave.
Nutritional Information
Note: Nutritional information is an estimate and may vary based on specific ingredients and portion sizes.
| Nutrient | Amount per Serving | % Daily Value |
|---|---|---|
| Calories | 276 kcal | N/A |
| Fat | 10 g | N/A |
| Saturated Fat | 6 g | N/A |
| Cholesterol | 23 mg | N/A |
| Sodium | 139 mg | N/A |
| Carbohydrates | 44 g | N/A |
| Fiber | 3 g | N/A |
| Sugar | 23 g | N/A |
| Protein | 5 g | N/A |
Variations & Substitutions
- Gluten-Free Date Squares: Substitute the all-purpose flour with a gluten-free all-purpose flour blend. Make sure the blend contains xanthan gum or guar gum for binding. Also, ensure your oats are certified gluten-free.
- Vegan Date Squares: Replace the butter with a vegan butter alternative or coconut oil.
- Nutty Date Squares: Add 1/2 cup of chopped walnuts or pecans to the oat mixture for a crunchy texture and nutty flavor.
- Citrus Zest: Add the zest of one orange or lemon to the date filling for a bright, refreshing twist.
- Maple Syrup: Substitute some of the brown sugar in the crust with maple syrup for a uniquely Canadian flavour.
FAQs (Frequently Asked Questions)
Q: Why are my date squares crumbly and not holding together?
A: This could be due to not pressing the bottom crust firmly enough into the pan or overmixing the oat mixture. Ensure you pack the crust tightly and avoid overmixing.
Q: Can I use instant oats instead of rolled oats?
A: While you can, rolled oats provide a better texture and chewiness to the squares. Instant oats may result in a softer, less defined crust.
Q: How do I prevent the date filling from being too sticky?
A: Cook the date filling until it thickens to a jam-like consistency. If it’s still too sticky, cook it a little longer, stirring constantly.
Q: Can I make these date squares ahead of time?
A: Absolutely! Date squares are perfect for making ahead. Store them in an airtight container at room temperature or in the refrigerator.
Q: My date squares are burning on top. What should I do?
A: If the top is browning too quickly, tent the pan with aluminum foil during the last 10 minutes of baking.
Final Thoughts
I hope this recipe inspires you to create your own batch of delicious Canadian Date Squares. They’re a simple yet satisfying treat that’s perfect for sharing with family and friends. Don’t hesitate to experiment with variations and substitutions to make them your own. And most importantly, enjoy the process and savor every bite of this classic Canadian dessert. I’d love to hear your feedback and see your creations! Consider pairing with a strong cup of dark roast coffee, or a chilled glass of icewine.