
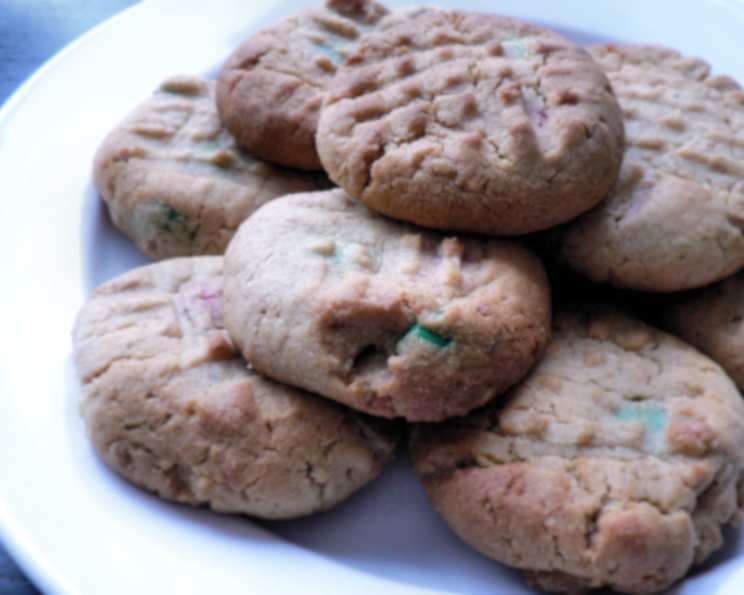
Canadian Living Peanut Butter Cookies: A Taste of Nostalgia
My grandmother, a staunch traditionalist in all things baking, rarely strayed from her meticulously handwritten recipe cards. Yet, there was one exception – a tattered, well-loved page torn from an old Canadian Living cookbook, boasting the definitive peanut butter cookie. The scent alone, a symphony of roasted peanuts and vanilla, transported me back to her sunny kitchen, where these cookies were perpetually cooling on a wire rack, waiting to be devoured with a tall glass of milk. Even now, decades later, the first bite is an instant portal, a warm hug from the past.
Recipe Overview
- Prep Time: 15 minutes
- Cook Time: 8 minutes
- Total Time: 23 minutes
- Yields: 40 cookies
- Dietary Type: Vegetarian
Ingredients
- ½ cup butter, softened
- 1 cup brown sugar, packed
- ¾ cup crunchy peanut butter
- 1 egg
- 1 teaspoon vanilla
- ¾ cup all-purpose flour
- ¾ cup whole wheat flour
- 1 ½ teaspoons baking powder
- ¼ teaspoon baking soda
- 1 pinch salt
- ¼ cup peanuts, halved (optional)
- ¼ cup M&M’s (optional)
Equipment Needed
- Large bowl
- Electric mixer (handheld or stand mixer)
- Small bowl
- Measuring cups and spoons
- Cookie sheets
- Parchment paper or greasing agent
- Fork
- Cooling rack
Instructions
-
Preheat your oven to 350°F (180°C). Prepare your cookie sheets by either greasing them lightly or lining them with parchment paper. This will prevent the cookies from sticking and make cleanup easier.
-
In a large bowl, cream together the softened butter and brown sugar using an electric mixer. Beat until the mixture is light and fluffy. This step is crucial for creating a tender cookie, so don’t rush it.
-
Add the crunchy peanut butter to the creamed butter and sugar mixture. Continue creaming thoroughly until well combined. The peanut butter should be fully incorporated, leaving no streaks.
-
Beat in the egg and vanilla extract until the mixture is smooth and homogenous. Ensure the egg is fully emulsified into the batter.
-
In a separate, small bowl, combine the all-purpose flour, whole wheat flour, baking powder, baking soda, and salt. Whisk these dry ingredients together to ensure even distribution, which will help the cookies rise properly.
-
Gradually blend the dry ingredients into the creamed mixture. Mix until just combined. Be careful not to overmix the dough, as this can result in tough cookies.
-
If using, fold in the M&M’s gently. Avoid overmixing at this stage to prevent the M&M’s from bleeding their colors into the dough.
-
Shape the dough into small balls, approximately 1-1/4 inch (3 cm) in diameter. You can use a cookie scoop for consistent sizing. Place the dough balls on the prepared cookie sheets, leaving some space between them for spreading.
-
Flatten the dough balls slightly with a floured fork, creating a crosshatch pattern. This not only makes the cookies look appealing but also helps them bake evenly.
-
If desired, top each cookie with a peanut half before baking. This adds a nice visual touch and enhances the peanut flavor.
-
Bake in the preheated oven for 8 minutes, or until the edges are lightly browned. Keep a close eye on the cookies, as they can burn quickly. They should be soft in the center but set around the edges.
-
Cool the cookies on the baking sheets for a few minutes before transferring them to a wire rack to cool completely. This allows them to firm up slightly and prevents them from breaking.
-
Enjoy!
Expert Tips & Tricks
- Softened Butter is Key: Make sure your butter is truly softened, not melted. This ensures proper creaming and a tender cookie.
- Chill the Dough (Optional): For thicker cookies with less spread, chill the dough for 30 minutes before baking.
- Even Baking: Rotate the cookie sheets halfway through baking for even browning.
- Don’t Overbake: Peanut butter cookies tend to dry out quickly if overbaked. Err on the side of slightly underbaked for a softer texture.
- Extra Egg Tip: If you are going to triple or more the recipe, add an extra egg. It helps keep them whole once baked.
- Flour Variation: As indicated by my grandma, the original recipe calls for 1.5 cups of all-purpose flour, but using half all-purpose and half whole wheat flour does not change the taste or texture.
Serving & Storage Suggestions
These peanut butter cookies are best enjoyed fresh, but they can be stored in an airtight container at room temperature for up to 3 days. For longer storage, freeze them for up to 2 months. Thaw at room temperature before serving. They are delicious on their own, with a glass of milk, or as part of a dessert platter. They also pair well with ice cream or a warm beverage like coffee or tea.
Nutritional Information
Please note that the following nutritional information is an estimate and can vary based on specific ingredients and portion sizes.
| Nutrient | Amount per Serving | % Daily Value |
|---|---|---|
| Calories | 88 kcal | 4% |
| Total Fat | 4.9 g | 7% |
| Saturated Fat | 1.9 g | 9% |
| Cholesterol | 11.4 mg | 3% |
| Sodium | 69.3 mg | 2% |
| Total Carbohydrate | 9.9 g | 3% |
| Dietary Fiber | 0.7 g | 2% |
| Sugars | 5.7 g | 22% |
| Protein | 1.9 g | 3% |
Variations & Substitutions
- Gluten-Free: Substitute a gluten-free all-purpose flour blend for the all-purpose and whole wheat flour.
- Dairy-Free: Use a plant-based butter alternative.
- Chocolate Chips: Replace the M&M’s with chocolate chips for a classic variation.
- Different Nuts: Substitute chopped walnuts, pecans, or almonds for the peanuts.
- Spice It Up: Add a pinch of cinnamon or nutmeg to the dough for a warm, spiced flavor.
FAQs (Frequently Asked Questions)
Q: Why are my cookies flat?
A: Your butter may have been too warm or melted. Ensure the butter is softened but still cool to the touch. Chilling the dough before baking can also help prevent excessive spreading.
Q: Can I use natural peanut butter?
A: Yes, but be aware that natural peanut butter can sometimes result in a drier cookie. You may need to add a tablespoon or two of milk to the dough to achieve the right consistency.
Q: How do I prevent the cookies from sticking to the baking sheet?
A: Always grease your cookie sheets or line them with parchment paper. Parchment paper is the most reliable method for preventing sticking.
Q: Can I freeze the cookie dough?
A: Yes, you can freeze the cookie dough for up to 2 months. Shape the dough into balls, place them on a baking sheet, and freeze until solid. Then, transfer the frozen dough balls to a freezer bag. Bake directly from frozen, adding a few extra minutes to the baking time.
Q: Why did my cookies turn out dry?
A: Overbaking is the most common cause of dry cookies. Make sure to bake them just until the edges are lightly browned, and the centers are still slightly soft. Overmixing the dough can also contribute to dryness.
Final Thoughts
This recipe for Canadian Living Peanut Butter Cookies isn’t just about baking; it’s about recreating memories, sharing traditions, and savoring the simple pleasures in life. Whether you follow the recipe exactly or add your own creative twist, I encourage you to give it a try. These cookies are guaranteed to bring a smile to your face and a sense of warmth to your kitchen. Don’t hesitate to share your baking experience and any variations you try – I’d love to hear how they turn out!