
Candied Mint Leaves: A Sweet Breath of Freshness
I remember my grandmother’s candy dish, a seemingly endless supply of brightly colored, curiously shaped sweets that always seemed to magically replenish themselves. But tucked among the hard candies and chocolates, there were always these delicate, almost translucent, green mint leaves. They weren’t as flashy as the others, but their cool, refreshing flavor was a delightful surprise, a palate cleanser that felt both elegant and nostalgic. To this day, the scent of peppermint instantly transports me back to her sun-drenched kitchen, a place filled with warmth, love, and the subtle, sweet aroma of candied mint.
Recipe Overview
- Prep Time: 30 minutes
- Cook Time: 0 minutes (plus overnight drying)
- Total Time: 24 hours 30 minutes
- Yields: 1 1/4 pounds
- Serves: Approximately 10
- Dietary Type: Vegetarian
Ingredients
- 4 ounces cream cheese, softened
- 1 pound confectioners’ sugar
- ½ tablespoon peppermint extract
- Green food coloring
- Confectioners’ sugar, for kneading
- Sugar, for rolling
Equipment Needed
- Mixing bowl
- Electric mixer (optional, but recommended)
- Plastic leaf molds (or any candy molds)
- Waxed paper or parchment paper
- Airtight container
Instructions
- In a mixing bowl, beat the cream cheese until it is light and fluffy. This step is crucial for creating a smooth base for your candies. Make sure your cream cheese is properly softened to avoid any lumps.
- Gradually add the confectioners’ sugar to the cream cheese, mixing well after each addition. The mixture will initially appear dry and crumbly, don’t be alarmed. This is normal. Continue mixing until the sugar is fully incorporated.
- Add the peppermint extract to the mixture and combine thoroughly. Be careful not to overdo it with the extract. A little goes a long way in providing that refreshing mint flavor.
- Divide the candy mixture into portions. Add green food coloring to one portion and mix until you achieve your desired shade of green. You can adjust the intensity of the color by adding more or less food coloring. Other colors can also be used if you are making different flavored candies.
- At this point, the candy mixture can be bagged in plastic and held at room temperature for several days, if desired. This is a great way to prepare ahead of time.
- If the mixture becomes sticky as it stands (or even during the mixing process), knead in more confectioners’ sugar until the candy is smooth and pliable. The consistency should be similar to playdough.
- Pinch off a small piece of candy, about the size of a marble, and roll it into a ball. The size will depend on the molds you are using.
- Roll the ball in sugar, coating it evenly. This will prevent the candy from sticking to the mold.
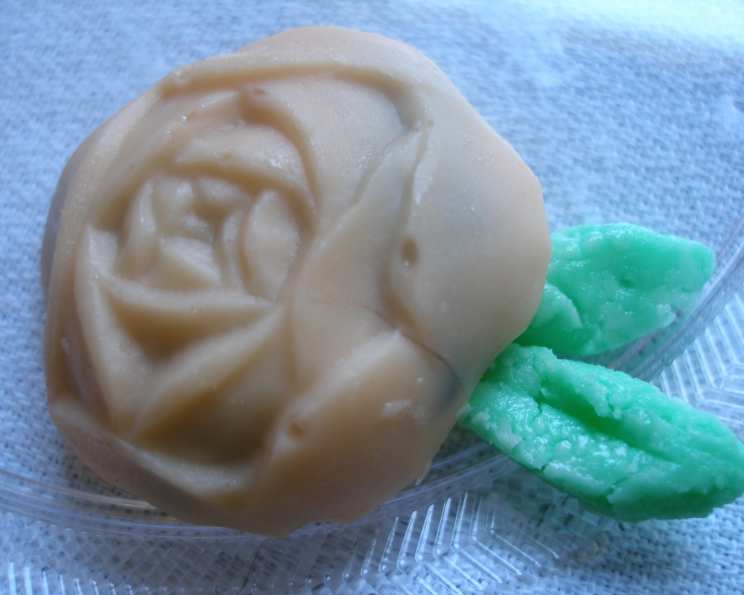
- Press the sugar-coated ball into a plastic leaf mold (or any candy mold). Ensure the candy fills all the details of the mold.
- Immediately turn the mold over onto waxed or parchment paper and gently release the candy leaves. If the candies are sticking, try tapping the mold lightly on the counter.
- Allow the candied mint leaves to dry, uncovered, overnight. This drying process is essential for hardening the candies and achieving that perfect, slightly crunchy texture.
- Store the dried candied mint leaves in an airtight container at room temperature. This will help preserve their freshness and prevent them from becoming sticky.
Expert Tips & Tricks
- Cream Cheese Consistency is Key: Ensure your cream cheese is at room temperature and properly softened. This will prevent lumps and create a smoother candy base. If it’s too cold, it won’t incorporate well with the sugar.
- Sugar Coating for Easy Release: The sugar coating before pressing into the molds not only adds sweetness but also helps the candies release easily. Don’t skip this step!
- Food Coloring Control: Add food coloring gradually. It’s easier to darken a color than to lighten it. You can create beautiful variations by using different shades of green or even mixing colors.
- Drying Time Matters: Be patient with the drying process. The overnight drying is crucial for achieving the right texture. Resist the urge to touch or move the candies during this time.
- Troubleshooting Sticky Dough: If your dough becomes too sticky, don’t hesitate to incorporate more confectioners’ sugar. Add it gradually until you achieve the desired consistency.
- Flavor Enhancement: For a more intense mint flavor, try using mint-infused sugar. You can make this by storing sugar with fresh mint leaves for a few days.
Serving & Storage Suggestions
Candied mint leaves are a delightful treat on their own, perfect for a quick burst of refreshing sweetness. They also make elegant additions to desserts. Use them to garnish cakes, cupcakes, or ice cream. They are especially lovely during the holidays, adding a touch of festive cheer to any dessert platter.
Store the candied mint leaves in an airtight container at room temperature. Properly stored, they will last for several weeks. Avoid storing them in the refrigerator, as the moisture can cause them to become sticky. If you live in a humid climate, consider adding a small packet of silica gel to the storage container to absorb excess moisture.
Nutritional Information
| Nutrient | Amount per Serving | % Daily Value |
|---|---|---|
| Calories | 217.9 kcal | N/A |
| Calories from Fat | 36 kcal | N/A |
| Total Fat | 4 g | 6% |
| Saturated Fat | 2.5 g | 12% |
| Cholesterol | 12.5 mg | 4% |
| Sodium | 34.1 mg | 1% |
| Total Carbohydrate | 45.6 g | 15% |
| Dietary Fiber | 0 g | 0% |
| Sugars | 44.5 g | N/A |
| Protein | 0.9 g | 1% |
Note: Percent Daily Values are based on a 2,000 calorie diet. Nutritional information is an estimate and can vary based on specific ingredients and portion sizes.
Variations & Substitutions
- Different Extracts: Experiment with other extracts like vanilla, almond, or lemon for different flavor profiles. Adjust food coloring accordingly.
- Vegan Option: Substitute the cream cheese with a vegan cream cheese alternative. Ensure it has a similar consistency to regular cream cheese for best results.
- Citrus Zest: Add a touch of lemon, lime, or orange zest to the candy mixture for a bright, zesty flavor.
- Spiced Mint: Incorporate a pinch of cinnamon, nutmeg, or ginger for a warm, spiced twist.
- Chocolate Drizzle: After the candies have dried, drizzle them with melted dark or white chocolate for an extra touch of indulgence.
FAQs (Frequently Asked Questions)
Q: Can I use fresh mint leaves instead of peppermint extract?
A: While you can try, it’s difficult to achieve the same concentrated flavor with fresh mint. The extract provides a more consistent and potent mint taste.
Q: Why is my candy mixture sticky?
A: The mixture is likely sticky due to excess moisture. Knead in more confectioners’ sugar until it reaches a smooth, pliable consistency.
Q: Can I use different candy molds?
A: Absolutely! Feel free to use any candy molds you like. Leaf shapes are traditional, but any shape will work.
Q: How long do the candied mint leaves last?
A: Stored in an airtight container at room temperature, candied mint leaves will last for several weeks.
Q: Can I freeze the candy mixture?
A: Freezing isn’t recommended, as it can alter the texture of the cream cheese. It’s best to store the mixture in the refrigerator for a few days before using it.
Final Thoughts
Candied mint leaves are more than just a sweet treat; they are a little piece of edible art. Their delicate sweetness and refreshing mint flavor make them a delightful addition to any occasion. Don’t be afraid to experiment with flavors and colors to create your own unique variations. So go ahead, indulge your sweet tooth and bring a breath of fresh air to your kitchen. I encourage you to try this recipe and share your creations. These little jewels are sure to bring joy to anyone who tries them!