
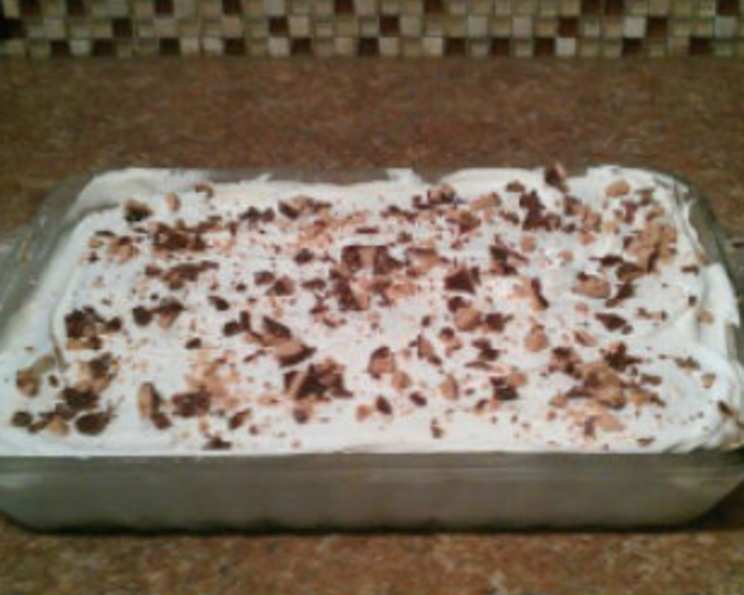
Candy Bar Ice Cream Cake: A Slice of Nostalgia
I’ll never forget my tenth birthday party. My mom, bless her heart, tried to bake a fancy layered cake, but it ended up a leaning tower of frosting. Ever resourceful, she salvaged the situation with an ice cream cake that was so simple, yet so delightful. Layers of ice cream sandwiches, Cool Whip, and crushed candy bars – it was pure, unadulterated joy. That simple treat became a family staple, and to this day, the taste instantly transports me back to carefree summer days and the sweet bliss of childhood birthdays.
Recipe Overview:
- Prep Time: 15 minutes
- Total Time: 35 minutes
- Servings: 10
- Dietary Type: Vegetarian
Ingredients:
- 8-10 ice cream sandwiches
- 10 ounces Cool Whip
- 5 ounces favorite candy bars, crushed (Butterfinger, M&M’s, etc.)
Equipment Needed:
- 9×13 inch glass dish
- Large knife
- Cutting board
- Large bowl
- Spatula or large spoon
- Rolling pin or mallet (optional, for crushing candy bars)
Instructions:
-
Start by unwrapping all of the ice cream sandwiches. This is easier to do while they’re still frozen.
-
Line the bottom of your 9×13 inch glass dish with the unwrapped ice cream sandwiches. Depending on the size of your sandwiches, you may need to cut some to fit snugly and completely cover the bottom of the dish. Use a large knife to carefully slice through the frozen sandwiches if necessary. Arrange them in a single layer, ensuring there are no gaps.
-
In a large bowl, take the Cool Whip and spread it evenly over the layer of ice cream sandwiches.
-
Crush your favorite candy bars. You can do this by placing them in a zip-top bag and using a rolling pin or mallet to crush them into small pieces. Alternatively, you can pulse them in a food processor, but be careful not to over-process them into a powder.
-
Sprinkle half of the crushed candy bars evenly over the Cool Whip layer.
-
Repeat the layers: Add another layer of ice cream sandwiches on top of the crushed candy bars. Again, cut them as needed to ensure full coverage.
-
Spread the remaining Cool Whip over the second layer of ice cream sandwiches.
-
Finally, sprinkle the rest of the crushed candy bars on top of the Cool Whip.
-
Place the dish in the freezer and freeze for at least 30 minutes to allow the layers to set. Freezing longer, even overnight, won’t hurt; it might even improve the flavor.
-
When ready to serve, remove from the freezer, slice, and enjoy!
Expert Tips & Tricks:
- Softening the Ice Cream Sandwiches: For easier slicing and a smoother final product, let the ice cream sandwiches sit at room temperature for a few minutes before unwrapping. This will soften them slightly without melting them completely.
- Candy Bar Choices: Don’t be afraid to experiment with different candy bars! Consider using a mix of textures and flavors, such as chocolate-covered caramel bars, peanut butter cups, and chocolate-covered pretzel bars. For a more sophisticated flavor profile, use dark chocolate candy bars.
- Homemade Cool Whip Alternative: If you prefer, you can substitute the Cool Whip with stabilized whipped cream. To make stabilized whipped cream, whip heavy cream with powdered sugar until stiff peaks form. Then, gently fold in a small amount of gelatin that has been bloomed in cold water. This will help the whipped cream hold its shape for longer.
- Even Candy Distribution: To ensure an even distribution of candy bar pieces, consider gently pressing them into the Cool Whip layer after sprinkling. This will help them adhere better and prevent them from falling off when slicing.
- Preventing Freezer Burn: To prevent freezer burn, cover the ice cream cake tightly with plastic wrap before freezing. You can also place it in a freezer-safe container.
Serving & Storage Suggestions:
Serve the Candy Bar Ice Cream Cake straight from the freezer. Use a sharp knife to cut clean slices. For an extra touch, consider garnishing each slice with a few extra crushed candy bar pieces or a drizzle of chocolate sauce.
Leftovers should be stored in the freezer, tightly covered with plastic wrap or in a freezer-safe container. The cake will stay fresh in the freezer for up to a week. After that, the texture may start to deteriorate. Because of the ice cream component, this cake doesn’t hold well at room temperature and is best enjoyed frozen.
Nutritional Information:
| Nutrient | Amount per Serving | % Daily Value |
|---|---|---|
| Calories | 250 kcal | 13% |
| Total Fat | 15g | 23% |
| Saturated Fat | 10g | 50% |
| Cholesterol | 10mg | 3% |
| Sodium | 100mg | 4% |
| Total Carbohydrate | 25g | 8% |
| Dietary Fiber | 0g | 0% |
| Sugars | 20g | – |
| Protein | 2g | 4% |
Note: Nutritional information is an estimate and may vary based on specific ingredients used.
Variations & Substitutions:
- Gluten-Free Version: Use gluten-free ice cream sandwiches and gluten-free candy bars to make a gluten-free version of this cake.
- Dairy-Free Version: Substitute the ice cream sandwiches with dairy-free ice cream sandwiches and use a dairy-free whipped topping, such as coconut whipped cream. Be sure to check the labels of your candy bars to ensure they are also dairy-free.
- Different Flavors of Ice Cream Sandwiches: Experiment with different flavors of ice cream sandwiches, such as chocolate, vanilla, or cookies and cream.
- Seasonal Variations: Adapt the cake to different seasons by using seasonal candy bars. For example, use peppermint patties during the holidays or caramel apple-flavored candy bars in the fall.
- Ice Cream Flavors: Instead of ice cream sandwiches, you could use layers of different ice cream flavors in a loaf pan, freeze until solid, and then proceed with the Cool Whip and candy bar layers.
FAQs (Frequently Asked Questions):
Q: Can I use homemade ice cream sandwiches instead of store-bought?
A: Absolutely! Homemade ice cream sandwiches would add a personal touch and allow you to control the ingredients. Just make sure they are frozen solid before assembling the cake.
Q: Can I make this cake ahead of time?
A: Yes, this cake is perfect for making ahead of time! Just make sure to wrap it tightly to prevent freezer burn. It can be stored in the freezer for up to a week.
Q: How do I prevent the ice cream from melting while I’m assembling the cake?
A: Work quickly and keep the ice cream sandwiches in the freezer until you’re ready to use them. If they start to soften too much, pop them back into the freezer for a few minutes.
Q: Can I use different types of whipped topping?
A: Yes, you can use any type of whipped topping you prefer, such as homemade whipped cream or a dairy-free alternative. Just make sure it’s stable enough to hold its shape.
Q: What if I don’t have a 9×13 inch dish?
A: You can use a different size dish, but you may need to adjust the amount of ingredients accordingly. You can also use a loaf pan for a taller, narrower cake.
Final Thoughts:
This Candy Bar Ice Cream Cake is a guaranteed crowd-pleaser that’s as fun to make as it is to eat. Its simplicity makes it perfect for involving kids in the kitchen, and its adaptable nature invites experimentation with different flavors and ingredients. So go ahead, indulge your sweet tooth and create a memorable dessert that will bring smiles to everyone’s faces. Don’t hesitate to share your own unique variations and experiences – I’d love to hear about them! Maybe pair it with a glass of ice-cold milk, or a shot of espresso for the adults. Enjoy!