
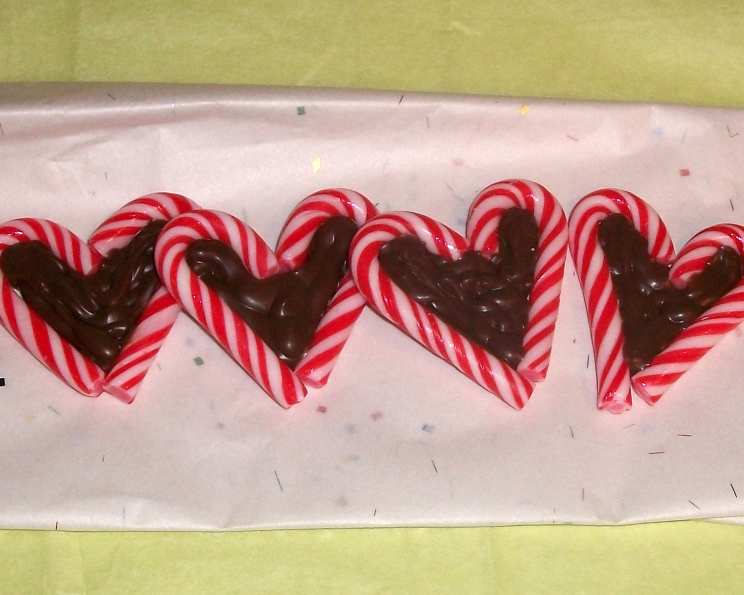
Candy Cane Hearts: A Sweet Valentine’s Treat
The scent of peppermint always transports me back to childhood Christmases. We’d hang candy canes on the tree, their vibrant red and white stripes adding a festive touch. But even more magical was when my grandmother would melt them down into adorable, misshapen hearts. They were never perfect, always a little bubbly and uniquely formed, but each one was filled with her love and the pure joy of the season. Now, I recreate that memory, adding my own spin to these sweet treats.
Recipe Overview
- Prep Time: 2 minutes
- Cook Time: 4-5 minutes
- Total Time: 7 minutes
- Yields: 5 hearts
- Serves: 5
- Dietary Type: Vegetarian, Gluten-Free
Ingredients
- 10 mini candy canes (or regular size)
- Non-stick aluminum foil
Equipment Needed
- Jelly roll pan
Instructions
-
Begin by preheating your oven to 300°F (150°C). This lower temperature is crucial to prevent the candy canes from burning or spreading too thin.
-
Next, prepare your baking surface. Line a jelly roll pan with non-stick aluminum foil. This will prevent the melted candy from sticking and make for easy cleanup. Using non-stick foil is important; regular foil can be difficult to peel away from the cooled candy.
-
Now, arrange your candy canes into heart shapes. Place two candy canes together on the prepared pan, curved sides meeting to form the top of the heart. Be precise with your placement; once melted, they will fuse in their current position. Ensure the tips are touching to create a defined point at the bottom of the heart. If using larger candy canes, you may need to break them slightly to achieve the desired heart shape within the confines of your pan.
-
Carefully place the jelly roll pan into the preheated oven. Monitor the candy canes closely as they melt.
-
Bake for 4-5 minutes, or until the candy canes have melted together and formed a smooth, glossy surface. The exact baking time may vary slightly depending on your oven, so keep a watchful eye to prevent over-baking. The candy should be melted but not bubbling excessively or turning brown.
-
Remove the pan from the oven and let the candy cane hearts cool for a few minutes on the pan. This allows them to firm up slightly, making them easier to handle.
-
Once partially cooled but still pliable, carefully peel the candy cane hearts from the non-stick aluminum foil. If they stick, try using a thin spatula to gently lift them. Allow them to cool completely on a flat surface before serving or storing.
Expert Tips & Tricks
- Temperature is key: Baking at 300°F is essential. A higher temperature will cause the candy to melt too quickly and spread excessively, resulting in misshapen hearts. If you suspect your oven runs hot, consider lowering the temperature slightly.
- Don’t overcrowd the pan: Give each heart ample space on the baking sheet. This prevents them from melting into each other.
- Add some sparkle: Before baking, sprinkle the candy canes with edible glitter or sanding sugar for a festive touch.
- Flavor variations: Experiment with different flavors of mini candy canes. Peppermint is classic, but consider cherry, chocolate mint, or even fruit-flavored varieties.
- Repairing Broken Hearts: If a heart breaks while removing it from the foil, gently reheat it in the oven for a minute or two until pliable, then reshape it.
Serving & Storage Suggestions
These Candy Cane Hearts make delightful additions to cupcakes, hot cocoa, or even as standalone treats. They can be served immediately once cooled.
To store, place the hearts in an airtight container at room temperature. They should last for several weeks, although their texture may become slightly sticky over time due to humidity. Avoid storing them in the refrigerator, as this can cause them to become even stickier. Stacking them between layers of parchment paper will prevent them from sticking together.
Nutritional Information
| Nutrient | Amount per Serving | % Daily Value |
|---|---|---|
| Calories | 50 kcal | 3% |
| Total Fat | 0g | 0% |
| Saturated Fat | 0g | 0% |
| Cholesterol | 0mg | 0% |
| Sodium | 0mg | 0% |
| Total Carbohydrate | 13g | 5% |
| Dietary Fiber | 0g | 0% |
| Sugars | 13g | |
| Protein | 0g | 0% |
Variations & Substitutions
- Swirl Effect: For a marbled look, twist two different flavored mini candy canes together before shaping them into a heart.
- Added Decorations: After baking and while still slightly warm, press sprinkles, mini chocolate chips, or crushed nuts into the melted candy for added texture and flavor.
- Lollipop Sticks: Insert a lollipop stick into the bottom point of the heart before the candy cools completely to create Candy Cane Heart lollipops.
- Larger Hearts: While the recipe is geared towards mini candy canes, you can adapt it for full-size canes. Just increase the baking time slightly and be mindful of the heart’s overall size to ensure it fits on your baking sheet.
FAQs (Frequently Asked Questions)
Q: Can I use regular aluminum foil instead of non-stick?
A: While you can, it’s highly recommended to use non-stick foil. Regular foil will likely cause the melted candy to stick, making it difficult to remove the hearts without breaking them.
Q: What if my candy canes start to bubble too much in the oven?
A: If the candy canes are bubbling excessively, lower the oven temperature slightly or reduce the baking time. Excessive bubbling indicates that the candy is overheating.
Q: How do I prevent the hearts from becoming sticky after storage?
A: Store the Candy Cane Hearts in an airtight container at room temperature, away from humidity. Stacking them between layers of parchment paper also helps prevent sticking.
Q: Can I add other ingredients to the hearts before baking?
A: Yes! Edible glitter, sanding sugar, or even small sprinkles can be added before baking for a decorative touch. Just sprinkle them on after you’ve arranged the candy canes into hearts.
Q: What if my hearts break when I try to remove them from the foil?
A: If a heart breaks, gently reheat it in the oven for a minute or two until pliable. Then, carefully reshape it and let it cool completely.
Final Thoughts
These Candy Cane Hearts are a simple yet heartwarming treat that’s perfect for Valentine’s Day, Christmas, or any occasion that calls for a little sweetness. Don’t be afraid to experiment with different flavors and decorations to create your own unique variations. Share your creations with loved ones and spread the joy of homemade goodness! I encourage you to embrace any imperfections, as they only add to the charm of these delightful confections.