
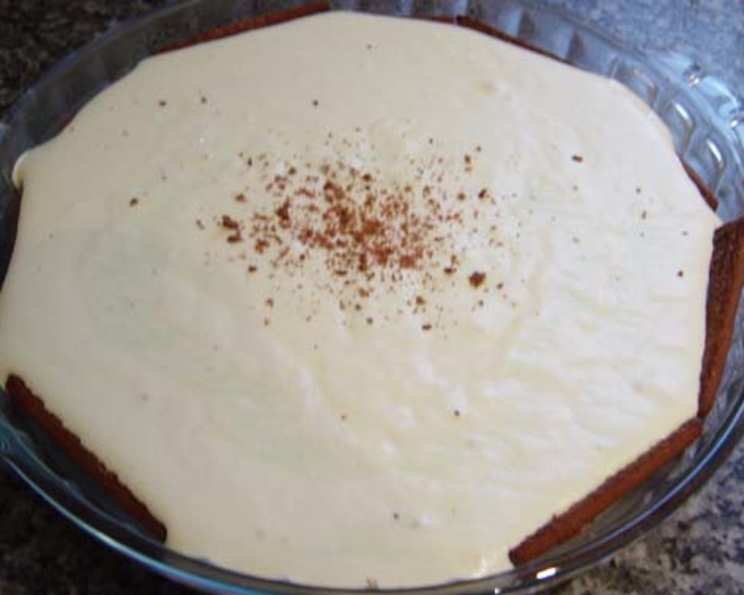
Candy Cane Pie: A Slice of Christmas Magic
The scent of peppermint always takes me back to childhood Christmases. I remember eagerly unwrapping candy canes from the tree, their sugary sweetness a delightful contrast to the crisp winter air. One year, my grandmother, a culinary magician if there ever was one, decided to transform those festive candies into something even more spectacular: a Candy Cane Pie. The first bite was pure holiday bliss – the cool, creamy peppermint filling, the satisfying crunch of chocolate wafers, and the shared joy around the table. It’s a tradition I’ve carried on ever since, and now I’m sharing it with you.
Recipe Overview
- Prep Time: 20 minutes
- Cook Time: 5 minutes
- Total Time: 6 hours 25 minutes (includes chilling time)
- Servings: 8
- Yield: 1 pie
- Dietary Type: Not Gluten-Free (can be adapted)
Ingredients
- 3/4 cup crushed candy cane (about 8)
- 1 cup milk
- 2 teaspoons unflavored gelatin
- 1/4 cup cold water
- 1 1/2 cups whipping cream, whipped
- 23 chocolate wafers
Equipment Needed
- Saucepan
- Whisk
- 10 x 6 x 1-1/2 inch baking dish or a 9-10 inch pie plate
- Mixing bowl
- Measuring cups and spoons
Instructions
-
In a saucepan, combine the crushed candy cane and milk.
-
Heat over low heat, stirring frequently, until the candy cane dissolves completely. Avoid boiling the mixture, as this can affect the texture of the gelatin later.
-
In a separate small bowl, soften the gelatin in the cold water. Let it stand for about 5 minutes until it becomes a spongy consistency. This process is called “blooming” the gelatin and ensures it dissolves evenly.
-
Add the softened gelatin to the hot milk mixture and stir until the gelatin is completely dissolved. It’s crucial to ensure there are no granules of undissolved gelatin.
-
Important Gelatin Note: Gelatin strength can vary between brands and regions. The 2 teaspoons suggested are based on standard gelatin in Canada. If using gelatin from the UK or other regions, you might need to increase the amount to about 4 teaspoons for a firm set. Check the package instructions of your gelatin and adjust accordingly.
-
Remove the mixture from the heat and let it cool slightly. This will prevent the whipped cream from melting when you fold it in.
-
Chill the candy cane milk mixture until it is partially set. You want it to be thick enough to coat the back of a spoon, but not completely solid. This usually takes about 1-2 hours in the refrigerator. Check periodically.
-
While the mixture is chilling, prepare your baking dish or pie plate. Break 7 chocolate wafers in half and stand them around the outside edge of the dish, pressing them gently into the sides. These will create a decorative border for the pie.
-
Place a whole layer of chocolate wafers in the bottom of the dish, covering the entire surface. You may need to break some wafers to fit them snugly.
-
Once the candy cane mixture has partially set, gently fold in the whipped cream. Be careful not to overmix, as this can deflate the whipped cream and result in a less airy filling.
-
Pour half of the peppermint mixture over the layer of chocolate wafers in the dish.
-
Repeat the layers: add another layer of whole chocolate wafers and then pour the remaining peppermint mixture over them.
-
Cover the dish with plastic wrap and chill in the refrigerator for at least 6 hours, or preferably overnight, to allow the pie to set completely.
-
Before serving, sprinkle the top of the pie with a few chocolate wafer crumbs for added texture and visual appeal. To make the crumbs, simply crush a couple of wafers with your hands or in a plastic bag with a rolling pin.
-
Cut the pie into slices and serve chilled.
Expert Tips & Tricks
- Candy Cane Dust: For a more intense peppermint flavor, grind some candy canes into a fine powder using a food processor or blender. Add a teaspoon or two of this powder to the milk mixture for an extra burst of flavor.
- Chocolate Ganache Drizzle: Drizzle melted chocolate ganache over the top of the pie before chilling for an even richer, more decadent dessert.
- Make-Ahead Tip: The candy cane pie can be assembled up to 2 days in advance. Just keep it tightly covered in the refrigerator.
- Whipping Cream Stability: To stabilize the whipped cream and prevent it from separating, add a teaspoon of powdered sugar or a pinch of cream of tartar while whipping.
- Even Wafer Placement: Before adding the filling, lightly brush the bottom of the pie dish with melted chocolate. This will help the chocolate wafers adhere better and prevent them from shifting.
Serving & Storage Suggestions
Serve the Candy Cane Pie chilled. A dollop of extra whipped cream or a sprinkle of candy cane pieces makes a lovely garnish. To store leftovers, cover the pie tightly with plastic wrap or transfer it to an airtight container. It will keep in the refrigerator for up to 3 days. While you can freeze the pie, the texture of the filling may change slightly upon thawing. If freezing, wrap it tightly in several layers of plastic wrap and then foil. Thaw in the refrigerator overnight before serving. It is not recommended to leave this pie at room temperature for more than two hours, due to the dairy content.
Nutritional Information
| Nutrient | Amount per Serving | % Daily Value |
|---|---|---|
| Calories | 250 kcal | N/A |
| Fat | 20g | 30% |
| Saturated Fat | 12g | 58% |
| Cholesterol | 66mg | 21% |
| Sodium | 133mg | 5% |
| Carbohydrates | 15g | 5% |
| Fiber | 1g | 2% |
| Sugars | 5g | N/A |
| Protein | 4g | 7% |
Note: Nutritional information is an estimate and may vary based on specific ingredients and serving size.
Variations & Substitutions
- Gluten-Free Version: Use gluten-free chocolate wafers to make this pie suitable for those with gluten sensitivities.
- Dairy-Free Version: Substitute the milk with coconut milk or almond milk and use a plant-based whipped cream alternative.
- Chocolate Crust: Use a pre-made chocolate crumb crust instead of chocolate wafers for a quicker and easier option.
- Mint Extract Boost: Add 1/4 teaspoon of pure peppermint extract to the milk mixture for a more pronounced mint flavor.
- Layered Delight: Incorporate a layer of crushed Oreos (with or without the cream filling, depending on your preference) between the wafer and peppermint layers.
FAQs (Frequently Asked Questions)
Q: Can I use peppermint extract instead of candy canes?
A: While you can, using actual candy canes provides a more authentic flavor and texture. If substituting, start with 1/4 teaspoon of peppermint extract and adjust to taste.
Q: How do I prevent the crust from getting soggy?
A: Make sure the peppermint filling has partially set before pouring it over the chocolate wafers. This will create a barrier and prevent the crust from absorbing too much moisture.
Q: My gelatin didn’t set properly. What went wrong?
A: Ensure you are using the correct amount of gelatin for your region’s strength and that you bloom it in cold water before dissolving it in the hot milk mixture. Insufficient chilling time can also affect the set.
Q: Can I make this pie without whipping cream?
A: Yes, you can substitute whipped topping, but the texture and flavor will be slightly different.
Q: How long does this pie last in the freezer?
A: Properly wrapped, the Candy Cane Pie can be stored in the freezer for up to 1 month. However, the texture may change slightly after thawing.
Final Thoughts
This Candy Cane Pie is more than just a dessert; it’s a celebration of the holiday season, a shared experience, and a delicious reminder of cherished memories. Don’t be intimidated by the chilling time – the results are well worth the wait. I encourage you to gather your loved ones, try this recipe, and create your own sweet memories. And please, let me know how it turns out! Pair it with a warm mug of hot chocolate or a festive holiday cocktail for the ultimate indulgence. Happy baking!