
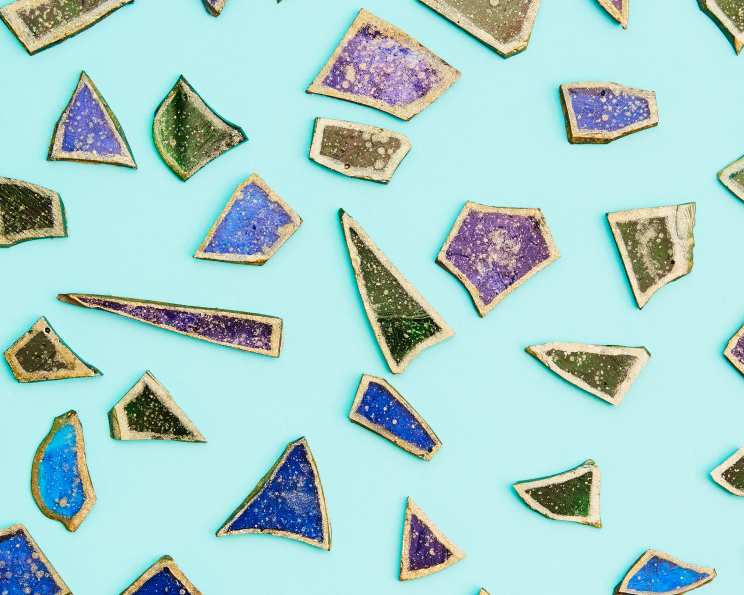
Dazzling Candy Crystals: A Sweet Alchemy
As a child, I was completely mesmerized by the glittering geodes in my grandfather’s rock collection. Their crystalline structures held a secret world of color and light. These candy crystals are my edible tribute to those geological wonders – each shard a tiny, sparkling jewel, ready to be savored. The satisfying crack as you break them apart, the intense sweetness that dances on your tongue… it’s pure magic.
Recipe Overview
- Prep Time: 10 minutes
- Cook Time: 15-20 minutes
- Total Time: 3-4 hours (including cooling time)
- Yields: 80-100 Crystals
- Dietary Type: Gluten-Free
Ingredients
- Nonstick cooking spray
- ½ cup water
- ¾ cup light corn syrup
- 2 ¼ cups sugar
- ½ teaspoon royal blue gel food coloring (also can use Regal Purple and Leaf Green)
- 1 tablespoon lemon extract
- ½ ounce gold edible dust to decorate candy
Equipment Needed
- Baking sheet
- Parchment paper
- Medium saucepan
- Candy thermometer
- Whisk
- Small brush
Instructions
-
Prepare the Baking Sheet: Line a baking sheet with parchment paper and spray generously with nonstick cooking spray. This will prevent the candy from sticking and make it easier to break apart later.
-
Combine the Ingredients: In a medium saucepan over medium-high heat, stir together the water, light corn syrup, and sugar. Ensure the sugar is well-distributed to prevent burning.
-
Cook to Hard Crack Stage: Attach a candy thermometer to the side of the pan, making sure it doesn’t touch the bottom. Bring the mixture to a boil, then reduce the heat to a simmer. Cook, without stirring (unless absolutely necessary to prevent burning), until the thermometer registers 290 degrees F. This is the hard crack stage, crucial for achieving that signature brittle texture.
-
Cool Briefly: Remove the saucepan from the heat and let it cool slightly until the bubbling subsides. This prevents the food coloring from splattering when added.
-
Add Color and Flavor: Carefully add the royal blue gel food coloring (or your color of choice) and the lemon extract to the hot candy mixture. Whisk gently until the color is completely incorporated and evenly distributed. Be careful of hot splatters.
-
Pour and Cool: Pour the candy onto the prepared baking sheet in a thin, even layer. Gently shake the pan to ensure the candy spreads out evenly.
-
Harden Completely: Let the candy cool completely at room temperature until it is hardened. This will take approximately 3-4 hours, or even overnight. Patience is key!
-
Break into Crystals: Once the candy is completely hardened, use a towel to protect your hands (the shards can be sharp!) and carefully break the candy into different-sized pieces, about 1-2 inches in size. Embrace the imperfections – each shard should be unique.
-
Decorate with Gold Dust (Optional): Dip the tip of a small brush into the lemon extract, then coat it in the gold edible dust. Lightly brush the edges of the candy pieces to accent them with a touch of gold. This adds a beautiful, shimmering finish.
Expert Tips & Tricks
-
Preventing Sugar Crystals: Sugar crystals can ruin the smooth texture of your candy. To prevent this, ensure all the sugar is dissolved before the mixture boils, and avoid stirring the mixture after it starts boiling unless absolutely necessary. If crystals do form on the side of the pan, use a wet pastry brush to wash them down.
-
Achieving the Perfect Color: Gel food coloring is highly concentrated, so start with a small amount and gradually add more until you reach your desired color intensity. Remember that the color will deepen slightly as the candy cools.
-
Working Quickly: Once the candy reaches 290 degrees F, you need to work quickly. The mixture will start to thicken and harden rapidly, so have your baking sheet prepared and your food coloring ready to go.
-
Alternative Flavors: Don’t be afraid to experiment with different extracts to customize the flavor of your candy crystals. Almond, orange, peppermint, or even a touch of chili extract can add a unique twist.
-
Humidity Matters: Making candy on a humid day can be challenging, as the candy may not harden properly. If you live in a humid climate, consider making these crystals on a drier day or using a dehumidifier in your kitchen.
Serving & Storage Suggestions
Serve these candy crystals as a delightful after-dinner treat, a whimsical addition to a candy buffet, or as a unique edible decoration for cakes and cupcakes.
Store the candy crystals in an airtight container at room temperature. They should last for up to 2 weeks. Avoid storing them in the refrigerator, as the moisture can cause them to become sticky.
Nutritional Information
| Nutrient | Amount per Serving | % Daily Value |
|---|---|---|
| Calories | 31 kcal | 2% |
| Total Fat | 0g | 0% |
| Saturated Fat | 0g | 0% |
| Cholesterol | 0mg | 0% |
| Sodium | 2.1mg | 0% |
| Total Carbohydrate | 8.1g | 3% |
| Dietary Fiber | 0g | 0% |
| Sugars | 6.5g | 13% |
| Protein | 0g | 0% |
Variations & Substitutions
-
Sugar-Free Candy Crystals: Use a sugar substitute designed for hard candies, such as isomalt. Follow the package instructions carefully, as the cooking times and temperatures may differ from those of regular sugar.
-
Natural Food Coloring: Experiment with natural food colorings derived from fruits, vegetables, and spices. Beet juice can create a vibrant red color, while spinach juice can produce a green hue. Keep in mind that natural food colorings may not be as intense as artificial ones.
-
Citrus Zest Infusion: Add a teaspoon of finely grated citrus zest (lemon, orange, or lime) to the candy mixture along with the extract for a more pronounced citrus flavor.
-
Spiced Candy Crystals: Incorporate a pinch of ground cinnamon, nutmeg, or cardamom to create warm, spiced candy crystals.
FAQs (Frequently Asked Questions)
Q: My candy is sticky and didn’t harden. What went wrong?
A: The most likely culprit is that the candy didn’t reach the hard crack stage (290 degrees F). Also, humidity can affect the candy’s ability to harden properly. Try again on a less humid day, and make sure your candy thermometer is accurate.
Q: Can I use a different type of sugar?
A: While granulated sugar is recommended for its reliable results, you can experiment with other types of sugar, such as caster sugar. Be aware that using brown sugar or other less refined sugars will affect the color and flavor of the candy.
Q: How do I clean the saucepan after making candy?
A: Fill the saucepan with water and bring it to a boil. The hot water will dissolve the hardened candy, making it easy to clean.
Q: Can I make these candy crystals without a candy thermometer?
A: While it’s possible, it’s not recommended. A candy thermometer is essential for ensuring the candy reaches the correct temperature and achieves the desired texture.
Q: Can I use oil-based food coloring?
A: No, oil-based food coloring is not suitable for hard candy. It will not mix properly with the water-based candy mixture and can cause the candy to separate. Always use gel or liquid food coloring.
Final Thoughts
I hope you’re inspired to create your own dazzling candy crystals! Don’t be afraid to experiment with different colors, flavors, and decorations to make them truly unique. Share your creations with friends and family, and let the sparkling sweetness bring a touch of joy to your day. And remember, the imperfections are what make each crystal special! Consider pairing these sweet treats with a warm cup of herbal tea or a glass of sparkling wine for a truly decadent experience.