
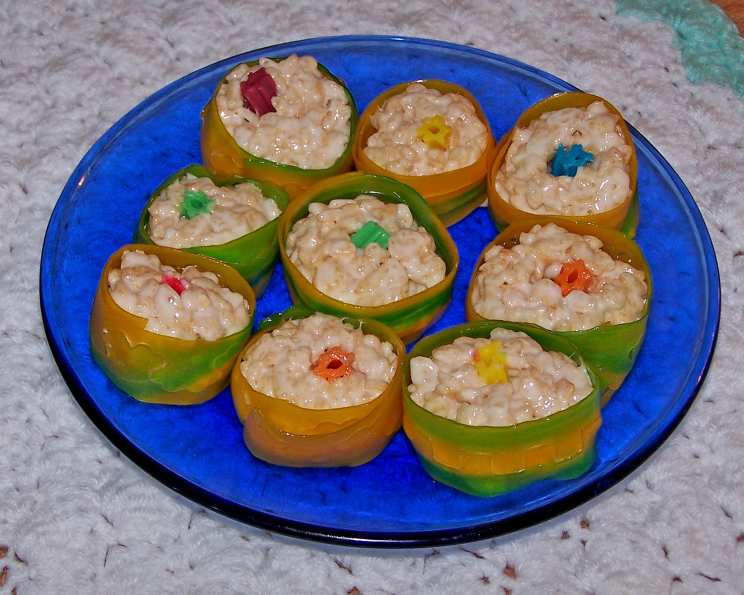
Candy Sushi: A Sweet Surprise Roll
There’s something undeniably magical about the way food can transport you back to childhood. I remember one rainy afternoon, my little brother and I were bouncing off the walls with boredom. My mom, in a stroke of genius, pulled out a bag of marshmallows, some colorful fruit leather, and a box of crispy rice cereal. “We’re making candy sushi!” she declared. The sheer absurdity of it, the sticky sweetness, and the collaborative effort turned a dull day into a joyful culinary adventure. The slightly misshapen “sushi” rolls we proudly presented to my dad that evening were less about perfect presentation and more about the pure, unadulterated fun of creation. To this day, the taste of that marshmallowy “rice” evokes the warmth of family, laughter, and the simple joy of making something delicious together.
Recipe Overview
- Prep Time: 15 minutes
- Cook Time: 5 minutes
- Total Time: 20 minutes
- Servings: 2-4
- Yield: Varies based on roll size
- Dietary Type: Not suitable for vegan diets
Ingredients
- 4 large marshmallows or 1 cup miniature marshmallows
- 1 tablespoon unsalted butter
- ½ cup crispy rice cereal
- 2 pieces red licorice (such as Twizzlers or Red Vines)
- 2 pieces fruit leather, any flavor (green in color looks best though)
Equipment Needed
- Small saucepan
- Spatula or spoon
- Knife
- Cutting board
- Plastic wrap (optional)
Instructions
-
In a small saucepan, melt the marshmallows with the butter over low heat. Stir constantly to prevent burning. It’s important to use low heat here, as you want the marshmallows to melt slowly and evenly, creating a smooth and creamy base. This typically takes about 3-5 minutes.
-
Once the marshmallows are completely melted and smooth, remove the saucepan from the heat. Immediately add the crispy rice cereal to the melted marshmallow mixture and stir to coat evenly. Ensure all the cereal is thoroughly coated in the marshmallow. The residual heat from the marshmallow will help the cereal stick together, creating the “rice” for your candy sushi.
-
Let the crispy rice cereal mixture cool slightly for a few minutes. This will make it easier to handle and prevent it from being too sticky when you start assembling the sushi. However, don’t let it cool down completely, or it will become too stiff to work with.
-
While the crispy rice cereal mixture is cooling, prepare the other ingredients. Cut the licorice to the length of the fruit roll-up. This will be the “filling” of your sushi roll. You can use kitchen shears or a sharp knife to cut the licorice.
-
Unroll the fruit roll-up and carefully peel off the plastic film. This step can be a bit tricky, as the fruit roll-up can be sticky. If you’re having trouble, try gently peeling it from one corner at a time.
-
Scoop half of the slightly cooled crispy rice cereal mixture onto the edge of each fruit roll-up. Gently spread the mixture along one edge, creating a line of “rice” that’s about an inch or two wide. This will help the roll hold its shape and prevent the licorice from slipping out.
-
Place the licorice in the center of the crispy rice cereal mixture. Position the licorice lengthwise along the “rice” line, ensuring it’s centered and evenly spaced.
-
Carefully roll up the fruit roll-up, starting from the edge with the crispy rice cereal and licorice. Roll it tightly, like you would a sushi roll, to create a compact and cohesive candy sushi. You may want to wrap the rolled sushi in plastic wrap and gently press to help it set into a cylinder shape for a few minutes.
-
Dip a knife in water to keep it from sticking and cut the candy sushi into 2-inch pieces. The water helps prevent the marshmallow from sticking to the knife, resulting in clean and even cuts.
-
Arrange your candy sushi on a plate and enjoy!
Expert Tips & Tricks
- For a smoother “rice,” use miniature marshmallows. They melt more evenly than large ones.
- If the rice cereal mixture is too sticky to handle, lightly grease your hands with butter or cooking spray.
- Don’t overcook the marshmallows, as they can become hard and brittle.
- Experiment with different flavors of fruit leather for a colorful and flavorful sushi. Try yellow for a “tamago” look or dark blue/purple for a “tuna” look.
- Add a small amount of food coloring to the melted marshmallow mixture for different colored “rice”.
- To give the sushi a more authentic look, you could use a thin strip of green fruit leather to resemble nori (seaweed).
- For a chocolatey twist, add a tablespoon of cocoa powder to the marshmallow mixture.
- Make it ahead: You can prepare the candy sushi a few hours in advance, but it’s best to store it in an airtight container to prevent it from drying out.
Serving & Storage Suggestions
Serve your candy sushi chilled or at room temperature. Arrange the pieces attractively on a platter for a fun and festive presentation. For a playful touch, serve with small bowls of crushed gummy bears to dip the “sushi” in.
Store leftover candy sushi in an airtight container at room temperature for up to 2-3 days. The marshmallow may become slightly stickier over time, but the flavor will remain the same. It is not recommended to refrigerate or freeze candy sushi, as this can alter the texture.
Nutritional Information
(Please note that these values are estimates and can vary based on specific ingredient brands and portion sizes.)
| Nutrient | Amount per Serving | % Daily Value |
|---|---|---|
| Calories | 200 kcal | 10% |
| Total Fat | 7g | 9% |
| Saturated Fat | 4g | 20% |
| Cholesterol | 15mg | 5% |
| Sodium | 130mg | 6% |
| Total Carbohydrate | 35g | 13% |
| Dietary Fiber | 0g | 0% |
| Sugars | 20g | |
| Protein | 1g | 2% |
Variations & Substitutions
- Vegan Option: Unfortunately, this recipe relies heavily on gelatin-based marshmallows, so a direct vegan substitution is difficult. A vegan alternative would require creating a marshmallow substitute from scratch using ingredients like agar-agar. While ambitious, it departs substantially from the core recipe concept.
- Gluten-Free: This recipe is naturally gluten-free, as long as you use gluten-free crispy rice cereal.
- Flavor Variations: Experiment with different flavors of fruit leather, such as strawberry, grape, or blue raspberry. You can also add a few drops of food coloring to the melted marshmallow mixture to create different colored “rice.”
- Filling Variations: Try using different types of candy for the filling, such as gummy worms, chocolate sticks, or even small pieces of cookies.
- Nutty Variation: Add a tablespoon of peanut butter to the melted marshmallow mixture for a nutty flavor.
FAQs (Frequently Asked Questions)
Q: Can I use different types of cereal?
A: Yes! While crispy rice cereal provides a classic texture, you can experiment with other cereals like frosted flakes or even crushed pretzels for a different twist.
Q: What if my marshmallows are not melting smoothly?
A: Make sure you are using low heat and stirring constantly. If the marshmallows are still not melting, add a teaspoon of water or milk to the saucepan.
Q: Can I make this ahead of time?
A: Yes, you can prepare the candy sushi a few hours in advance. Store it in an airtight container at room temperature to prevent it from drying out.
Q: The fruit roll-up is too sticky to peel off the plastic. What can I do?
A: Try chilling the fruit roll-up in the refrigerator for a few minutes before peeling. This can help firm it up and make it easier to remove the plastic.
Q: My candy sushi is falling apart. What am I doing wrong?
A: Make sure the rice cereal mixture has cooled slightly before rolling. If it’s too hot, it will be too sticky and the sushi won’t hold its shape. Also, be sure to roll the fruit roll-up tightly to create a compact roll.
Final Thoughts
Candy sushi is more than just a recipe; it’s an opportunity to unleash your creativity and have some fun in the kitchen. Whether you’re making it for a themed party, a special occasion, or simply a rainy day activity, this sweet treat is sure to bring a smile to everyone’s face. Don’t be afraid to experiment with different flavors, colors, and fillings to create your own unique version of this playful dessert. So gather your ingredients, grab your little ones, and get ready to roll your way to a sweet and unforgettable culinary adventure! Share your creations and feedback – I’d love to see your personalized candy sushi rolls!