
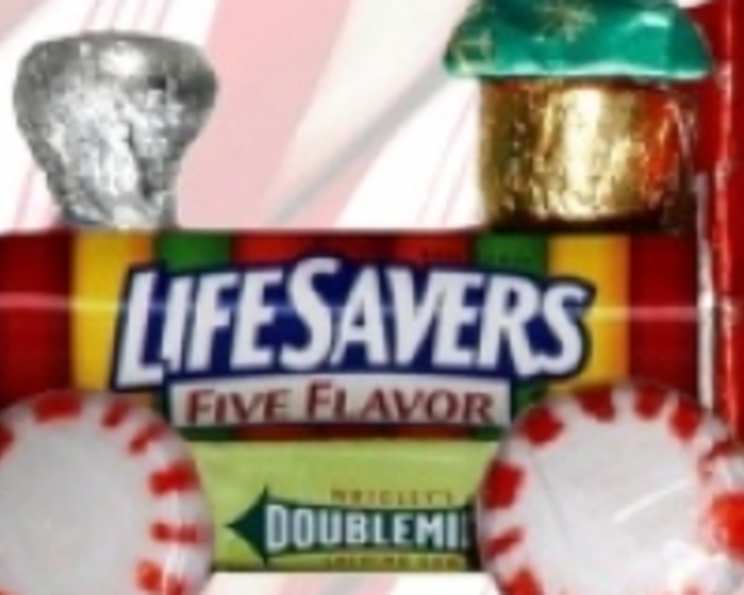
The Sweetest Ride in Town: Crafting a Candy Train
The scent of peppermint and chocolate always transports me back to childhood Christmases. I vividly remember one year, my grandmother, with her twinkling eyes and flour-dusted apron, gathered all the grandchildren around her enormous kitchen table. Instead of cookies, though, she unveiled a magical collection of candies, glue, and a mischievous grin. That day, we built candy trains, each one a unique reflection of our personalities – some sturdy and reliable, others whimsical and precarious. The hot glue burns were badges of honor, and the finished trains, proudly displayed on the mantelpiece, were a testament to our sticky-fingered creativity. This recipe is a direct descendant of that chaotic, joy-filled afternoon, a tradition I hope to pass on for generations to come.
Recipe Overview: Candy Train
- Prep Time: 15 minutes
- Cook Time: 0 minutes
- Total Time: 15 minutes
- Servings: 1
- Yield: 1 Candy Train
- Dietary Type: Vegetarian (depending on candy ingredients; can be adapted to be gluten-free, dairy-free etc., based on candy selection)
Ingredients
- 1 roll Lifesavers candy (1.14 oz)
- 1 pack chewing gum (5 sticks per pack, 1 oz)
- 1 chocolate Rollo candy (1.7 oz)
- 1 Hershey chocolate kiss
- 1 mini Hershey’s chocolate bar (0.49 oz)
- 1 Starburst candy (.5 oz)
- 4 round peppermint candies
Equipment Needed
- Hot-glue gun
- Parchment paper (to protect your work surface)
Instructions
-
Begin by prepping your workspace. Lay down a sheet of parchment paper to protect your table from stray glue and candy mishaps. Ensure your hot-glue gun is plugged in and heating up; this will only take a few minutes.
-
Take the roll of Lifesavers candy and the pack of chewing gum. Apply a line of hot glue along the top of the gum package. Carefully, but quickly, attach the roll of Lifesavers to the glued surface. This forms the base of your train. Be sure to press firmly, but gently, to ensure a strong bond.
-
Now it’s time to add the wheels. Grab your four round peppermint candies. Apply a generous dab of hot glue to one side of each peppermint. Position two peppermints on each side of the gum pack, acting as the wheels. Ensure they are evenly spaced and aligned for a stable train. Press and hold each wheel for a few seconds until the glue sets.
-
Let’s create the smokestack! Take a Hershey’s Kiss and apply a small dot of hot glue to its base. Affix the Hershey’s Kiss to the top-end of the Lifesavers roll, positioning it towards what you consider to be the front of your train. This serves as the train’s smokestack.
-
For the engineer’s room, use a Rollo candy. Apply hot glue to the base of the Rollo and attach it to the opposite end of the Lifesavers roll, creating a small cabin. To make a roof for the engineer, choose either a Starburst candy or a mini Hershey’s chocolate bar. Add a small dab of hot glue to the top of the Rollo and carefully place the chosen candy on top to create a roof.
-
The final touch: the caboose. Take your mini Hershey’s bar. Apply a line of hot glue along the entire length of one side of the candy bar. Place the glued side of the mini Hershey’s bar on the back end of the candy train, extending slightly off the edge of the gum pack. This creates a caboose for your sweet ride.
-
Allow the glue to cool and harden completely before handling the candy train. This usually takes about 5-10 minutes.
Expert Tips & Tricks
- Glue Gun Safety: Remember that hot glue can cause burns. Use caution and supervise children closely when using the glue gun.
- Candy Selection: Feel free to experiment with different types of candies! Just make sure they are relatively flat on one side for easy gluing.
- Strong Bonds: For a more secure hold, lightly score the surface of the candies where you’ll be applying the glue. This gives the glue something to grip onto.
- Patience is Key: Allow the glue to cool completely before moving or handling the train. This prevents the candies from shifting and ensures a sturdy structure.
- Customization: Add edible glitter or sprinkles for extra festive flair!
- Alternative Adhesives: If you are concerned about the safety of using a glue gun (especially with young children), consider using melted chocolate as an adhesive. This will take longer to set but is edible.
Serving & Storage Suggestions
Serve your candy train as a delightful treat during the holiday season, as a whimsical centerpiece, or as a unique party favor. Candy trains are best enjoyed fresh, but if you must store them, keep them in a cool, dry place away from direct sunlight to prevent the chocolate from melting. They should last for several days, though the structural integrity might weaken over time. It’s not recommended to refrigerate or freeze the candy train, as this can affect the texture and appearance of the candies.
Nutritional Information
Please note that the nutritional information is an estimate and will vary depending on the specific brands and types of candy used.
| Nutrient | Amount per Serving | % Daily Value |
|---|---|---|
| Calories | 250 kcal | 13% |
| Total Fat | 8g | 12% |
| Saturated Fat | 5g | 25% |
| Trans Fat | 0g | 0% |
| Cholesterol | 0mg | 0% |
| Sodium | 20mg | 1% |
| Total Carbohydrate | 45g | 15% |
| Dietary Fiber | 1g | 4% |
| Sugars | 35g | 70% |
| Protein | 2g | 4% |
Variations & Substitutions
- Dietary Restrictions: For a gluten-free candy train, use gluten-free candies. Similarly, for a dairy-free version, choose dairy-free chocolate and candies.
- Theme: Create themed candy trains based on holidays or interests. Use green and red candies for Christmas, pastel candies for Easter, or character-themed candies for a child’s birthday.
- Construction: Instead of a gum pack base, use a larger candy bar or a small cardboard box covered in wrapping paper.
- Decorations: Add small pretzel sticks as ladders, gumdrops as cargo, or edible markers to draw details on the candies.
FAQs (Frequently Asked Questions)
Q: What is the best type of glue to use for a candy train?
A: A low-temperature hot-glue gun is recommended as it provides a strong, quick bond without melting the candy.
Q: Can I use edible glue instead of hot glue?
A: Yes, edible glue or melted chocolate can be used as alternatives, but they may take longer to set and might not be as strong.
Q: How do I prevent the candies from falling off?
A: Ensure you are using enough glue and that you press and hold each candy in place for a few seconds until the glue sets. Lightly scoring the candy surface before gluing can also help.
Q: How long will the candy train last?
A: The candy train is best enjoyed fresh, but it can last for several days if stored in a cool, dry place away from direct sunlight.
Q: Can I eat the candy after it has been glued?
A: While the candy is technically edible after being glued, it is not recommended as the glue is not food-safe.
Final Thoughts
Creating a candy train is more than just following a recipe; it’s about creating memories and sharing joy. Gather your loved ones, embrace the mess, and let your imaginations run wild. Each candy train will be unique, a delicious reflection of the creativity and love you put into it. Don’t be afraid to experiment with different candies and decorations, and most importantly, have fun! Once you’ve crafted your masterpiece, share it with friends, family, or even just admire it as a testament to your sweet ingenuity. Now, go forth and build the sweetest ride in town!