
The Timeless Art of Home-Canned Green and Wax Beans
I can still picture my grandmother’s pantry, a cool, dimly lit sanctuary filled with rows upon rows of colorful jars. Among the ruby-red beets and golden peaches, the jars of neatly packed green and wax beans always stood out. They represented not only a delicious side dish, but also a symbol of resourcefulness, tradition, and love that went into preserving the summer’s bounty for the long winter months. Recreating that same magic in my own kitchen feels like a tangible connection to her, a way to keep her spirit alive through the simple act of canning.
Recipe Overview
- Prep Time: 30 minutes
- Cook Time: 30 minutes
- Total Time: 1 hour
- Yields: 4 quarts
- Serves: 8
- Dietary Type: Vegan, Gluten-Free
Ingredients
- 16 cups green beans or 16 cups wax beans, cut in 1-inch lengths
- 32 cups water
- ¾ cup pickling salt
- ½ cup white vinegar
Equipment Needed
- Large pot
- Sterilized jars (4 quart-sized)
- Jar lifter
- Canning funnel
- Clean cloth
- Hot water bath canner with rack
Instructions
-
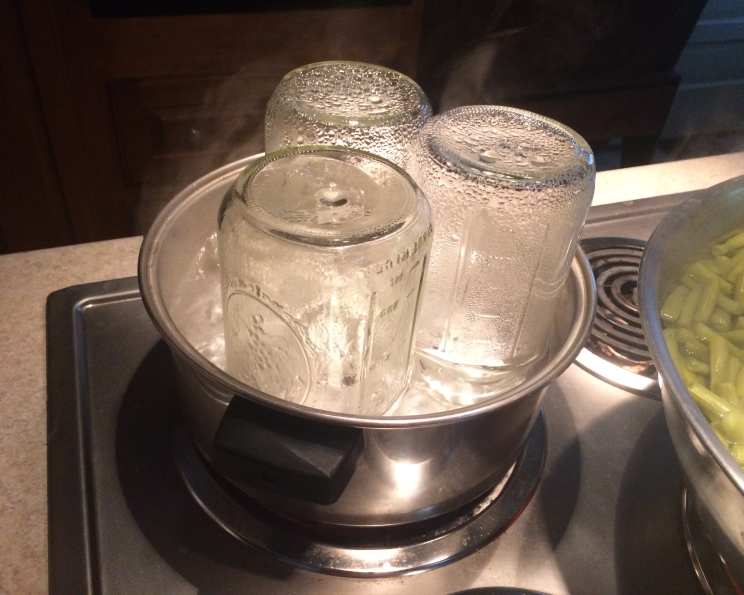
Begin by sterilizing your canning jars and lids. You can do this by boiling them in water for 10 minutes or running them through a sterilizing cycle in your dishwasher. Keep the jars hot until you’re ready to fill them.
-
Prepare the beans: Wash the green beans or wax beans thoroughly. Trim the ends and cut them into 1-inch lengths. Pack the beans loosely into the hot, sterilized jars, leaving 1 inch of headspace (the space between the top of the beans and the jar rim). Be careful not to pack them too tightly, as this can prevent proper sealing.
-
Prepare the brine: In a large pot, combine the 32 cups of water, ¾ cup of pickling salt, and ½ cup of white vinegar. Bring the mixture to a rolling boil, stirring to ensure the salt is completely dissolved.
-
Fill the jars: Using a canning funnel, carefully pour the boiling brine over the beans in each jar, maintaining ½ inch of headspace. The hot brine helps to remove air pockets and ensures a proper seal.
-
Remove air bubbles: Gently tap each jar on a padded surface to release any trapped air bubbles. You can also use a non-metallic utensil, like a chopstick or spatula, to run along the inside of the jar, gently dislodging any stubborn bubbles.
-
Wipe the jar rims: Using a clean, damp cloth, thoroughly wipe the rims of each jar. This is crucial to remove any food residue or brine that could interfere with the lid sealing properly.
-
Seal the jars: Place the sterilized lids on top of each jar, followed by the screw bands. Tighten the bands until they are fingertip tight – not too loose, but not overly tight either. Over-tightening can prevent the air from escaping during processing, leading to seal failures.
-
Process in a hot water bath: Carefully lower the filled jars into a hot water bath canner, ensuring they are completely submerged under at least 1 inch of water. Bring the water to a rolling boil and process for 30 minutes. The processing time is critical for killing any potentially harmful bacteria and ensuring the beans are safe to eat.
-
Cool and check seals: After processing, turn off the heat and carefully remove the jars from the canner using a jar lifter. Place them on a towel-lined surface, allowing ample space between each jar for air circulation. Let the jars cool completely, undisturbed, for 12-24 hours. As the jars cool, you should hear a “popping” sound as the lids seal.
-
Verify the seals: Once the jars are completely cool, check the seals by pressing down on the center of each lid. If the lid flexes up and down, it is not properly sealed and needs to be reprocessed or refrigerated for immediate use. Remove the screw bands for storage, as they can trap moisture and lead to rusting.
Expert Tips & Tricks
- Use high-quality ingredients: The quality of your beans will directly impact the final product. Choose fresh, firm beans that are free from blemishes. Pickling salt is preferred over table salt, as it doesn’t contain iodine, which can darken the beans and affect their flavor.
- Don’t overcrowd the jars: Packing the beans too tightly can prevent proper heat penetration during processing, potentially leading to spoilage.
- Maintain consistent heat: During the hot water bath process, ensure the water remains at a rolling boil for the entire processing time. Fluctuations in temperature can compromise the seal.
- Label and date: Always label your jars with the contents and date of canning. This helps you keep track of your inventory and ensures you use the oldest jars first.
Serving & Storage Suggestions
Home-canned green and wax beans can be served heated in their own liquid for a more intense flavor, or drained and rinsed for a milder taste. They are a versatile side dish that pairs well with a variety of main courses, such as roasted chicken, grilled pork, or baked fish. You can also add them to soups, stews, or salads.
Store properly sealed jars in a cool, dark, and dry place. Properly processed and stored canned beans can last for up to 1-2 years. Once opened, refrigerate any leftover beans in an airtight container and consume within a week.
Nutritional Information
| Nutrient | Amount per Serving | % Daily Value |
|---|---|---|
| Calories | 65 kcal | 3% |
| Calories from Fat | 3 g | 6% |
| Total Fat | 0.4 g | 0% |
| Saturated Fat | 0.1 g | 0% |
| Cholesterol | 0 mg | 0% |
| Sodium | 10651.2 mg | 443% |
| Total Carbohydrate | 14.1 g | 4% |
| Dietary Fiber | 5.4 g | 21% |
| Sugars | 6.6 g | 26% |
| Protein | 3.7 g | 7% |
Note: Nutritional information is an estimate and may vary based on specific ingredients and preparation methods.
Variations & Substitutions
- Spicy Beans: Add a pinch of red pepper flakes or a sliced jalapeno to each jar for a little heat.
- Garlic Herb Beans: Add a clove of garlic and a sprig of fresh thyme or rosemary to each jar for added flavor.
- Different Vinegar: Experiment with different types of vinegar, such as apple cider vinegar or red wine vinegar, for a unique flavor profile.
- Yellow Beans Only: Feel free to use just wax beans in the canning process instead of the combination for a slightly different look and taste.
FAQs (Frequently Asked Questions)
Q: Why is it important to use pickling salt instead of regular table salt?
A: Pickling salt is pure sodium chloride and doesn’t contain iodine or anti-caking agents that can darken the beans and create a cloudy brine.
Q: Can I use previously used canning jars?
A: Yes, you can reuse canning jars as long as they are in good condition, free from cracks or chips. However, you should always use new lids for each canning process to ensure a proper seal.
Q: What happens if a jar doesn’t seal properly?
A: If a jar doesn’t seal within 24 hours, you can either reprocess it with a new lid, or refrigerate the beans immediately and consume them within a week.
Q: Can I reduce the amount of salt in the recipe?
A: While you can slightly reduce the amount of salt, it’s important to use the recommended amount for preserving purposes. Salt helps to inhibit the growth of bacteria and ensure the beans are safe to eat.
Q: How do I know if the canned beans have spoiled?
A: If you notice any signs of spoilage, such as bulging lids, foul odor, or cloudy liquid, discard the beans immediately. Do not taste them.
Final Thoughts
Canning your own green and wax beans is a rewarding experience that allows you to enjoy the fresh flavors of summer year-round. It’s a skill that can be passed down through generations, connecting you to a rich history of food preservation. Don’t be intimidated by the process – with a little practice and attention to detail, you’ll be filling your pantry with jars of delicious, homemade goodness in no time. I encourage you to try this recipe, experiment with different variations, and share your creations with friends and family. Perhaps serve them alongside a hearty pot roast or as a vibrant addition to a summer picnic. The possibilities are endless!