
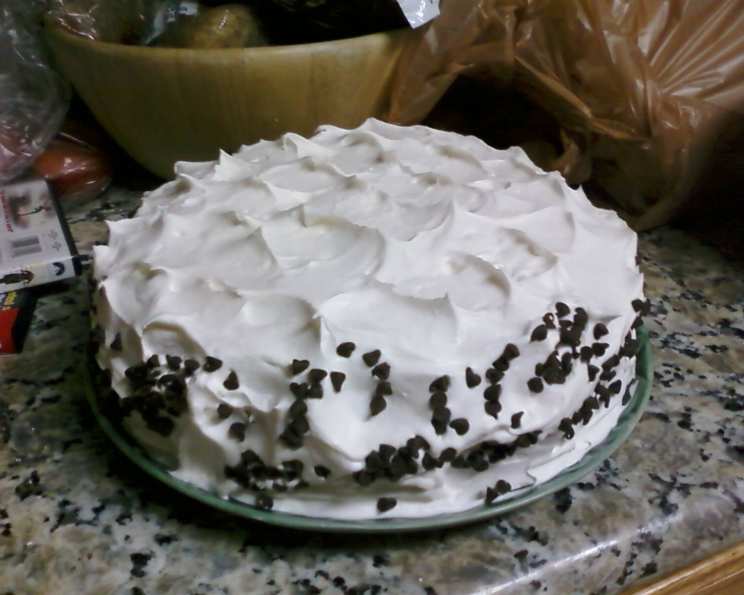
Cannoli Cake: A Slice of Sicily in Every Bite
The scent of citrus always transports me back to my grandmother’s kitchen. She wasn’t Sicilian by birth, but she married into it, and embraced the culture and cuisine with open arms. Her cannoli were legendary, crispy shells filled with sweet ricotta and chocolate. This Cannoli Cake is my homage to her, a celebration of those flavors in a show-stopping dessert that’s perfect for any occasion. It’s a bit more involved than a simple cake, but trust me, the result is worth every delicious minute.
Recipe Overview
- Prep Time: 45 minutes
- Cook Time: 30-35 minutes
- Total Time: 3 hours 45 minutes (includes chilling)
- Servings: 16
- Yield: 1 cake
- Dietary Type: Not specified
Ingredients
FOR THE CAKE:
- 6 large eggs, separated
- 1 cup sugar (divided)
- ¾ cup all-purpose flour
- 1 tablespoon baking powder
- ½ teaspoon salt
- 2 tablespoons water
- 1 teaspoon vanilla extract
FOR BRUSHING CAKE LAYERS:
- 2 large oranges
- 2 tablespoons orange-flavored liqueur (optional)
FOR THE FILLING:
- 1 (32 ounce) container ricotta cheese
- 1 (8 ounce) package cream cheese, softened
- 1 teaspoon vanilla extract
- 1 cup confectioners’ sugar
- ¼ cup semisweet chocolate, mini pieces
VANILLA-CREAM FROSTING:
- 3 tablespoons margarine or 3 tablespoons butter, softened
- 3 tablespoons milk
- 1 ¾ cups confectioners’ sugar
- ¾ teaspoon vanilla extract
- 2 cups whipping cream
FOR DECORATION:
- ⅓ cup miniature semisweet chocolate chips (for feather design on top of cake)
Equipment Needed
- Mixer (hand or stand)
- Small and large mixing bowls
- Rubber spatula
- Ungreased 10-inch by 3-inch springform pan
- Wire rack
- Serrated knife
- Metal spatula
- Heavy small saucepan
- Waxed paper
- Toothpick or small knife
Instructions
-
Preheat your oven to 375°F (190°C). It’s crucial to start with a properly heated oven for even baking.
-
Prepare the egg whites: In a small bowl, using a mixer at high speed, beat the egg whites until soft peaks form. Gradually sprinkle in ½ cup of the sugar, continuing to beat until the sugar is completely dissolved and the whites stand in stiff, glossy peaks. This step is vital for creating a light and airy cake.
-
Prepare the egg yolk batter: In a large bowl, using the same beaters (no need to wash them), and with the mixer at low speed, beat the egg yolks, flour, baking powder, salt, the remaining ½ cup of sugar, vanilla extract, and water until everything is blended. Be careful not to overmix; you want the batter to be just combined.
-
Combine the mixtures: With a rubber spatula, gently fold the beaten egg whites into the egg yolk mixture, one-third at a time. This gradual incorporation helps maintain the airiness of the egg whites. Be gentle!
-
Bake the cake: Spoon the batter into the UNGREASED 10-inch by 3-inch springform pan. Bake for 30 to 35 minutes, or until the cake is golden brown and the top springs back when lightly touched. A toothpick inserted into the center should come out clean.
-
Cool the cake: Invert the cake in the pan onto a wire rack and cool completely in the pan. Cooling upside down helps prevent the cake from collapsing.
-
Prepare the orange syrup: While the cake cools, prepare the orange syrup for brushing the layers. From the oranges, grate 2 teaspoons of the peel (reserve the rest for the filling). Squeeze ⅓ cup of juice (if you’re not using liqueur, increase the juice to ½ cup). Stir the orange-flavored liqueur into the ⅓ cup of juice; set aside. The orange liqueur is optional, but it adds a lovely depth of flavor that complements the ricotta filling perfectly.
-
Make the ricotta filling: In a large bowl, with the mixer at low speed, beat the ricotta cheese, cream cheese, the reserved grated orange peel, confectioners’ sugar, and vanilla extract until smooth. Then, stir in the semisweet chocolate mini pieces.
-
Assemble the cake: With a metal spatula, loosen the cake from the edge of the pan; remove the pan side. Loosen the cake from the pan bottom; remove the pan bottom. Using a serrated knife, cut the cake horizontally into two layers.
-
Brush with orange syrup: Brush the orange-juice mixture evenly over the cut side of both layers. Don’t be shy with the syrup – it adds moisture and flavor!
-
Fill the cake: Place the bottom cake layer, cut-side up, on a cake plate. Spoon the ricotta-cheese filling onto the center of the cake layer. Spread some of the filling out to the edge, leaving the center rounded to achieve a dome effect.
-
Create the top layer: Cut a small wedge out of the remaining cake layer. Gently rest the cake layer over the filling. (Cutting the wedge will allow the cake layer to bend, without cracking, to fit over the dome shape.)
-
Prepare the Vanilla-Cream Frosting: In a small bowl, with the mixer at medium speed, beat the margarine or butter (softened), milk, confectioners’ sugar, and vanilla extract until smooth, adding more milk if necessary until the mixture has an easy spreading consistency. In a large bowl, using the same beaters and with the mixer at medium speed, beat the whipping cream until stiff peaks form. Gently fold the confectioners’-sugar mixture into the whipped cream.
-
Frost the cake: Spread the Vanilla-Cream Frosting over the top and down the sides of the cake.
-
Melt the chocolate: In a heavy small saucepan over low heat, heat the remaining ⅓ cup of miniature semisweet chocolate chips, stirring frequently, until melted and smooth.
-
Create the feather design: Spoon the melted chocolate into a waxed-paper cone. (Or, use a small decorating bag with a small writing tube.) With the chocolate, create a feather design on top of the cake following these steps:
-
Make a Waxed-Paper Cone: Cut a square of waxed paper; fold in half into a triangle. Lay the triangle on a flat surface so the wide side is at the top. Fold the left-hand corner down to the center point. Take the right-hand corner; wrap it completely around the folded left-hand corner, forming a cone. Both corners should meet at the center point of the original triangle. Fold in these ends twice to hold together. Fill the cone two-thirds full; fold the top over.
-
Piping Circles on Cake: Using the paper cone, cut the tip to make a 1/8 inch diameter hole. Pipe the melted chocolate on top of the cake in concentric circles, starting in the center and moving to the edge of the cake. Start with a small circle in the middle of the cake and go around each circle to the edge. Aim for about 6 circles.
-
Drawing Spokes Towards Center: Before the chocolate hardens, quickly, with the tip of a toothpick or small knife, draw lines in a spoke fashion, about 1 ½ inches apart, around the edge of the cake; alternate the direction of each spoke, first from the edge to the center of the cake, then from the center to the edge.
-
Completing Feather Design: Continue around the top of the cake, alternating the direction of each spoke to make an attractive feather design.
-
-
Chill: Refrigerate the cake until the filling is firm for easier cutting, about 3 hours. This chilling time is essential for the filling to set properly and for the flavors to meld together.
Expert Tips & Tricks
- For a smoother ricotta filling: If your ricotta is a bit grainy, you can press it through a fine-mesh sieve before using it in the filling.
- Make ahead: The cake layers can be baked a day in advance and stored, well-wrapped, at room temperature. The filling can also be made a day ahead and stored in the refrigerator. Assemble the cake just before serving.
- Even layers: Use a cake leveler or a long serrated knife and a steady hand to ensure your cake layers are even.
- Prevent sticking: Even though the springform pan is ungreased, you can line the bottom with parchment paper for extra insurance against sticking.
- Chocolate variations: Experiment with different types of chocolate in the filling, such as dark chocolate or white chocolate.
Serving & Storage Suggestions
Serve the Cannoli Cake chilled. It’s best enjoyed within 2-3 days of making it. Store leftovers in an airtight container in the refrigerator. The cake is not suitable for freezing, as the ricotta filling may become watery upon thawing.
Nutritional Information
| Nutrient | Amount per Serving | % Daily Value |
|---|---|---|
| Calories | 656.6 kcal | N/A |
| Calories from Fat | 357 g | 54% |
| Total Fat | 39.7 g | 61% |
| Saturated Fat | 22.5 g | 112% |
| Cholesterol | 208.8 mg | 69% |
| Sodium | 402.5 mg | 16% |
| Total Carbohydrate | 62.6 g | 20% |
| Dietary Fiber | 1.7 g | 6% |
| Sugars | 50.1 g | N/A |
| Protein | 15.8 g | 31% |
Note: These values are estimates and may vary based on specific ingredients and preparation methods.
Variations & Substitutions
- Gluten-Free: Substitute the all-purpose flour with a gluten-free blend for a gluten-free version. Be sure to use a blend that’s designed for baking and contains xanthan gum.
- Dairy-Free: It’s difficult to make this cake completely dairy-free and still retain the classic cannoli flavor profile. However, you can try using a plant-based cream cheese alternative and coconut whipped cream for the frosting. Look for a high-quality ricotta cheese substitute, though the texture will be different.
- Lemon Zest: Substitute the orange zest with lemon zest for a different citrus flavor.
- Nuts: Add chopped pistachios or almonds to the filling for extra texture and flavor.
- Chocolate Chips: Use different types of chocolate chips (milk, dark, white) in the filling or for decoration.
FAQs (Frequently Asked Questions)
Q: Can I make this cake without the orange liqueur?
A: Yes, you can. Simply increase the amount of orange juice used to brush the cake layers to ½ cup. The liqueur adds a depth of flavor, but the orange juice alone will still provide a lovely citrus aroma.
Q: Why is it important to cool the cake upside down?
A: Cooling the cake upside down helps to prevent it from collapsing in the center, ensuring a more even and attractive cake.
Q: Can I use store-bought whipped cream instead of making my own frosting?
A: While you can use store-bought whipped cream, the homemade frosting will have a much better flavor and texture. Making your own allows you to control the sweetness and consistency.
Q: How do I prevent the chocolate feather design from becoming messy?
A: Make sure the melted chocolate is smooth and not too hot. Work quickly and use a light touch when creating the design. Chilling the cake slightly before adding the chocolate can also help.
Q: What if my ricotta filling is too runny?
A: Place the ricotta in a cheesecloth-lined sieve and let it drain in the refrigerator for several hours to remove excess moisture.
Final Thoughts
This Cannoli Cake is more than just a dessert; it’s a taste of tradition, a celebration of flavors, and a labor of love. Don’t be intimidated by the number of steps – each one is simple and contributes to the final masterpiece. I hope you’ll give this recipe a try and share the joy with your friends and family. Pair it with a strong Italian coffee or a sweet dessert wine for the perfect ending to a memorable meal. Enjoy!