
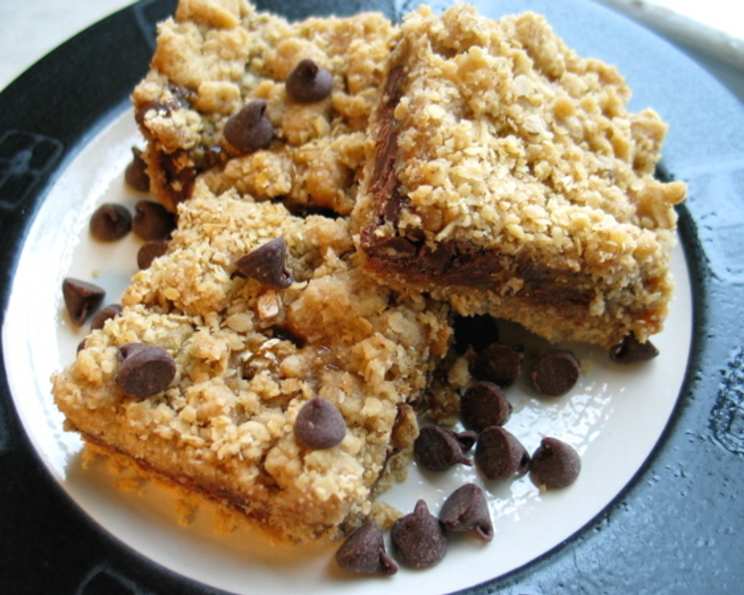
Caramel Chocolate Dream Bars
I remember being a young pastry cook, constantly searching for that perfect balance of flavors and textures. One afternoon, while experimenting with a new caramel sauce, I stumbled upon a combination that sent shivers down my spine. The richness of dark chocolate, the chewiness of oatmeal, and the gooey sweetness of caramel intertwined to create an unforgettable experience. These Caramel Chocolate Dream Bars transport me back to that moment of pure culinary discovery. They’re simple to make, but their decadent taste belies their humble origins.
Recipe Overview
- Prep Time: 15 minutes
- Cook Time: 25 minutes
- Total Time: 40 minutes
- Yields: 1 9×13 pan
- Serves: 20
- Dietary Type: Vegetarian
Ingredients
- 1 1/2 cups brown sugar, firmly packed
- 2 cups quick oatmeal
- 1 (16 ounce) bag chocolate chips
- 3/4 cup caramel ice cream topping
- 1 1/4 cups margarine
- 2 cups flour, plus
- 3 tablespoons flour
- 1 teaspoon baking soda
- 1 teaspoon salt
Equipment Needed
- 9×13 inch baking pan
- Mixing bowls
- Measuring cups and spoons
- Oven
- Spatula
Instructions
-
Preheat your oven to 350°F (175°C). Make sure the rack is in the center position for even baking.
-
In a large mixing bowl, cream together the brown sugar and margarine. This step is crucial for achieving a tender crumb. Use an electric mixer for the best results, creaming until the mixture is light and fluffy.
-
In a separate bowl, combine the flour (reserving 3 tablespoons for later use), baking soda, and salt. Whisk together to ensure the baking soda and salt are evenly distributed throughout the flour. This will help the bars rise properly and have a balanced flavor.
-
Gradually add the dry ingredients to the creamed mixture, mixing until just combined. Be careful not to overmix, as this can result in tough bars.
-
Stir in the quick oatmeal. Ensure it’s evenly distributed throughout the dough.
-
Press half of the oatmeal mixture into the bottom of a greased 9 x 13 inch pan. Use your fingers or the back of a spoon to create an even layer.
-
Bake the crust for 10 minutes. This pre-baking step helps the crust set and prevents the chocolate chips from sinking to the bottom.
-
Remove the pan from the oven and sprinkle the chocolate chips evenly over the partially baked crust.
-
In a small bowl, mix the caramel topping with the reserved 3 tablespoons of flour. This will help thicken the caramel and prevent it from becoming too runny during baking.
-
Drizzle the caramel mixture evenly over the chocolate chips. Try to distribute it as evenly as possible.
-
Sprinkle the remaining oatmeal mixture over the caramel layer, creating a crumbly topping.
-
Bake for an additional 15 minutes, or until the top is golden brown and the caramel is bubbly. A toothpick inserted into the center should come out with moist crumbs, not wet batter.
-
Remove the pan from the oven and let it cool completely before cutting into bars. This is essential for the bars to set properly.
Expert Tips & Tricks
- For a richer flavor: Use dark chocolate chips instead of semi-sweet. You can even use a combination of both.
- To prevent sticking: Line the baking pan with parchment paper, leaving an overhang on the sides. This will make it easy to lift the bars out of the pan once they’ve cooled.
- Spice it up: Add a pinch of cinnamon or nutmeg to the dry ingredients for a warm, comforting flavor.
- Salted Caramel Variation: Sprinkle a bit of flaky sea salt on top of the caramel before baking for an incredible flavor contrast.
- Even Baking: Rotate the pan halfway through baking to ensure even browning. If the top starts to brown too quickly, tent it with foil.
- Make Ahead: These bars can be made a day in advance. Store them at room temperature in an airtight container.
Serving & Storage Suggestions
These Caramel Chocolate Dream Bars are best served at room temperature. Cut them into squares or rectangles and arrange them on a platter for an attractive presentation. They’re perfect as a dessert, afternoon snack, or even a sweet addition to a brunch spread.
To store, place the cooled bars in an airtight container. They will keep at room temperature for up to 3 days, in the refrigerator for up to a week, or in the freezer for up to 2 months. To freeze, wrap the bars individually in plastic wrap and then place them in a freezer-safe bag or container. Thaw at room temperature before serving.
Nutritional Information
| Nutrient | Amount per Serving | % Daily Value |
|---|---|---|
| Calories | 384.4 kcal | N/A |
| Calories from Fat | 169 g | 44% |
| Total Fat | 18.8 g | 28% |
| Saturated Fat | 6.5 g | 32% |
| Cholesterol | 0.1 mg | 0% |
| Sodium | 363 mg | 15% |
| Total Carbohydrate | 54.8 g | 18% |
| Dietary Fiber | 2.6 g | 10% |
| Sugars | 28.5 g | 113% |
| Protein | 3.8 g | 7% |
Variations & Substitutions
- Gluten-Free: Use a gluten-free all-purpose flour blend instead of regular flour. Ensure the oatmeal is certified gluten-free as well.
- Dairy-Free: Use a dairy-free margarine and dairy-free chocolate chips. Many brands offer excellent substitutes that won’t compromise the flavor.
- Nutty Variation: Add 1/2 cup of chopped nuts (such as pecans or walnuts) to the oatmeal mixture for added texture and flavor.
- Different Chocolate: Try using white chocolate chips or peanut butter chips instead of semi-sweet chocolate chips.
- Seasonal Variation: Drizzle a bit of pumpkin spice over the caramel layer in the fall for a seasonal twist.
FAQs (Frequently Asked Questions)
Q: Can I use rolled oats instead of quick oats?
A: While you can use rolled oats, the texture will be slightly different. Quick oats create a finer, more cohesive crumb. If using rolled oats, pulse them briefly in a food processor to break them down slightly.
Q: My caramel is too runny. What did I do wrong?
A: Make sure you mix the caramel topping with the reserved 3 tablespoons of flour. This helps to thicken the caramel during baking. Also, ensure your oven temperature is accurate.
Q: Can I freeze these bars?
A: Yes, these bars freeze very well. Wrap them individually in plastic wrap and then place them in a freezer-safe bag or container. They can be frozen for up to 2 months.
Q: The topping is browning too quickly. What should I do?
A: Tent the pan with aluminum foil to prevent the topping from burning while the center continues to bake.
Q: How do I know when the bars are done?
A: The bars are done when the top is golden brown and the caramel is bubbly. A toothpick inserted into the center should come out with moist crumbs, not wet batter.
Final Thoughts
These Caramel Chocolate Dream Bars are more than just a dessert; they’re a little slice of heaven. The combination of textures and flavors is simply irresistible. Whether you’re a seasoned baker or just starting out, this recipe is sure to become a favorite. Don’t be afraid to experiment with variations to make it your own. I encourage you to give this recipe a try and share your creations with loved ones. Pair these bars with a scoop of vanilla ice cream or a warm cup of coffee for the ultimate indulgence. Happy baking!