
Caramel Gold: A Taste of Homemade Heaven
The scent of caramel always takes me back to my grandmother’s kitchen. Every Christmas, a huge batch of homemade candies would appear – caramels, peanut brittle, fudge – all meticulously wrapped in waxed paper and tied with festive ribbons. But the caramels… those were special. Soft, chewy, and intensely buttery, they were the gold standard (pun intended!) by which I judged all other caramels. This recipe reminds me so much of her candies; simple, honest, and utterly irresistible.
Recipe Overview
- Prep Time: 5 minutes
- Cook Time: 12-15 minutes
- Total Time: 20 minutes
- Yields: 12-15 squares
- Dietary Type: Not Gluten-Free (potentially adaptable)
Ingredients
- 1 cup butter (Sorry NO substitute)
- 2 1⁄4 cups brown sugar
- 1 dash salt
- 1 cup light corn syrup
- 1 (15 ounce) can sweetened condensed milk
- 1 teaspoon vanilla
Equipment Needed
- Heavy 3-quart saucepan
- Metal spatula or wooden spoon
- 9x9x2 inch baking pan
- Butter or cooking spray
- Waxed paper (optional, for making turtles)
Instructions
-
Begin by melting the butter in a heavy 3-quart saucepan over medium heat. Using a heavy-bottomed pan is crucial to prevent scorching and ensure even heat distribution.
-
Once the butter is fully melted, add the brown sugar and salt. Stir thoroughly with a metal spatula or wooden spoon to combine. Make sure to break up any clumps of brown sugar for a smooth consistency.
-
Next, stir in the light corn syrup. Mix well until the sugar and corn syrup are fully incorporated into the melted butter. The mixture should be uniform and glossy.
-
Now, the magic ingredient: add the sweetened condensed milk, stirring constantly. This is where the mixture will start to thicken. Constant stirring is essential to prevent the milk from sticking to the bottom of the pan and burning.
-
Continue to cook and stir the mixture over medium heat, maintaining a constant stirring motion. This is the most crucial step. Heat to the firm ball stage (245 degrees Fahrenheit). The time it takes to reach this stage can vary depending on your stove and the humidity in your kitchen, but it typically takes about 12 to 15 minutes.
To test for the firm ball stage: Drop a small spoonful of the caramel mixture into a bowl of ice water. If it forms a firm ball that you can pick up and it doesn’t dissolve in the water, it’s ready. If it’s still soft and dissolves, continue cooking for a few more minutes and test again.
-
Once the caramel reaches the firm ball stage, remove it from the heat immediately.
-
Quickly add the vanilla and stir it in until evenly distributed throughout the caramel. The vanilla will add a depth of flavor and aroma to the finished caramels.
-
Pour the caramel into a 9x9x2 inch pan that has been generously buttered or sprayed with cooking spray. This will prevent the caramels from sticking and make them easier to remove later.
-
Cool completely at room temperature before cutting into squares. This may take a few hours. Patience is key!
-
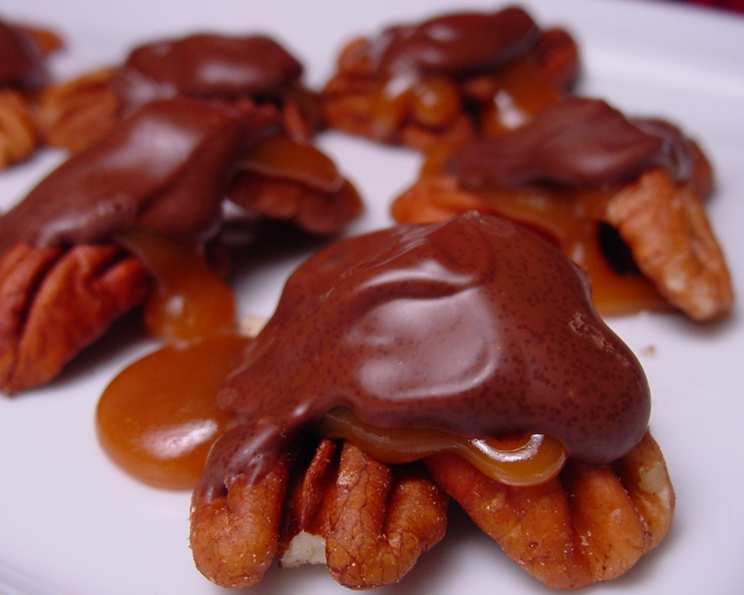
Alternatively, you can make homemade turtles by arranging two pecan halves on a buttered sheet of waxed paper. Spoon a little caramel on top of the pecans, let cool, then spoon a little melted milk chocolate on top. Allow the turtles to cool completely before enjoying.
-
Enjoy the cooled caramels or turtles!
Expert Tips & Tricks
- The spatula is your friend: As noted in the original recipe, using a metal spatula can help scrape the bottom of the pan more effectively, preventing scorching. However, a sturdy wooden spoon will also work.
- Don’t rush the cooking process: Reaching the firm ball stage is crucial for achieving the right texture. If you undercook the caramel, it will be too soft and sticky. If you overcook it, it will be hard and brittle.
- Humidity matters: On humid days, it may take longer for the caramel to reach the firm ball stage.
- For softer caramels: Consider pulling the caramel a degree or two before firm ball stage. This will depend on the accuracy of your thermometer.
Serving & Storage Suggestions
These caramels are best served at room temperature. They can be enjoyed as is, or used as a component in other desserts.
- Storage: Store the caramels in an airtight container at room temperature. They will keep for up to 2 weeks. For longer storage, you can wrap them individually in waxed paper and store them in the refrigerator for up to 1 month.
- Freezing: While freezing is not recommended, these can be frozen if individually wrapped to prevent sticking. Thaw overnight in the refrigerator.
- Serving Suggestions: Serve the caramels on a platter with other candies, nuts, and dried fruits. They also make a great addition to a dessert buffet. You can also melt them down and use them as a sauce for ice cream or brownies.
Nutritional Information
Please note: This is an estimated nutritional breakdown. Actual values may vary.
| Nutrient | Amount per Serving | % Daily Value |
|---|---|---|
| Calories | 487.6 kcal | N/A |
| Calories from Fat | 166 g | 34% |
| Total Fat | 18.5 g | 28% |
| Saturated Fat | 11.7 g | 58% |
| Cholesterol | 52.7 mg | 17% |
| Sodium | 222.2 mg | 9% |
| Total Carbohydrate | 81.6 g | 27% |
| Dietary Fiber | 0 g | 0% |
| Sugars | 67 g | 267% |
| Protein | 3 g | 6% |
Variations & Substitutions
- Salted Caramel: Add a sprinkle of coarse sea salt to the top of the caramel after pouring it into the pan.
- Chocolate Caramel: Swirl in melted chocolate into the caramel before pouring it into the pan.
- Nutty Caramel: Add chopped nuts (pecans, walnuts, almonds) to the caramel before pouring it into the pan.
- Spiced Caramel: Add a pinch of cinnamon, nutmeg, or ginger to the caramel mixture while cooking.
- Gluten-Free Option: While corn syrup is generally considered gluten-free, some brands may contain traces of gluten. Ensure your corn syrup is certified gluten-free if needed.
FAQs (Frequently Asked Questions)
Q: What does “firm ball stage” mean, and how do I know when the caramel has reached it?
A: The “firm ball stage” refers to a specific temperature range (245°F) where the sugar syrup thickens to a consistency that forms a firm, but pliable, ball when dropped into cold water. Test by dropping a small amount into ice water; it should hold its shape.
Q: Can I use a different type of sugar instead of brown sugar?
A: Brown sugar contributes to the caramel’s color, flavor, and moisture. While you can substitute granulated sugar, the results will be different. The caramel will be lighter in color and may have a slightly different texture.
Q: My caramel is too soft. What did I do wrong?
A: The most common reason for soft caramel is undercooking. Ensure you reach the firm ball stage (245°F). If it’s too soft, you can try gently reheating the caramel in a saucepan and cooking it a bit longer, but be careful not to burn it.
Q: How do I prevent the caramel from sticking to the pan?
A: Generously buttering the pan (or using cooking spray) is essential. You can also line the pan with parchment paper, leaving an overhang on the sides to easily lift the caramel out once it’s cooled.
Q: Can I make this recipe without corn syrup?
A: Corn syrup helps prevent crystallization and gives the caramel a smooth texture. Substituting it can be tricky. You might try using honey or golden syrup, but the flavor and texture will be different.
Final Thoughts
I hope this recipe brings you as much joy as it brings me. There’s something truly special about making homemade candies, and these caramels are no exception. They’re the perfect treat to share with loved ones or to enjoy all by yourself. So gather your ingredients, put on some music, and get ready to create a little bit of homemade heaven. And if you’re feeling adventurous, try pairing these caramels with a dark roast coffee or a glass of aged bourbon. Don’t hesitate to share your results or any questions you have along the way! Happy cooking!