
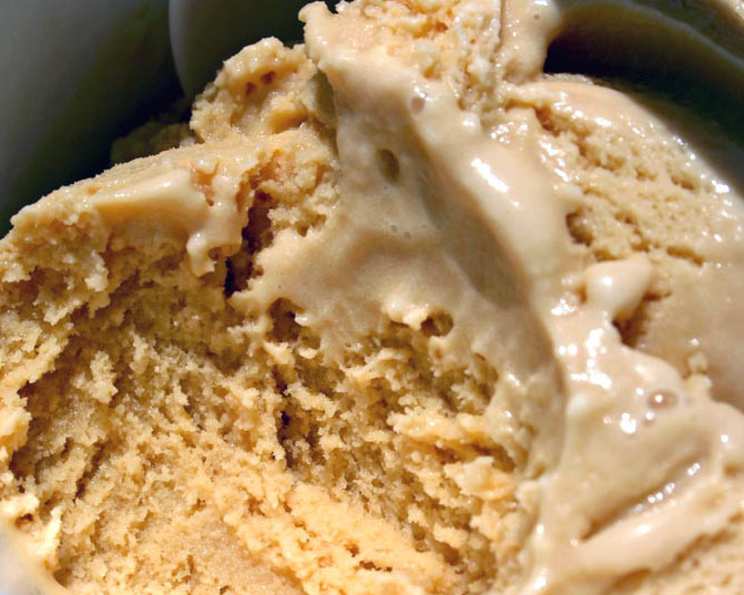
Silky Smooth Caramel Ice Cream: A Culinary Journey
I still remember the thrill of churning homemade ice cream with my grandmother on sweltering summer afternoons. The rhythmic whir of the antique ice cream maker, the anticipation building with each turn, and then, the first glorious spoonful of cool, creamy perfection. While many flavors graced our table, caramel was always a favorite, a luxurious treat that felt both comforting and special. This recipe is a tribute to those cherished memories, a chance to recreate that same magic in your own kitchen.
Recipe Overview
- Prep Time: 30 minutes
- Cook Time: 25 minutes
- Total Time: 5 hours 55 minutes (includes chilling and processing time)
- Servings: About 1 quart
- Yields: About 1 quart
- Dietary Type: Not suitable for dairy-free or vegan diets.
Ingredients
- 1 cup half-and-half
- 1 cup heavy cream
- ½ vanilla bean, split lengthwise
- 4 egg yolks
- ⅓ cup sugar
- 2 tablespoons butter (or 2 tablespoons margarine), cut into pieces
- 1 cup sugar (for caramel)
- 1 cup water (divided: ⅓ cup and ⅔ cup)
Equipment Needed
- Medium saucepan
- Mixing bowl
- Whisk
- Small saucepan
- Ice cream maker
Instructions
- Infuse the Cream: In a medium saucepan, combine the half-and-half, heavy cream, and the split vanilla bean. Bring the mixture to a gentle boil over medium heat, watching carefully to prevent it from scorching.
- Rest and Steep: Remove the saucepan from the heat, cover it, and let the mixture stand for at least 15 minutes. This allows the vanilla bean to fully infuse its flavor into the cream.
- Whisk the Yolks and Sugar: While the cream is steeping, in a mixing bowl, beat the egg yolks with the ⅓ cup of sugar until the mixture is thick and lemon-colored. This creates a stable base for the custard.
- Temper the Egg Yolks: Gradually whisk about ⅓ of the scalded cream mixture into the egg yolk mixture. This process, called tempering, gently raises the temperature of the egg yolks to prevent them from scrambling when added to the hot cream.
- Cook the Custard: Return the tempered egg yolk mixture to the saucepan. Place the saucepan over medium heat and cook for about 5 minutes, or until the mixture thickens enough to coat the back of a spoon. Be vigilant and DO NOT BOIL the custard, as this will cause the egg yolks to curdle.
- Emulsify with Butter: Remove the saucepan from the heat. Stir in the butter pieces, one at a time, blending well after each addition. This adds richness and smoothness to the custard.
- Cool the Custard: Let the custard cool to room temperature. Once cooled, cover the custard and refrigerate for at least 4 hours, or up to 3 days. This allows the flavors to meld and the custard to fully chill.
- Make the Caramel Syrup: While the custard is cooling, prepare the caramel syrup. In a small saucepan, combine the 1 cup of sugar and ⅓ cup of water. Bring the mixture to a boil over medium heat.
- Steam the Sugar: Cover the saucepan and let the mixture steam for one minute. This helps to dissolve the sugar and prevent crystallization.
- Caramelize the Sugar: Remove the lid and continue cooking, without stirring, until the mixture caramelizes to a dark tea color. This step requires patience and attention, as the sugar can burn quickly.
- Add Water Carefully: Remove the saucepan from the heat. Slowly add the remaining ⅔ cup of water (be careful, as the mixture will spatter) and stir to combine.
- Cool the Caramel Syrup: Cover the saucepan and let the caramel syrup cool to room temperature.
- Combine and Chill: Remove the vanilla bean from the custard, scraping any seeds back into the custard mixture for maximum flavor. Stir the cooled caramel syrup into the custard. At this point, the mixture can be refrigerated again before proceeding to the next step.
- Churn the Ice Cream: Transfer the chilled custard mixture to an ice cream maker and process according to the manufacturer’s instructions. This typically takes about 20-30 minutes.
Expert Tips & Tricks
- For an even richer flavor, consider browning the butter before adding it to the custard. Be careful not to burn it!
- A pinch of sea salt added to the caramel syrup can enhance the sweetness and create a more complex flavor profile.
- If you don’t have a vanilla bean, you can substitute 1 teaspoon of vanilla extract. Add it to the custard after it has cooled slightly.
- To prevent ice crystals from forming, make sure your ice cream maker is thoroughly chilled before use.
- If your caramel seizes when adding water, don’t panic! Just return it to low heat and stir gently until it smooths out.
Serving & Storage Suggestions
Serve the caramel ice cream immediately after churning for a soft-serve consistency, or transfer it to an airtight container and freeze for a firmer texture. It’s delicious on its own, or paired with warm apple pie, brownies, or a simple pound cake. For an extra touch of elegance, drizzle with additional caramel sauce and sprinkle with sea salt.
Properly stored in an airtight container in the freezer, homemade ice cream will last for about 2-3 weeks. While it’s technically safe to eat after that, the texture and flavor may begin to deteriorate.
Nutritional Information
| Nutrient | Amount per Serving | % Daily Value |
|---|---|---|
| Calories | 428 kcal | 21% |
| Total Fat | 28g | 43% |
| Saturated Fat | 17g | 85% |
| Cholesterol | 190mg | 63% |
| Sodium | 60mg | 3% |
| Carbohydrates | 42g | 14% |
| Fiber | 0g | 0% |
| Sugar | 40g | N/A |
| Protein | 4g | 8% |
Note: Nutritional information is an estimate and may vary depending on specific ingredients and portion sizes.
Variations & Substitutions
- Salted Caramel Ice Cream: Increase the salt in the caramel to 1/2 tsp or more.
- Coffee Caramel Ice Cream: Add 1/4 cup of strongly brewed coffee to the cream mixture when heating.
- Boozy Caramel Ice Cream: Stir in a tablespoon or two of your favorite liqueur, like bourbon or rum, after churning.
- Nutty Caramel Ice Cream: Add toasted pecans or walnuts to the ice cream during the last few minutes of churning.
- Dairy-Free Option: Unfortunately, this recipe is very difficult to make dairy-free due to the high fat content needed for proper texture. Substituting coconut milk and non-dairy butter alternatives would change the texture significantly.
FAQs (Frequently Asked Questions)
Q: Why do I need to temper the egg yolks?
A: Tempering the egg yolks prevents them from scrambling when they come into contact with the hot cream, ensuring a smooth and creamy custard.
Q: Can I skip the vanilla bean and just use vanilla extract?
A: Yes, you can substitute 1 teaspoon of vanilla extract for the vanilla bean. Add it to the custard after it has cooled slightly.
Q: How do I know when the custard is thick enough?
A: The custard is ready when it coats the back of a spoon and leaves a clear line when you run your finger through it. Be careful not to overcook it.
Q: My caramel seized up when I added the water. What did I do wrong?
A: This can happen if the caramel is too hot or the water is added too quickly. Return it to low heat and stir gently until it smooths out.
Q: Can I make this without an ice cream maker?
A: While an ice cream maker is ideal, you can attempt a “no-churn” method. Freeze the custard mixture in a shallow container, and then blend it every 30 minutes for 2-3 hours to break up ice crystals. The texture won’t be as smooth as ice cream maker-churned, but it will still be delicious.
Final Thoughts
This caramel ice cream recipe is a labor of love, but the end result is well worth the effort. The combination of rich custard and intensely flavored caramel creates a truly unforgettable dessert. Don’t be afraid to experiment with variations and make it your own. I encourage you to give it a try and share your feedback. It pairs beautifully with a glass of chilled dessert wine or a cup of freshly brewed coffee, making it the perfect ending to any meal. Enjoy!