
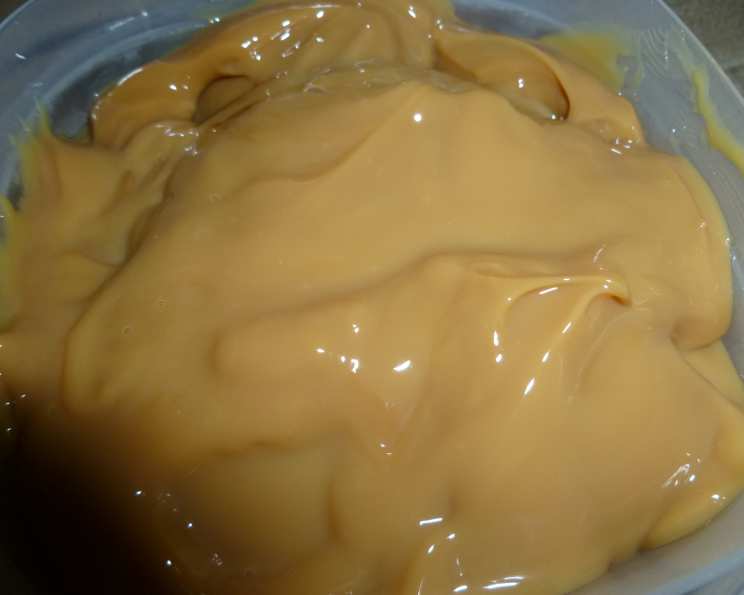
Caramel in a Can: The Easiest Dessert Hack You’ll Ever Try
My grandmother, bless her heart, was not known for her culinary prowess. Her specialties leaned towards “convenient” rather than “gourmet,” but one thing she made that I always loved was her “caramel dip.” I recently realized this involved nothing more than a can of sweetened condensed milk, slowly transformed into rich, decadent caramel. No fuss, no thermometers, just pure, simple sweetness. It brings back such fond memories of family gatherings and her unapologetic love for shortcut desserts. This recipe is dedicated to her and every other busy baker looking for a little magic.
Recipe Overview
- Prep Time: 5 minutes
- Cook Time: 8 hours
- Total Time: 8 hours 5 minutes
- Yields: 1 can full
- Dietary Type: Not specified
Ingredients
- 1 (14 ounce) can sweetened condensed milk
- Water
Equipment Needed
- Crock-pot (slow cooker)
- Tongs or slotted spoon
Instructions
-
Start by removing the paper label from the unopened can of sweetened condensed milk. Make sure to get all the paper and glue off to prevent any unwanted flavors from seeping in during the cooking process.
-
Place the unopened can carefully into your crock-pot. It’s crucial that the can remains sealed throughout the entire process to prevent any water from getting inside.
-
Completely submerge the unopened can in water. Ensure the water level is at least an inch or two above the top of the can. This is vital for even cooking and prevents the can from overheating and potentially exploding.
-
Cook on the crock-pot’s lowest setting for 8 hours. This slow cooking time allows the sugars in the condensed milk to caramelize beautifully, creating a smooth and creamy texture. If you’re using a sous vide immersion circulator, set it for about 200°F (93°C) and cook for the same amount of time.
-
Carefully remove the can from the crock-pot (or sous vide bath) using tongs or a slotted spoon. Be extremely cautious as the can will be very hot.
-
Let the can cool down in the fridge for at least 2 hours. This cooling period is absolutely essential. Cooling allows the caramel to thicken properly and develop its final flavor. Don’t rush this step!
-
Once thoroughly chilled, open the can. And voilà, you have caramel!
Expert Tips & Tricks
- Water Level is Key: Maintaining a consistent water level during cooking is crucial. Check the crock-pot periodically and add more water if needed to keep the can fully submerged.
- Cooling is Non-Negotiable: Resist the urge to open the can before it’s completely cooled. The caramel will be too runny and won’t have the desired texture.
- Sous Vide Option: While the crock-pot is the classic method, using a sous vide immersion circulator provides incredibly consistent temperature control, resulting in an even smoother caramel.
- Don’t Forget to Remove the Label: This is an important, but easy to overlook, step. Leaving the paper label on the can could impart unwanted flavors to your caramel.
- For a Deeper Flavor: For a richer, more intense caramel flavor, consider adding a pinch of sea salt to the water in the crock-pot. This will enhance the sweetness and add a lovely complexity.
- Preventing Explosions: The high water level is the most important factor. If the can runs dry it will overheat and explode.
Serving & Storage Suggestions
This caramel is incredibly versatile. Drizzle it over ice cream, use it as a dip for apples or pretzels, spread it on toast, or incorporate it into your favorite baked goods like brownies or cookies. For a truly decadent treat, use it as a filling for homemade candies.
Store any leftover caramel in an airtight container in the refrigerator. It will keep for up to 2 weeks. If you want to extend its shelf life, you can freeze it for up to 2 months. Thaw it in the refrigerator overnight before using. The texture might change slightly after freezing, but the flavor will remain delicious.
Nutritional Information
Please note that these are estimated values and may vary based on specific ingredients and serving sizes.
| Nutrient | Amount per Serving | % Daily Value |
|---|---|---|
| Calories | 1274 kcal | N/A |
| Calories from Fat | 310 kcal | N/A |
| Total Fat | 34.5 g | 53% |
| Saturated Fat | 21.8 g | 108% |
| Cholesterol | 135 mg | 44% |
| Sodium | 504.1 mg | 21% |
| Total Carbohydrate | 215.9 g | 71% |
| Dietary Fiber | 0 g | 0% |
| Sugars | 215.9 g | N/A |
| Protein | 31.4 g | 62% |
Variations & Substitutions
- Salted Caramel: Stir in a pinch of sea salt after opening the can for a classic salted caramel twist.
- Vanilla Bean Infusion: Add a split vanilla bean to the water in the crock-pot for an extra layer of flavor.
- Espresso Caramel: Mix in a teaspoon of instant espresso powder after the caramel has cooled for a coffee-infused delight.
- Spiced Caramel: Add a dash of cinnamon, nutmeg, or cardamom to the water for a warm and comforting spiced caramel.
- Dairy-Free Caramel (Experimental): While the classic recipe requires sweetened condensed milk, some have had success using sweetened condensed coconut milk for a vegan option, but be prepared for a potentially different texture and flavor profile. I recommend testing this on a small scale first.
FAQs (Frequently Asked Questions)
Q: Can I use a different size can of sweetened condensed milk?
A: Yes, but you may need to adjust the cooking time accordingly. Smaller cans will likely require less time, while larger cans may need longer. Ensure the can is always fully submerged in water.
Q: Is it safe to cook a sealed can in water for so long?
A: Yes, as long as the can is completely submerged in water and the water level is maintained throughout the cooking process. The water prevents the can from overheating and potentially bursting.
Q: Can I speed up the cooling process?
A: While you can try placing the can in an ice bath, it’s still recommended to finish the cooling in the refrigerator for at least 2 hours to ensure the caramel thickens properly.
Q: My caramel is too runny, what did I do wrong?
A: The most likely culprit is not cooling the can for long enough. Ensure it’s thoroughly chilled in the refrigerator. If it’s still runny after cooling, you may have used too much water in the crock-pot.
Q: Can I use this caramel for candy making?
A: Yes, you can use this caramel for various candy recipes, but be aware that it might have a slightly softer texture compared to traditional caramel made with a candy thermometer.
Final Thoughts
This Caramel in a Can recipe is a testament to the fact that sometimes, the simplest things in life are the most satisfying. It’s an incredibly easy and foolproof way to create delicious, homemade caramel without any special equipment or complicated techniques. So, give it a try, experiment with different flavors, and share your creations with friends and family. I hope this recipe brings you as much joy and sweet memories as it brings me. Happy cooking!