
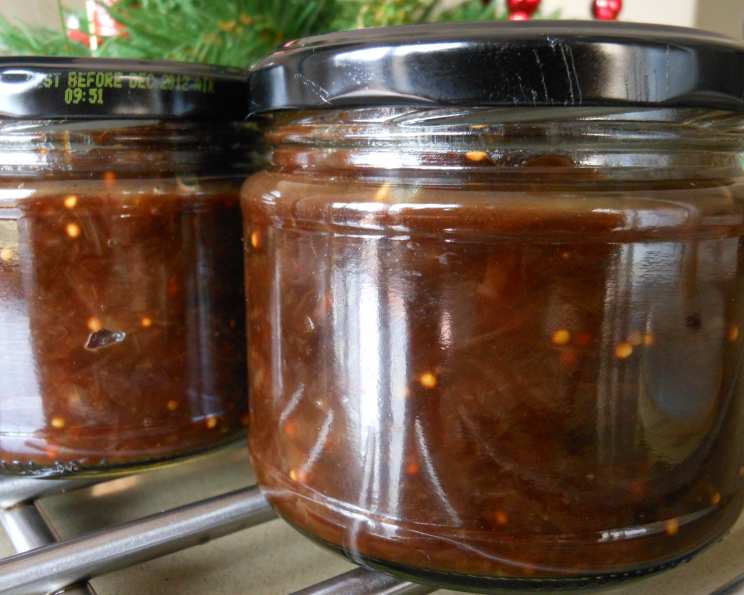
The Sweet Whisper of Autumn: Caramelised Red Onion Chutney
I can almost smell it now – the earthy, sweet aroma of red onions slowly softening in olive oil, a scent that instantly transports me back to my grandmother’s kitchen. Every autumn, she would craft jars of this ruby-red preserve, the low simmer filling the house with a comforting warmth that chased away the chill. It wasn’t just a chutney; it was bottled sunshine, a taste of home that lingered long after the last jar was sealed. It was a key ingredient in her famous Boxing Day sandwiches, piled high with leftover turkey and stuffing, a tradition I’ve happily carried on.
Recipe Overview
- Prep Time: 15 minutes
- Cook Time: 50 minutes
- Total Time: 1 hour 5 minutes
- Yield: 4-6 jars
- Dietary Type: Vegan, Gluten-Free
Ingredients
- 8 red onions
- 1 red chili, de-seeded
- 2 bay leaves
- 25 ml olive oil
- 200 g brown sugar
- 2 teaspoons mustard seeds
- 150 ml balsamic vinegar
- 150 ml red wine vinegar
Equipment Needed
- Large heavy-bottomed saucepan
- Sharp knife
- Cutting board
- Sterilized jars
- Ladle
Instructions
-
Begin by preparing your red onions. Peel them and cut them into thin slices. Then, cut each slice in half again to create smaller, more manageable pieces. This will help them caramelize evenly.
-
De-seed the red chili and slice it thinly. Remember to wash your hands thoroughly after handling chilies to avoid any accidental burning.
-
In a large, heavy-bottomed saucepan, combine the sliced red onions and red chili with the bay leaves and olive oil.
-
Cook the mixture gently over a low heat for approximately 20 minutes. The goal here is to soften the onions and begin the caramelization process without burning them. Stir occasionally to prevent sticking. The onions should gradually turn darker and become more translucent.
-
Once the onions are dark and sticky (after about 20 minutes), add the brown sugar, balsamic vinegar, red wine vinegar, and mustard seeds to the pan.
-
Increase the heat slightly to bring the mixture to a simmer. Then, reduce the heat back to low and continue to simmer for about 30 minutes, or until the chutney is thick and dark. It’s crucial to stir the chutney at intervals during this stage to prevent it from sticking to the bottom of the pan and burning. The chutney is ready when a spoon drawn through it leaves a clear trail.
-
While the chutney is simmering, ensure your jars are properly sterilized. You can do this by washing them in hot, soapy water, rinsing them thoroughly, and then placing them in a preheated oven at 160°C (320°F) for about 10 minutes. Alternatively, you can boil them in water for the same amount of time. Make sure the jars are still warm when you fill them with the chutney.
-
Once the chutney is ready, carefully pour it into the hot, sterilized jars using a ladle. Leave about 1 cm (1/2 inch) of headspace at the top of each jar.
-
Seal the jars tightly while they are still hot. As the chutney cools, the lids should create a vacuum seal. You can check if the jars are sealed correctly by pressing down on the center of the lid; it should not flex or pop.
-
Allow the chutney to cool completely at room temperature.
-
Now comes the hard part: You must resist the temptation to dive in immediately! For the best flavor, allow the chutney to mature for at least a month, or even longer, to allow the flavors to fully blend and mellow.
Expert Tips & Tricks
-
Slow and Low: Patience is key! Cooking the onions over low heat is essential for proper caramelization. Rushing the process will result in bitter, unevenly cooked onions.
-
Sugar Selection: Brown sugar adds a lovely molasses-like depth to the chutney. You can experiment with different types of brown sugar, such as dark brown sugar for a richer flavor or light brown sugar for a slightly more subtle sweetness.
-
Vinegar Balance: The combination of balsamic and red wine vinegar provides a complex, balanced acidity. Don’t be tempted to substitute one for the other entirely, as it will alter the overall flavor profile.
-
Chili Heat: The amount of chili can be adjusted to suit your preference. If you prefer a milder chutney, you can remove the seeds and membranes from the chili entirely. For a spicier chutney, leave some of the seeds in or add an extra chili.
-
Jar Sterilization: Properly sterilizing your jars is crucial for preserving the chutney and preventing spoilage. Follow the instructions carefully and ensure the jars are sealed tightly.
Serving & Storage Suggestions
This caramelized red onion chutney is incredibly versatile. It’s wonderful served with a cheese platter, adding a sweet and tangy counterpoint to sharp cheddar or creamy brie. Spread it on crusty bread or crackers for a simple yet satisfying snack. It’s also delicious as a topping for grilled meats, vegetables, or even baked potatoes.
Use it to elevate your sandwiches, burgers, and wraps. Imagine a grilled chicken sandwich with a smear of this chutney – pure bliss! Or, spread it on homemade pizzas or flatbreads for a gourmet touch.
Once opened, store the chutney in the refrigerator. It should last for several weeks, if not months, depending on how well it was sealed and stored. Before each use, check for any signs of spoilage, such as mold or an off odor. Unopened jars can be stored in a cool, dark place for up to a year.
Nutritional Information
Please note that these values are estimates and may vary based on specific ingredients and serving sizes.
| Nutrient | Amount per Serving | % Daily Value |
|---|---|---|
| Calories | 373 kcal | 19% |
| Total Fat | 6 g | 8% |
| Saturated Fat | 0.9 g | 5% |
| Cholesterol | 0 mg | 0% |
| Sodium | 35 mg | 2% |
| Total Carbohydrate | 77 g | 28% |
| Dietary Fiber | 4 g | 16% |
| Sugars | 64 g | 128% |
| Protein | 3 g | 6% |
Variations & Substitutions
-
Spiced Chutney: Add a pinch of ground cinnamon, cloves, or ginger to the chutney for a warm, spiced flavor.
-
Apple Chutney: Incorporate diced apples (such as Granny Smith or Braeburn) into the chutney for a fruitier flavor and added texture. Add them along with the sugar and vinegars.
-
Balsamic Glaze: For a richer, more intense flavor, try using balsamic glaze instead of balsamic vinegar. Reduce the amount slightly, as the glaze is more concentrated.
-
Different Onions: While red onions are traditional, you can experiment with other types of onions, such as yellow onions or shallots, for a slightly different flavor profile.
FAQs (Frequently Asked Questions)
Q: Can I use a different type of vinegar?
A: While balsamic and red wine vinegar are recommended for their balanced acidity and flavor, you can experiment with other vinegars like apple cider vinegar or white wine vinegar. Be mindful that this will change the final taste.
Q: How do I know when the chutney is thick enough?
A: The chutney is ready when a spoon drawn through it leaves a clear trail on the bottom of the pan. It should also be thick and glossy in appearance.
Q: Can I freeze caramelized red onion chutney?
A: Yes, you can freeze it. Allow the chutney to cool completely before transferring it to freezer-safe containers or bags. Thaw in the refrigerator before using.
Q: Why is it important to sterilize the jars?
A: Sterilizing the jars eliminates bacteria and other microorganisms that can cause spoilage, ensuring that your chutney stays fresh and safe to eat for a longer period.
Q: How long will the chutney last?
A: Properly sealed jars of chutney can last for up to a year in a cool, dark place. Once opened, store in the refrigerator and consume within several weeks.
Final Thoughts
I hope this recipe inspires you to create your own batch of caramelized red onion chutney. It’s a simple yet incredibly rewarding process, and the result is a condiment that will elevate countless dishes. Whether you’re enjoying it with a cheese board, spreading it on a sandwich, or using it as a topping for grilled meats, I’m confident that you’ll love the sweet and tangy flavor of this delightful preserve. Don’t hesitate to experiment with different variations and find your own personal touch. Happy cooking, and please do share your experiences and feedback!