
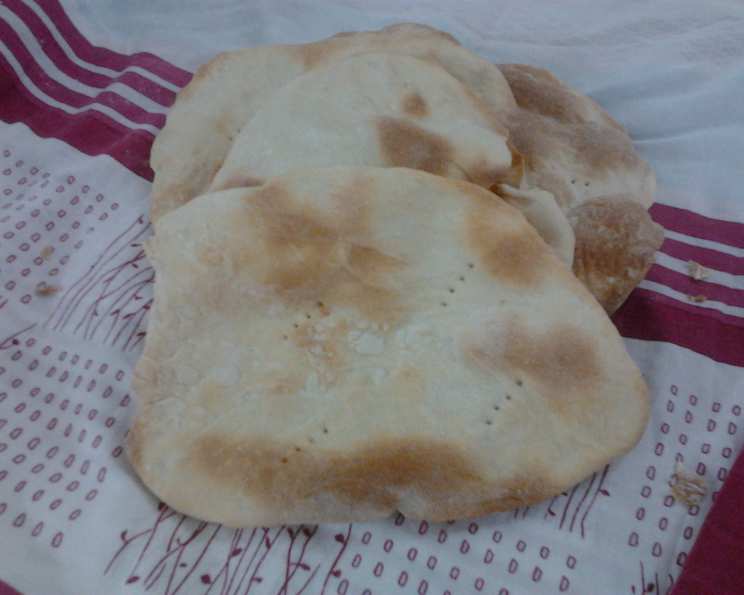
Carol’s Easy Pita Bread: A Taste of Home
The scent of baking bread, especially pita, always takes me back to my grandmother Carol’s kitchen. I remember standing on a stool, mesmerized as she expertly kneaded the dough, her hands moving with a grace born from years of experience. The warmth of the oven, the yeasty aroma filling the air, and the anticipation of biting into a freshly baked, slightly chewy pita – it was pure magic. These moments weren’t just about baking; they were about love, family, and the simple joy of sharing good food. This recipe is a tribute to her, a way to bring that same magic into your kitchen.
Recipe Overview
- Prep Time: 30 minutes
- Cook Time: 8 minutes
- Total Time: 1 hour 13 minutes (includes rising time)
- Servings: 8
- Yield: 8 rounds
- Dietary Type: Vegetarian
Ingredients
- 2 cups flour
- 2 1/4 teaspoons quick-rising yeast
- 1/2 teaspoon salt
- 1 1/4 cups hot water (but not boiling)
- 1 – 1 1/2 cups flour, for kneading and adjusting consistency
Equipment Needed
- Large mixing bowl
- Measuring cups and spoons
- Floured surface for kneading
- Cookie sheet
- Rolling pin
- Clean kitchen towel
Instructions
-
In a large bowl, combine 2 cups of flour, the quick-rising yeast, salt, and hot water. It’s crucial that the water is hot but not boiling to activate the yeast without killing it. Aim for around 120-130°F (50-55°C).
-
Beat the mixture well for about 1 minute. You can use a stand mixer with a dough hook attachment or simply a sturdy spoon. The mixture will initially look shaggy and uneven, but that’s perfectly normal.
-
Gradually mix in the remaining 1 to 1 1/2 cups of flour, using just enough to form a soft, sticky dough. Don’t add all the flour at once; add it slowly, a little at a time, until the dough pulls away from the sides of the bowl but still feels slightly tacky to the touch.
-
Turn the dough out onto a lightly floured board. Knead the dough for about 5 minutes. Use a firm, even pressure, pushing the dough away from you with the heel of your hand, then folding it back over itself. Rotate the dough a quarter turn and repeat. The dough should become smoother and more elastic as you knead.
-
Divide the dough into 8 equal-sized balls. A kitchen scale can help ensure even portions, which will result in evenly sized pitas.
-
On a lightly floured surface, roll out each ball into a circle approximately 1/4 inch thick and 6 inches in diameter. Try to maintain a consistent thickness for even baking.
-
Place the rolled-out pitas on a very lightly greased cookie sheet. A dusting of cornmeal on the sheet is traditionally used to prevent sticking and add a subtle texture, but it’s not strictly necessary. If you don’t have cornmeal, simply ensure the cookie sheet is lightly greased.
-
Let rise in a warm place for 25-35 minutes. Covering the cookie sheet with a clean kitchen towel will help create a humid environment, promoting even rising. The pitas should puff up slightly during this time. Avoid placing the pitas in a spot that’s too hot, as this can cause the yeast to rise too quickly and then collapse.
-
Bake in a preheated oven at 450°F (232°C) for 4 minutes. Then, turn over each pita and bake for another 4 minutes, or until lightly browned. Keep a close eye on the pitas during baking, as oven temperatures can vary, and they can burn quickly.
-
Immediately wrap the baked pitas in a clean dish towel for 3-4 minutes. This steams the pitas, softening them and making them more pliable.
Expert Tips & Tricks
-
Achieving the Pocket: The secret to a good pita pocket is a high oven temperature and a short baking time. The intense heat creates steam inside the pita, causing it to puff up and separate into two layers.
-
Dough Consistency is Key: Don’t be afraid to adjust the amount of flour to get the right dough consistency. Humidity levels can affect how much flour your dough needs. You want a soft, slightly sticky dough that’s easy to handle.
-
Preheating the Baking Sheet: For an extra boost of heat, preheat your baking sheet in the oven while the pitas are rising. This can help them puff up even more dramatically.
-
Freezing Dough: These pita can be prepared up to the rolling stage and frozen. Simply wrap each rolled-out pita in plastic wrap and freeze for up to a month. Thaw completely before baking as directed.
Serving & Storage Suggestions
Serve Carol’s Easy Pita Bread warm, either plain or filled with your favorite ingredients. They are perfect for sandwiches, gyros, falafel, or as an accompaniment to dips like hummus, baba ghanoush, or tzatziki.
Leftover pitas can be stored in an airtight container at room temperature for up to 2 days, or in the refrigerator for up to 5 days. For longer storage, freeze them in a freezer-safe bag for up to 3 months. To reheat, wrap in foil and warm in a low oven (300°F/150°C) for a few minutes, or microwave briefly. You can also toast them lightly for a crispier texture.
Nutritional Information
| Nutrient | Amount per Serving | % Daily Value |
|---|---|---|
| Calories | 174 kcal | 9% |
| Total Fat | 0.5g | 1% |
| Saturated Fat | 0.1g | 1% |
| Cholesterol | 0mg | 0% |
| Sodium | 148mg | 6% |
| Total Carbohydrate | 36g | 12% |
| Dietary Fiber | 1.5g | 6% |
| Sugars | 0.1g | 0% |
| Protein | 5g | 10% |
Variations & Substitutions
-
Whole Wheat Pita: Substitute up to half of the all-purpose flour with whole wheat flour for a nuttier flavor and added fiber.
-
Herb-Infused Pita: Add dried herbs like oregano, thyme, or rosemary to the dough for an aromatic twist. Mix them in with the flour and salt.
-
Garlic Pita: Brush the baked pitas with garlic-infused olive oil for a savory treat.
-
Gluten-Free Pita: Use a gluten-free flour blend designed for bread-making. You may need to adjust the amount of liquid to achieve the right dough consistency.
FAQs (Frequently Asked Questions)
Q: Why aren’t my pitas puffing up?
A: Several factors can prevent pitas from puffing: the oven temperature may not be hot enough, the dough may be too dry, or the yeast may be inactive. Ensure your oven is preheated to the correct temperature, the dough is soft and slightly sticky, and the yeast is fresh.
Q: Can I use active dry yeast instead of quick-rising yeast?
A: Yes, but you’ll need to proof the yeast first. Dissolve the active dry yeast in the warm water with a teaspoon of sugar and let it sit for 5-10 minutes until foamy before adding it to the flour.
Q: How do I keep the pitas from getting too hard?
A: Wrapping the baked pitas in a clean dish towel immediately after baking is crucial for softening them and keeping them pliable. Also, avoid overbaking them.
Q: Can I make the dough ahead of time?
A: Yes, you can make the dough ahead of time and refrigerate it for up to 24 hours. Let it come to room temperature before dividing and rolling out.
Q: Is cornmeal really necessary?
A: No, cornmeal is not essential. It helps prevent sticking and adds a subtle texture, but you can skip it if you don’t have any on hand. Just ensure your baking sheet is lightly greased.
Final Thoughts
Carol’s Easy Pita Bread is more than just a recipe; it’s a connection to cherished memories and a way to share a piece of my family’s history. I encourage you to try this recipe and experience the satisfaction of baking your own homemade pita. Don’t be afraid to experiment with variations and fillings to create your own signature version. And most importantly, share your creations with loved ones and enjoy the simple pleasure of good food and good company. I’d love to hear about your experiences and any creative twists you add to the recipe!