
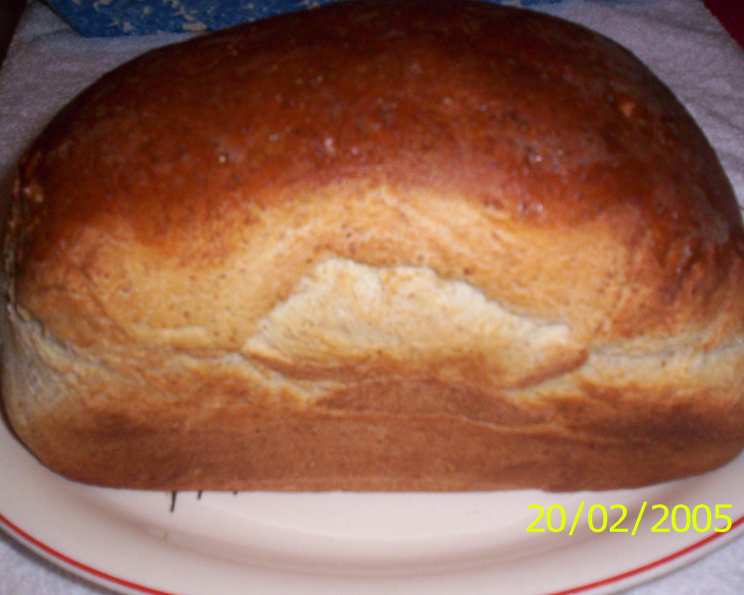
Carrie’s Beautiful Bread (ABM)
My grandmother, bless her heart, wasn’t the most experimental cook, but she had a knack for bread. Her loaves were always a source of comfort. I remember the yeasty aroma that would fill her kitchen on baking days, a promise of warm, crusty slices slathered with butter. Carrie’s Beautiful Bread, baked using a bread machine for the dough and then finished in the oven, reminds me of those simpler times, echoing the same comforting flavors with a light, airy texture that’s simply irresistible.
Recipe Overview
- Prep Time: 15 minutes
- Cook Time: 25-35 minutes
- Total Time: 40-50 minutes
- Servings: 10
- Yield: 1 loaf
- Dietary Type: Vegetarian
Ingredients
- 2 teaspoons salt
- 1/4 cup sugar
- 2 tablespoons dry milk
- 3 1/4 cups all-purpose flour
- 1/2 cup wheat flour
- 1 1/3 cups warm water
- 2 tablespoons extra virgin olive oil
- 1 teaspoon lemon juice
- 1 package active dry yeast (I use Red Star)
Equipment Needed
- Bread Machine (ABM)
- Measuring cups and spoons
- Mixing bowls (optional, if proofing outside the bread machine)
- Baking sheet
- Oven
Instructions
-
Begin by measuring all of your ingredients precisely. This is crucial for bread baking success. Gather your salt, sugar, dry milk, all-purpose flour, wheat flour, warm water, extra virgin olive oil, lemon juice, and active dry yeast.
-
Consult your specific bread machine’s manufacturer instructions for the recommended order of ingredient addition. Generally, wet ingredients go in first, followed by dry ingredients, with the yeast added last, often in a well on top of the flour.
-
Add the warm water to the bread machine pan. Follow with the extra virgin olive oil and lemon juice.
-
Next, add the dry ingredients: salt, sugar, dry milk, all-purpose flour, and wheat flour. Ensure the salt and sugar are evenly distributed among the flour.
-
Create a small well in the center of the flour and add the active dry yeast to this well. This prevents the yeast from prematurely activating before the kneading process begins.
-
Secure the bread machine pan into the machine. Select the appropriate setting for your machine. This recipe works best on a setting for a light or medium crust, depending on your personal preference. You can also use the “dough” setting.
-
Allow the bread machine to complete its cycle, which includes kneading and the first rise. If using the “dough” setting, remove the dough after the first rise.
-
Preheat your conventional oven to 350 degrees Fahrenheit (175 degrees Celsius).
-
If you used the “dough” setting, gently deflate the dough and shape it into a loaf on a lightly floured surface. You can also divide the dough and create rolls or other shapes.
-
Place the shaped dough on a baking sheet lined with parchment paper.
-
Bake in the preheated oven for 25-35 minutes, or until the loaf is golden brown and sounds hollow when tapped on the bottom. Baking time can vary depending on your oven, so keep a close eye on it.
-
Remove the baked bread from the oven and let it cool on a wire rack before slicing and serving.
Expert Tips & Tricks
- High Altitude Adjustments: If you live at a high altitude (like the recipe creator), you may need to reduce the amount of yeast slightly or increase the liquid. Start with a little less yeast and add more water a tablespoon at a time if the dough seems too dry.
- Proofing Yeast: To ensure your yeast is active, you can proof it before adding it to the bread machine. In a small bowl, combine the yeast with a teaspoon of sugar and 1/4 cup of the warm water from the recipe. Let it sit for 5-10 minutes; if it gets foamy, it’s good to go.
- Dough Consistency: The dough should be slightly sticky but manageable. If it’s too wet, add a tablespoon of flour at a time. If it’s too dry, add a tablespoon of water at a time.
- Oven Temperature: Ovens can vary, so keep a close eye on the bread during baking. If it’s browning too quickly, tent it with foil.
- Freezing Dough: You can freeze the dough after the first rise. Wrap it tightly in plastic wrap and then in foil. Thaw it in the refrigerator overnight before shaping and baking.
Serving & Storage Suggestions
Serve Carrie’s Beautiful Bread warm, with butter, jam, or your favorite spreads. It’s also excellent for sandwiches, toast, or as a side to soup or salad.
To store leftover bread, wrap it tightly in plastic wrap or place it in an airtight container. It will last for 2-3 days at room temperature or up to a week in the refrigerator. You can also freeze slices or the whole loaf for longer storage; thaw completely before serving. To revive slightly stale bread, lightly dampen the crust and bake in a preheated 350°F (175°C) oven for a few minutes.
Nutritional Information
(Approximate values per serving – based on 10 servings)
| Nutrient | Amount per Serving | % Daily Value |
|---|---|---|
| Calories | 222 kcal | N/A |
| Total Fat | 3.7 g | 5% |
| Saturated Fat | 0.7 g | 3% |
| Cholesterol | 1.5 mg | 0% |
| Sodium | 472 mg | 19% |
| Total Carbohydrate | 41.2 g | 13% |
| Dietary Fiber | 1.9 g | 7% |
| Sugars | 5.7 g | N/A |
| Protein | 5.7 g | N/A |
Variations & Substitutions
- Whole Wheat Bread: Substitute up to half of the all-purpose flour with whole wheat flour for a nuttier flavor and added fiber.
- Herb Bread: Add a tablespoon of your favorite dried herbs, such as rosemary, thyme, or oregano, to the dough for an herby twist.
- Sweet Bread: Increase the sugar to 1/2 cup and add 1/4 cup of raisins or chopped nuts for a sweet treat.
- Gluten-Free: While this recipe is formulated for all-purpose and wheat flours, you can attempt to adapt it using a gluten-free bread flour blend. Be aware that you may need to adjust the liquid content to achieve the right dough consistency. Always check the specific brand of gluten-free flour for recommendations.
- Dairy-Free: Replace the dry milk with a dairy-free milk powder substitute or simply omit it.
FAQs (Frequently Asked Questions)
Q: Can I use instant yeast instead of active dry yeast?
A: Yes, you can. If using instant yeast, you don’t need to proof it first. Just add it directly to the dry ingredients. Use the same amount as active dry yeast.
Q: My bread is sinking in the middle. What could be the cause?
A: This can happen if the dough rises too much before baking, or if the oven temperature is too low. Try reducing the rising time slightly or increasing the oven temperature by 25 degrees Fahrenheit.
Q: Can I make this bread without a bread machine?
A: Yes, you can. Combine all the ingredients in a large bowl and knead for 8-10 minutes until smooth and elastic. Let rise in a warm place for 1-1.5 hours, or until doubled in size. Punch down the dough, shape it into a loaf, and bake as directed.
Q: How do I get a crispier crust?
A: You can spray the loaf with water before baking, or place a pan of hot water on the bottom rack of the oven during baking to create steam.
Q: My bread is too dense. What did I do wrong?
A: This could be due to several factors, including using old yeast, not kneading the dough enough, or not letting it rise long enough. Make sure your yeast is fresh, knead the dough thoroughly, and allow it to rise until doubled in size.
Final Thoughts
Carrie’s Beautiful Bread (ABM) is more than just a recipe; it’s a journey back to simple pleasures. Whether you’re a seasoned baker or just starting out, I encourage you to try this recipe and experience the satisfaction of baking your own homemade bread. The aroma alone is worth the effort! Feel free to experiment with variations and make it your own. And, most importantly, don’t forget to share your baking triumphs (and even your learning experiences!) with others. Happy baking!