
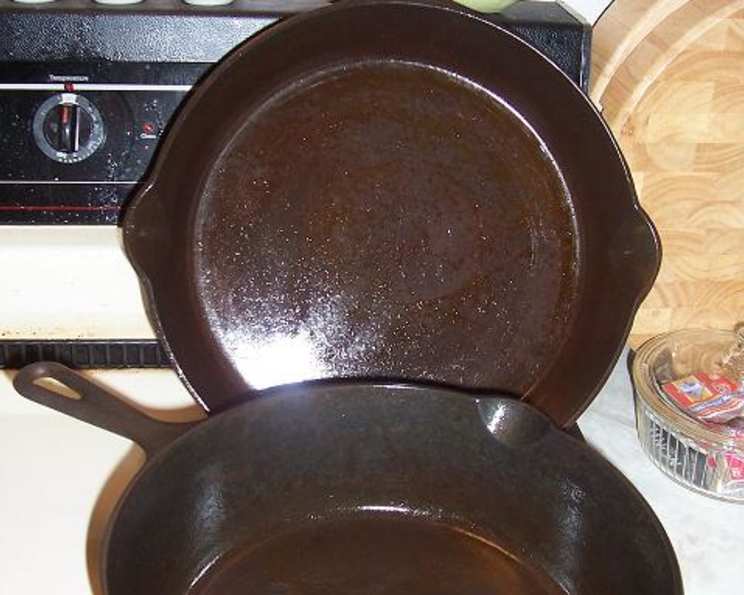
Revitalizing Your Cast Iron: A Chef’s Guide to Cleaning and Seasoning
My grandmother’s cast iron skillet was more than just cookware; it was a family heirloom, imbued with the smoky aroma of countless Sunday suppers. I remember standing on a stool, watching her expertly flip cornbread in that seasoned workhorse, the dark, smooth surface whispering tales of generations past. One time, I accidentally left it uncleaned overnight after a particularly messy batch of fried chicken. The horror! But with a little elbow grease and the method I’m about to share, even the most neglected cast iron can be brought back to life.
Recipe Overview: Cast Iron Revival
- Prep Time: 15 minutes
- Cook Time: 2 hours
- Total Time: 2 hours 15 minutes
- Servings: Yields 1 cleaned & seasoned skillet
- Dietary Type: Naturally Gluten-Free
Ingredients
- 1 tablespoon Crisco shortening
- 1 tablespoon mineral oil (optional substitute for Crisco)
Equipment Needed
- Self-cleaning oven
- Wire brush (optional, for stubborn residue)
- Paper towels
- Clean dishcloth (for storage)
Instructions: From Grimy to Gleaming
-
Inspect Your Cast Iron: Begin by thoroughly checking all your cast iron pieces—skillets, lids, Dutch ovens—for any breaks or cracks. If you find any structural damage, this intense cleaning method might not be suitable, as it could exacerbate the existing issues. Safety first!
-
Pre-Cleaning (If Needed): If your cast iron has any severely burnt-on residue, try to remove as much of it as possible with a scraper or stiff brush before proceeding. While the self-cleaning cycle will likely remove most of it, tackling the worst offenders beforehand will make the process more effective.
-
Position in Oven: Place your cast iron cookware open (or top) sides down on the middle rack of your oven. Ensure the pieces are spaced evenly to allow for proper heat circulation.
-
Initiate Self-Cleaning Cycle: Following your oven manufacturer’s instructions, set your oven to begin the self-cleaning cycle. Before you start, remove absolutely anything from the stovetop and any storage drawer beneath the oven. The high heat can damage or even ignite stray items.
-
Cycle Duration: Most self-cleaning ovens cycle for around two hours. This duration is generally sufficient to effectively clean even heavily soiled cast iron. Let the oven do its work!
-
Cooling Down: When the self-cleaning cycle is complete, do not open the oven immediately. Allow everything to cool completely to the touch before removing your cast iron. This can take several hours. Sudden temperature changes can damage cast iron.
-
Removal: Once cooled, carefully remove your cast iron from the oven. Be prepared for a significant amount of ash residue.
-
Residue Removal: Your cast iron will likely be covered in a fine layer of powder residue. Brush off this residue using a wire brush if necessary (especially for stubborn spots). This helps smooth the surface of the cast iron. Blow out or wipe out any remaining dust particles.
-
First Coat of Fat: Using a new paper towel for each piece of cookware, apply the Crisco shortening (or mineral oil, if using) to the entire surface of the cast iron. Start with up to 1 tablespoon on your paper towel. The goal is to create a thin, even layer. Apply a slightly thicker layer on the inside cooking portion of your cookware.
-
Baking to Season: Place your seasoned cast iron pieces right side up in your oven and bake on low heat for 1 up to 2 hours, depending on your available time. A temperature between 200-250°F (93-121°C) is ideal. This allows the oil to polymerize, creating that coveted non-stick surface.
-
Cool and Wipe: Take your cast iron out of the oven and let it cool on your stovetop. Once cooled to the touch (but still slightly warm), use more clean paper towels to thoroughly wipe away any excess Crisco from the cast iron. You want a dry, smooth finish, not a greasy one.
-
Storage: I store my cast iron with a clean dishcloth placed between each piece if I’m stacking them. This helps prevent scratching and keeps them clean.
-
Maintenance: In between seasonings, clean your cast iron in mildly soapy water. Rinse well, then place the cast iron on your stovetop over medium-high heat until it is completely dry. Turn off the flame and let it cool to the touch. Finally, wipe the inside with Crisco (or mineral oil) on a clean paper towel.
Expert Tips & Tricks
- Oven Temperature is Key: Don’t exceed the recommended low temperature during the seasoning bake. Too much heat can cause the oil to become sticky or even burn.
- Ventilation Matters: This process can produce some smoke, so be sure to ventilate your kitchen well by opening windows and turning on your exhaust fan.
- Multiple Thin Layers: Instead of one thick layer of oil, consider applying multiple very thin layers, baking for an hour between each. This can create a more durable and even seasoning.
- Crisco vs. Mineral Oil: While Crisco is a classic choice, some prefer mineral oil for its purity and neutral flavor. Experiment to see which works best for you.
- Don’t Forget the Lid: If you’re cleaning a Dutch oven, make sure to clean and season the lid as well!
Serving & Storage Suggestions
Well-maintained cast iron is ready for just about any cooking task! Serve your dishes directly from the skillet for a rustic presentation.
Store your clean and seasoned cast iron in a dry place. Avoid stacking unseasoned cast iron, as this can lead to rust. A layer of paper towel or cloth between pieces will prevent scratching. Properly seasoned cast iron can be stored indefinitely.
Nutritional Information
| Nutrient | Amount per Serving | % Daily Value |
|---|---|---|
| Calories | 113 kcal | 6% |
| Total Fat | 12.8g | 19% |
| Saturated Fat | 3.2g | 16% |
| Cholesterol | 0mg | 0% |
| Sodium | 0mg | 0% |
| Carbohydrate | 0g | 0% |
| Fiber | 0g | 0% |
| Sugar | 0g | 0% |
| Protein | 0g | 0% |
Note: Nutritional information is estimated and will vary based on the specific type and amount of oil/shortening used.
Variations & Substitutions
- Oil Alternatives: Experiment with other oils like grapeseed oil, flaxseed oil, or even coconut oil for seasoning, but be aware that some oils may have different smoke points and affect the final seasoning.
- Seasoning Scents: For a hint of aroma, infuse your seasoning oil with herbs like rosemary or thyme before applying it to the cast iron. Remove the herbs before baking.
- Vegan Option: Ensure you are using a plant-based oil if you are vegan, such as vegetable shortening or mineral oil.
FAQs (Frequently Asked Questions)
Q: Can I use this method on enameled cast iron?
A: No, this method is specifically for bare cast iron. The high heat of the self-cleaning cycle can damage or destroy the enamel coating.
Q: My cast iron looks rusty after the self-cleaning cycle. Is it ruined?
A: Not at all! The rust is just surface oxidation. The cleaning and seasoning process will remove it and restore the protective coating.
Q: How often should I clean my cast iron this thoroughly?
A: This method is best reserved for cast iron that has significant build-up or rust. Regular cleaning with soap and water, followed by stovetop drying and a light oiling, is usually sufficient.
Q: What if my oven doesn’t have a self-cleaning cycle?
A: You can try baking the cast iron at a high temperature (450-500°F) for an hour, but it won’t be as effective as the self-cleaning cycle. You can also use a lye bath, but this requires extreme caution and proper safety equipment.
Q: My seasoning is sticky after baking. What did I do wrong?
A: You likely used too much oil. Make sure to wipe away as much excess oil as possible before baking. You can try baking it again at a slightly higher temperature to help polymerize the oil.
Final Thoughts
Don’t be intimidated by the prospect of cleaning cast iron. With this method, even the most neglected pieces can be restored to their former glory. It’s a rewarding process that connects you to a culinary tradition and ensures that your cast iron will last for generations. So, dust off that old skillet, fire up your oven, and prepare to be amazed at the transformation. Share your success stories and questions with me – I’m always eager to hear about your cast iron adventures!