
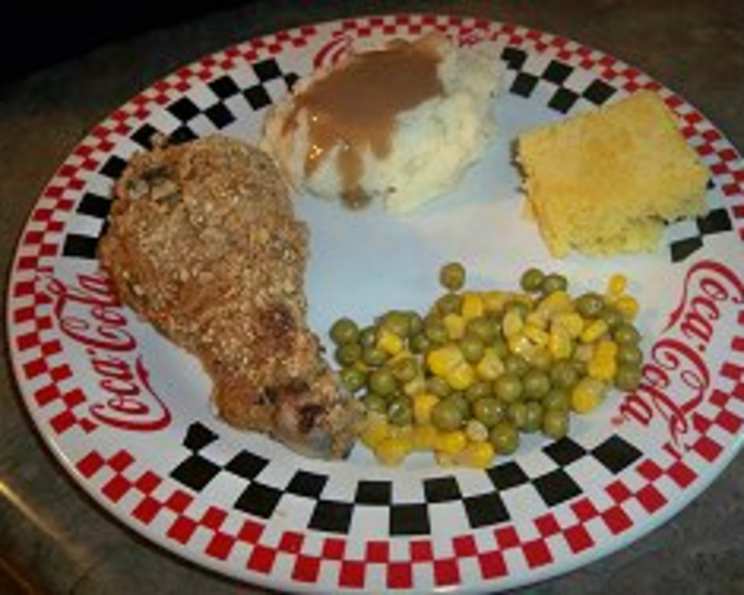
Cat Cora’s Crispy Baked “Fried” Chicken: A Healthier Take on a Classic Comfort Food
I remember one sweltering summer afternoon, my grandmother attempted to fry chicken on the stovetop. Despite her best efforts, the kitchen filled with smoke, and the chicken emerged more soggy than crispy. We ended up ordering pizza. That experience ingrained in me a lifelong appreciation for alternatives to traditional fried chicken, especially those that don’t involve a smoke alarm. This recipe, adapted from Cat Cora, promises all the satisfying crunch of fried chicken, but baked in the oven, making it a healthier and much less stressful cooking experience.
Recipe Overview
- Prep Time: 20 minutes
- Cook Time: 40-50 minutes
- Total Time: 1 hour 10 minutes
- Servings: 4-6
- Dietary Type: Pescatarian
Ingredients
- 6 chicken pieces (2 breasts, 2 thighs, 2 legs, 2 wings)
- 2 teaspoons olive oil
- 1/2 cup flour
- 1 teaspoon salt
- 1/4 teaspoon black pepper
- 2 cups corn flakes
- 1/2 cup buttermilk
- 1 tablespoon Dijon mustard
- 1/4 teaspoon ground mustard seeds
- 1 teaspoon ground red pepper
- 1 teaspoon paprika
- 1/2 teaspoon rubbed sage
- 1 tablespoon sesame seeds
Equipment Needed
- Large baking dish
- Wide bowls or plates
- Resealable plastic bag
- Rolling pin
Instructions
- Preheat your oven to 425 degrees Fahrenheit (220 degrees Celsius).
- Pour 2 teaspoons of olive oil into a baking dish large enough to comfortably hold all 6 chicken pieces. Rub the oil over the entire surface of the dish with your fingers, ensuring it’s completely and lightly coated. This step is crucial to prevent the chicken from sticking and helps achieve that desirable crispy bottom. Set the prepared baking dish aside.
- Rinse the chicken pieces under cold running water. Pat them thoroughly dry with paper towels. Removing excess moisture is key for achieving a crispy coating.
- In a wide bowl or plate, combine the flour, salt, and black pepper. This seasoned flour will be the first layer of our crispy armor. Dredge each piece of chicken through the flour mixture, making sure it’s completely coated.
- Tap each piece of chicken against the bowl to remove any excess flour. This step is important to prevent the coating from becoming too thick and pasty. Set the floured chicken pieces aside. Discard the remaining flour mixture after dredging.
- Now, let’s prepare the corn flake coating. Place the corn flakes in a large resealable plastic bag, carefully pressing the bag to remove as much air as possible before sealing. Use a rolling pin to crush the corn flakes into coarse crumbs. You don’t want them to be completely pulverized; some texture is good for that extra crunch.
- Pour the crushed corn flakes into a wide bowl or plate.
- In a separate large bowl, whisk together the buttermilk, Dijon mustard, ground mustard seeds, ground red pepper, paprika, rubbed sage, and sesame seeds. This buttermilk mixture not only adds flavor but also helps the corn flake coating adhere to the chicken.
- Give each floured chicken piece a generous bath in the buttermilk mixture, ensuring it’s fully coated. Then, roll the chicken in the crushed corn flake crumbs, pressing gently to help the crumbs adhere.
- Arrange the coated chicken pieces in the oiled baking dish. Make sure they are not overcrowded, allowing air to circulate and promote even cooking and crisping.
- Slide the baking dish into the preheated oven and cook for 15-20 minutes.
- After the initial high-heat blast, lower the oven temperature to 375 degrees Fahrenheit (190 degrees Celsius) and continue cooking for another 25-30 minutes, or until the chicken is cooked through and crispy.
- To check for doneness, pierce the thickest part of a chicken piece with a knife. The juices should run clear, not pink. If the juices are still pink, return the chicken to the oven for a few more minutes and check again.
- Once cooked through and golden brown, remove the chicken from the oven and let it rest for a few minutes before serving. This allows the juices to redistribute, resulting in more tender and flavorful chicken. Serve immediately.
Expert Tips & Tricks
- For extra crispy skin, consider placing the chicken under the broiler for the last few minutes of cooking, but watch it closely to prevent burning.
- If you’re short on time, you can prepare the chicken up to the point of baking and refrigerate it for a few hours. However, baking it immediately after coating yields the best results.
- To ensure even cooking, use chicken pieces that are roughly the same size.
- If you don’t have buttermilk on hand, you can make a quick substitute by adding 1 tablespoon of lemon juice or white vinegar to 1/2 cup of regular milk. Let it sit for 5 minutes to thicken.
- Don’t be afraid to experiment with the seasonings. A pinch of garlic powder, onion powder, or dried thyme can add extra depth of flavor.
Serving & Storage Suggestions
Serve Cat Cora’s Crispy Baked “Fried” Chicken hot out of the oven with your favorite sides. Classic pairings include mashed potatoes, coleslaw, corn on the cob, or a simple green salad. For a complete meal, consider adding some baked beans or mac and cheese.
Leftover chicken can be stored in an airtight container in the refrigerator for up to 3-4 days. To reheat, preheat your oven to 350 degrees Fahrenheit (175 degrees Celsius) and bake the chicken for 10-15 minutes, or until heated through. You can also reheat it in a microwave, but the skin won’t be as crispy.
While not ideal, you can freeze cooked chicken for up to 2-3 months. Wrap each piece individually in plastic wrap and then place them in a freezer-safe bag or container. Thaw overnight in the refrigerator before reheating.
Nutritional Information
| Nutrient | Amount per Serving | % Daily Value |
|---|---|---|
| Calories | 350 kcal | 18% |
| Total Fat | 18g | 28% |
| Saturated Fat | 4g | 20% |
| Cholesterol | 100mg | 33% |
| Sodium | 800mg | 35% |
| Total Carbohydrate | 25g | 8% |
| Dietary Fiber | 2g | 7% |
| Sugars | 4g | N/A |
| Protein | 25g | 50% |
Note: Nutritional information is an estimate and may vary based on specific ingredients and portion sizes.
Variations & Substitutions
- Gluten-Free: Use a gluten-free flour blend instead of regular flour. Make sure your Dijon mustard is also gluten-free.
- Spice it Up: Add a pinch of cayenne pepper or a dash of hot sauce to the buttermilk mixture for a spicier kick.
- Herbaceous: Mix in some finely chopped fresh herbs like parsley, thyme, or rosemary to the corn flake coating.
- Parmesan Crunch: Add 1/4 cup of grated Parmesan cheese to the corn flake mixture for a cheesy, savory flavor.
FAQs (Frequently Asked Questions)
Q: Can I use chicken tenders instead of bone-in pieces?
A: Yes, you can definitely use chicken tenders. Reduce the cooking time accordingly, checking for doneness after about 20-25 minutes.
Q: What if I don’t have buttermilk?
A: As mentioned earlier, you can easily make a buttermilk substitute by adding 1 tablespoon of lemon juice or white vinegar to 1/2 cup of regular milk. Let it sit for 5 minutes to thicken.
Q: Can I use a different type of mustard?
A: While Dijon mustard adds a nice tangy flavor, you can experiment with other types of mustard, such as yellow mustard or whole-grain mustard, to suit your preferences.
Q: Why is my chicken not crispy?
A: Make sure you are patting the chicken dry before coating it, not overcrowding the baking dish, and preheating the oven properly. Also, avoid opening the oven door too frequently during baking, as this can lower the temperature and affect crispiness.
Q: Can I freeze the chicken after it’s been cooked?
A: Yes, you can freeze cooked chicken for up to 2-3 months. Wrap each piece individually in plastic wrap and then place them in a freezer-safe bag or container. Thaw overnight in the refrigerator before reheating.
Final Thoughts
This recipe for Cat Cora’s Crispy Baked “Fried” Chicken is a delicious and healthier way to enjoy a classic comfort food. The combination of the crispy corn flake coating and the flavorful buttermilk marinade makes for a truly satisfying meal. Don’t hesitate to experiment with different seasonings and variations to create your own signature version. I encourage you to try this recipe and share your feedback! Perhaps pair it with a crisp, chilled glass of Sauvignon Blanc or a refreshing homemade lemonade for the perfect summer dinner.