
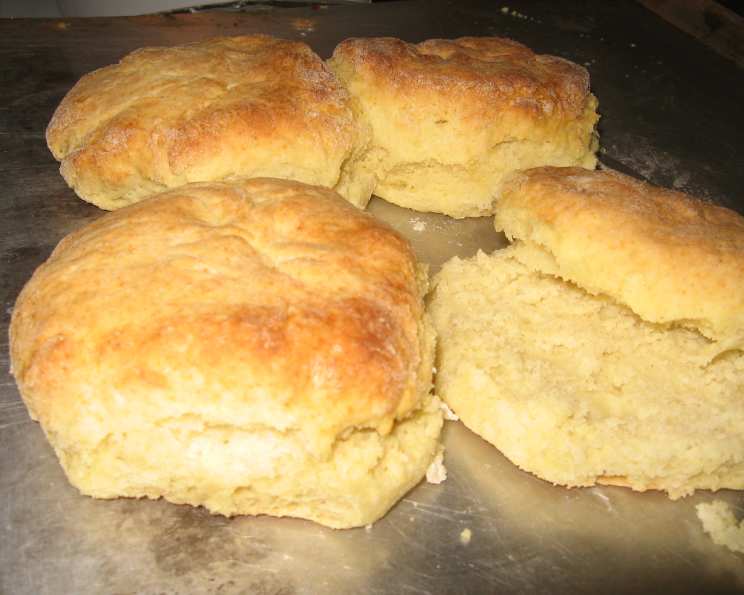
Cathead Biscuits: A Southern Comfort Classic
My grandmother, bless her heart, made cathead biscuits every Sunday morning. The memory of their slightly irregular shapes, the aroma of warm flour and butter swirling through the air, and the way they crumbled in my mouth slathered with homemade jam is a taste of pure nostalgia. They weren’t perfectly uniform, and that was part of their charm. Each biscuit, born from her hands, carried a piece of her love. This recipe brings me right back to her kitchen, and I hope it does the same for you.
Recipe Overview
- Prep Time: 15 minutes
- Cook Time: 10-12 minutes
- Total Time: 25-27 minutes
- Servings: Variable, depends on size (about 8)
- Yield: About 8 biscuits
- Dietary Type: Vegetarian (can be easily adapted to vegan)
Ingredients
- 2 1⁄4 cups flour (White Lily flour is preferred)
- 1⁄3 teaspoon baking soda
- 1 teaspoon salt
- 2 teaspoons baking powder
- 5 tablespoons shortening (lard, butter, or Crisco)
- 1 cup buttermilk
- 1⁄8 cup melted butter, for tops of biscuits (optional)
Equipment Needed
- Large mixing bowl
- Measuring cups and spoons
- Pastry cutter or fork (if using solid shortening)
- Baking sheet
- Pastry brush (if using melted butter)
Instructions
- Begin by preheating your oven to 475 degrees Fahrenheit. Ensure your oven rack is positioned in the center for even baking.
- In a large mixing bowl, combine the flour, baking soda, salt, and baking powder. Sift the dry ingredients together to ensure even distribution and a lighter texture.
- Cut in the shortening using a pastry cutter, fork, or your fingers. The goal is to incorporate the shortening into the flour mixture until it resembles a coarse meal. This step is crucial for creating those flaky layers we all love in a good biscuit. If using butter, make sure it’s cold and cut into small cubes for easier incorporation.
- Stir in the buttermilk until just combined. Be careful not to overmix the dough. Overmixing will develop the gluten in the flour, resulting in tough, less tender biscuits. The dough should be kind of wet and very sticky at this stage.
- Flour your hands generously and turn the dough out onto a lightly floured surface.
- Roll the dough in the flour just enough to make it manageable. You don’t want it to stick to your hands too much, but avoid working in too much extra flour. Adding too much flour will result in heavy, dry biscuits that taste of raw flour.
- For each biscuit, pinch off a piece of dough about the size of a large egg or a small lemon.
- Pat out the dough in an ungreased baking pan (a baking sheet lined with parchment paper also works well). You don’t want the biscuits to be really flat; just pat them down a bit so they’re relatively biscuit-shaped and about 1 inch high. The rustic, imperfect shapes are part of the charm of cathead biscuits!
- Bake at 475 degrees Fahrenheit for 10 to 12 minutes, or until the tops are golden brown. Keep a close eye on them while they’re in the oven, as oven temperatures can vary, and you don’t want them to burn.
- (Optional) Once the biscuits are out of the oven, brush the tops with melted butter for added richness and a beautiful golden sheen.
Expert Tips & Tricks
- Keep your ingredients cold: Cold butter and buttermilk are essential for creating flaky biscuits. The cold fat creates steam in the oven, which helps to separate the layers.
- Don’t overmix: Overmixing the dough will develop the gluten, resulting in tough biscuits. Mix just until the ingredients are combined.
- Use White Lily flour (if possible): White Lily flour is a Southern staple known for its low protein content, which contributes to a tender crumb. If you can’t find White Lily, use another all-purpose flour with a lower protein content.
- High Oven Temperature: The high baking temperature is essential for achieving a good rise and a golden-brown crust.
- For extra flaky layers: After patting out the dough, you can fold it over on itself a couple of times before patting it down again. This creates additional layers for flakier biscuits.
- Make-Ahead Tip: You can prepare the dry ingredients ahead of time and store them in an airtight container. When ready to bake, simply add the cold shortening and buttermilk.
Serving & Storage Suggestions
Cathead biscuits are best served warm, straight from the oven. They are delicious on their own, or with butter, jam, honey, or gravy. They also make excellent breakfast sandwiches.
To store leftover biscuits, place them in an airtight container at room temperature. They will stay fresh for about 2-3 days. For longer storage, you can freeze them. Wrap the biscuits individually in plastic wrap and then place them in a freezer bag. Frozen biscuits can be reheated in the oven or microwave.
To reheat biscuits, wrap them in foil and bake at 350 degrees Fahrenheit for about 10 minutes, or until warmed through. Alternatively, you can microwave them for 15-30 seconds, but be careful not to overcook them, or they will become tough.
Nutritional Information
Approximate nutritional information per biscuit (without optional butter topping):
| Nutrient | Amount per Serving | % Daily Value |
|---|---|---|
| Calories | 225 kcal | 11% |
| Total Fat | 10g | 15% |
| Saturated Fat | 6g | 30% |
| Cholesterol | 25mg | 8% |
| Sodium | 480mg | 21% |
| Total Carbohydrate | 29g | 10% |
| Dietary Fiber | 1g | 4% |
| Sugars | 2g | – |
| Protein | 5g | 10% |
Note: Nutritional information is an estimate and may vary based on specific ingredients and portion sizes.
Variations & Substitutions
- Vegan Cathead Biscuits: Substitute the butter for vegan butter or shortening and the buttermilk for non-dairy milk mixed with 1 tablespoon of lemon juice or apple cider vinegar. Let the mixture sit for 5 minutes to curdle before using.
- Cheese Biscuits: Add 1/2 cup of shredded cheddar cheese to the dry ingredients.
- Herb Biscuits: Add 1 tablespoon of chopped fresh herbs, such as rosemary, thyme, or chives, to the dry ingredients.
- Sweet Biscuits: Add 2 tablespoons of sugar to the dry ingredients for a slightly sweet biscuit.
- Gluten-Free Biscuits: Substitute a gluten-free all-purpose flour blend for the regular flour. You may need to adjust the amount of liquid depending on the blend you use.
FAQs (Frequently Asked Questions)
Q: Why are they called Cathead Biscuits?
A: The name likely comes from their size and somewhat irregular shape, resembling the size of a cat’s head. It’s an old-fashioned term that has stuck around!
Q: Can I use regular milk instead of buttermilk?
A: Buttermilk adds a tangy flavor and helps to tenderize the biscuits. If you don’t have buttermilk, you can make a substitute by adding 1 tablespoon of lemon juice or white vinegar to 1 cup of regular milk and letting it sit for 5 minutes.
Q: My biscuits are flat. What did I do wrong?
A: This could be due to several factors, including using old baking powder, overmixing the dough, or not using a hot enough oven. Make sure your baking powder is fresh, avoid overmixing, and ensure your oven is preheated to the correct temperature.
Q: Can I freeze the biscuit dough?
A: Yes, you can freeze the dough. Shape the biscuits as directed, then freeze them on a baking sheet. Once frozen, transfer them to a freezer bag. Bake from frozen, adding a few minutes to the baking time.
Q: What’s the best way to serve these biscuits?
A: They are wonderful with butter, jam, honey, gravy, or as a side to your favorite Southern meal. They also make delicious breakfast or lunch sandwiches.
Final Thoughts
Cathead biscuits are more than just a recipe; they’re a taste of history and a connection to generations past. Don’t be intimidated by their rustic appearance – the beauty of these biscuits lies in their simplicity and homemade charm. So, preheat your oven, gather your ingredients, and experience the joy of baking these Southern classics. Share your creations and tag me in your photos – I can’t wait to see your cathead biscuit masterpieces!