
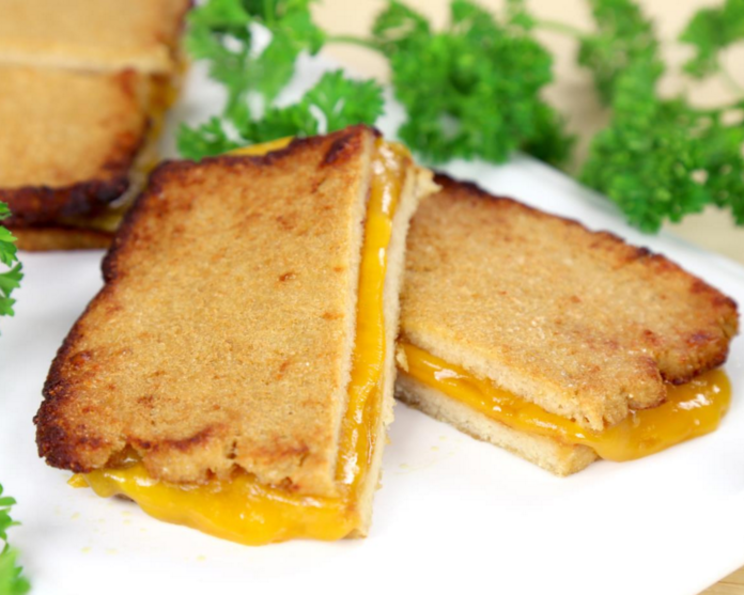
Cauliflower Bread Grilled Cheese: Reinventing Comfort Food
I’ll never forget the first time I had a grilled cheese sandwich that wasn’t made with standard white bread. My grandmother, bless her heart, was always experimenting in the kitchen, trying to sneak healthier ingredients into our favorite comfort foods. One day, she served us grilled cheese sandwiches made with her homemade zucchini bread. I was skeptical at first, but the slightly sweet, subtly savory bread, toasted and oozing with melted cheddar, was a revelation. That experience opened my mind to the possibilities of unconventional “breads” in grilled cheese, and this Cauliflower Bread Grilled Cheese is a delicious nod to my grandmother’s culinary adventurousness. It’s a comforting classic with a healthy, creative twist.
Recipe Overview
- Prep Time: 20 minutes
- Cook Time: 35 minutes
- Total Time: 55 minutes
- Servings: 2
- Yields: 4 slices of Cauliflower Bread
- Dietary Type: Gluten-Free, Low Carb (depending on cheese used)
Ingredients
- 1 head of cauliflower
- 1 egg
- ½ cup parmesan cheese (finely grated)
- 1 teaspoon garlic powder
- 4-8 slices cheddar cheese (or your favorite cheese for melting)
Equipment Needed
- Food Processor
- Microwave-safe bowl
- Baking Sheet
- Parchment Paper
- Spatula
- Toaster Oven (or oven broiler)
Instructions
- Begin by preparing the cauliflower. Break the cauliflower head into florets.
- Place the cauliflower florets in a food processor and blend until they reach a consistency resembling rice. Be careful not to over-process into a puree. We want distinct, small pieces.
- Transfer the cauliflower rice to a microwave-safe bowl.
- Microwave the cauliflower rice for 5 minutes at a time, 4 times, stirring in between each interval. This step is crucial for drawing out excess moisture from the cauliflower. The more moisture you remove, the better the texture of the final “bread.”
- Allow the microwaved cauliflower rice to cool for about 30 minutes, or until cool enough to handle comfortably. This allows even more moisture to evaporate. You can gently press the rice with a clean kitchen towel to help remove even more liquid.
- In a mixing bowl, combine the cooled cauliflower rice with the egg, parmesan cheese, and garlic powder. Mix thoroughly until all ingredients are evenly distributed. The egg acts as a binder, while the parmesan and garlic powder add flavor.
- Divide the cauliflower mixture into 4 equal portions.
- On a baking sheet lined with parchment paper, flatten out each portion into a ¼–½ inch thick square or rectangle shape. Aim for a shape that resembles bread slices. Using parchment paper is essential to prevent sticking.
- Bake the cauliflower bread at 450 degrees Fahrenheit for 15–20 minutes, or until golden brown. Keep a close eye on them during the last few minutes to prevent burning. The edges should be nicely browned and slightly crispy.
- Allow the baked cauliflower bread to cool for about 15 minutes on the baking sheet before removing. This will help them firm up and make them easier to handle.
- Use a spatula to carefully remove the cauliflower bread from the parchment paper.
- Assemble the grilled cheese sandwiches: Place 1-2 slices of cheddar cheese (or your cheese of choice) in between two slices of the cauliflower bread.
- Place the assembled sandwiches in a toaster oven (or under the broiler in your oven) for 5-10 minutes on broil, until the cheese is melted and bubbly, and the bread is toasty and golden. Watch carefully to avoid burning.
- Remove from the toaster oven (or oven broiler), let cool slightly, and enjoy immediately!
Expert Tips & Tricks
- Maximize Moisture Removal: Don’t skip the microwaving and cooling steps! They are vital for preventing soggy cauliflower bread. For even drier “bread,” consider squeezing the cooled cauliflower rice in a cheesecloth or clean kitchen towel.
- Flavor Boost: Experiment with different seasonings in the cauliflower mixture. Onion powder, dried herbs (like oregano or thyme), or a pinch of red pepper flakes can add depth and complexity.
- Cheese Choices: While cheddar is classic, feel free to use your favorite melting cheese. Gruyere, Monterey Jack, or even a blend of cheeses will work well.
- Even Browning: For even browning in the oven, consider flipping the cauliflower bread halfway through the baking time.
- Crispy Edges: For extra crispy edges, lightly brush the cauliflower bread with olive oil or melted butter before baking.
Serving & Storage Suggestions
Serve the Cauliflower Bread Grilled Cheese immediately while the cheese is melted and gooey and the bread is warm and toasty. It pairs perfectly with a side of tomato soup or a fresh green salad for a complete and satisfying meal.
Leftovers can be stored in an airtight container in the refrigerator for up to 2 days. Reheat in a toaster oven or skillet to retain the crispiness of the cauliflower bread. Microwaving is not recommended as it can make the bread soggy. While freezing is possible, it’s not ideal as it can affect the texture. It is best to enjoy this dish fresh.
Nutritional Information
| Nutrient | Amount per Serving | % Daily Value |
|---|---|---|
| Calories | 280 kcal | 14% |
| Total Fat | 18g | 28% |
| Saturated Fat | 11g | 55% |
| Cholesterol | 90mg | 30% |
| Sodium | 450mg | 19% |
| Total Carbohydrate | 10g | 3% |
| Dietary Fiber | 4g | 16% |
| Sugars | 4g | |
| Protein | 20g | 40% |
Nutritional information is an estimate and may vary based on specific ingredients used.
Variations & Substitutions
- Dairy-Free: Substitute the parmesan and cheddar cheese with your favorite dairy-free alternatives. There are many excellent vegan cheese options available that melt well.
- Vegan: In addition to dairy-free cheese, replace the egg with a flax egg (1 tablespoon ground flaxseed mixed with 3 tablespoons water, let sit for 5 minutes to thicken).
- Herb & Spice Infusion: Add fresh herbs like chopped chives, parsley, or basil to the cauliflower mixture for a brighter flavor.
- Spicy Kick: Mix in a pinch of red pepper flakes or a dash of hot sauce for a spicy twist.
- Vegetable Medley: Add finely chopped vegetables like bell peppers, onions, or spinach to the cauliflower mixture for extra nutrients and flavor. Just be sure to squeeze out any excess moisture from the vegetables before adding them.
FAQs (Frequently Asked Questions)
Q: Why is it important to remove the moisture from the cauliflower?
A: Removing excess moisture is crucial to prevent the cauliflower bread from being soggy and to help it achieve a crispier texture.
Q: Can I use frozen cauliflower rice instead of fresh?
A: Yes, but be sure to thaw it completely and squeeze out as much excess water as possible before using it in the recipe.
Q: Can I make the cauliflower bread ahead of time?
A: Yes, you can bake the cauliflower bread ahead of time and store it in the refrigerator for up to 2 days. Reheat it slightly before assembling the grilled cheese.
Q: What if my cauliflower bread is still too soft after baking?
A: Increase the baking time by a few minutes or broil it for a minute or two to crisp it up. Make sure you’ve adequately removed moisture throughout the microwaving and cooling stages.
Q: Can I use different types of cheese for the grilled cheese?
A: Absolutely! Experiment with your favorite melting cheeses, such as Gruyere, Monterey Jack, or a blend of cheeses, to customize the flavor.
Final Thoughts
This Cauliflower Bread Grilled Cheese is more than just a recipe; it’s an invitation to reimagine your favorite comfort foods with a healthy and creative twist. Don’t be afraid to experiment with different flavors and variations to create a dish that truly reflects your taste. I encourage you to try this recipe, share your feedback, and pair it with your favorite soup or salad for a delightful and satisfying meal. Happy cooking!