
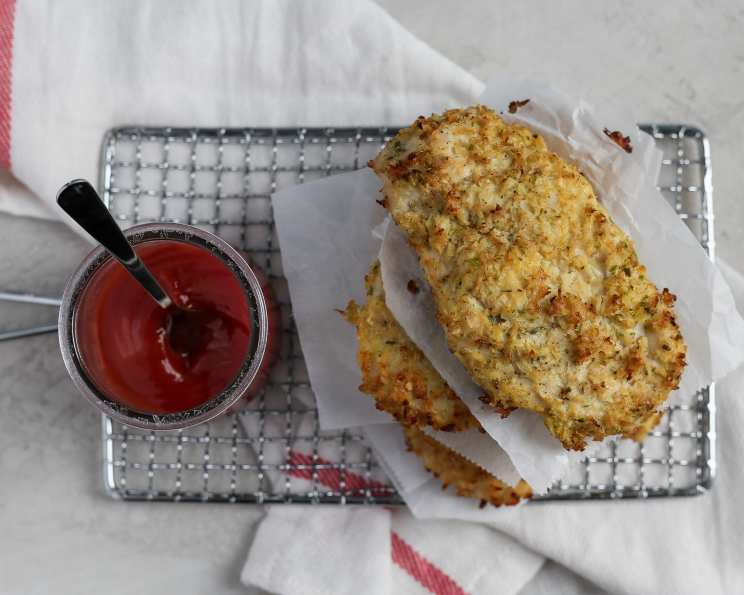
Cauliflower Crusted Chicken Tenders: A Healthy Twist on a Classic
My grandmother, bless her heart, was not exactly known for her healthy cooking. Everything was fried, buttered, or smothered in gravy. But she made the best chicken tenders. Crispy, juicy, and always a crowd-pleaser. I remember one summer afternoon, the whole family gathered at her house, the aroma of fried chicken filling the air, the taste of her love infused in every bite. These cauliflower-crusted chicken tenders are my attempt to capture that same nostalgic joy, but with a lighter, healthier twist, bringing a childhood favorite into the modern kitchen.
Recipe Overview
- Prep Time: 30 minutes
- Cook Time: 25 minutes
- Total Time: 55 minutes
- Servings: 4
- Dietary Type: Gluten-Free, Keto-Friendly (with suitable dipping sauce)
Ingredients
- 1 lb chicken tenderloins
- 48 ounces frozen cauliflower rice, thawed
- 2 eggs
- 2 tablespoons buttermilk
- 1⁄4 cup grated parmesan cheese
- 1 tablespoon onion powder
- 1 tablespoon garlic powder
- 1 tablespoon dried parsley
- 4 teaspoons ground mustard
- 1 teaspoon salt
- 1⁄2 teaspoon pepper
Equipment Needed
- Microwave-safe bowl
- Dish towel or cheesecloth
- Food processor
- Baking sheet
- Parchment paper
- Shallow bowls
Instructions
-
Preheat oven to 275°F (135°C) and line a baking sheet with parchment paper. This initial, low-temperature bake is crucial for drying out the cauliflower properly.
-
Add the cauliflower rice to a microwave-safe bowl and microwave according to package directions. Generally, this involves microwaving for several minutes until softened. Let the cauliflower cool slightly before proceeding to the next step.
-
This is the most important step! Squeeze out as much liquid as possible from the cauliflower. Use a clean dish towel or cheesecloth to wring out the moisture. This step is vital because excess moisture will prevent the cauliflower crust from becoming crispy. The drier, the better.
-
Add the squeezed cauliflower to a food processor and pulse until finely chopped. You want the cauliflower to resemble breadcrumbs, not a paste. Avoid over-processing.
-
Transfer the cauliflower to the prepared baking sheet and spread in an even layer. Bake for 1 hour, stirring every 20 minutes, until dried out and crispy. Monitor closely to prevent burning, especially around the edges. The cauliflower should be noticeably drier and slightly golden. Let the cauliflower cool completely.
-
While the cauliflower is baking, increase the oven temperature to 400°F (200°C).
-
Transfer the cooled crispy cauliflower to a shallow bowl. Add parsley, onion powder, garlic powder, ground mustard, grated parmesan, salt, and pepper. Toss to combine ensuring all ingredients are evenly distributed to create a well-seasoned crust.
-
Add eggs and buttermilk to another shallow bowl and whisk to combine. This egg wash will help the cauliflower adhere to the chicken.
-
Pat the chicken tenderloins with paper towels so that they are very dry. This helps the egg wash and cauliflower adhere better.
-
Dip the chicken in the egg wash, allowing any excess to drip off, then dredge in the cauliflower breadcrumbs, pressing firmly to ensure the crumbs adhere. Place on a parchment-lined baking sheet, making sure the tenders don’t touch.
-
Bake for 15 minutes, flipping halfway through, until the chicken is cooked through and the crust is golden brown. The internal temperature of the chicken should reach 165°F (74°C). Use a meat thermometer to ensure accuracy.
-
Serve immediately with your favorite dipping sauce.
Expert Tips & Tricks
- Crispiest Crust: The key to a truly crispy crust is getting as much moisture out of the cauliflower as possible. Don’t skip the squeezing step!
- Seasoning Boost: For an extra burst of flavor, consider adding a pinch of smoked paprika or cayenne pepper to the cauliflower breadcrumbs.
- Cheese Variations: If you’re not a fan of parmesan, try using Pecorino Romano or a blend of Italian cheeses.
- Make-Ahead Prep: The cauliflower breadcrumbs can be made ahead of time and stored in an airtight container at room temperature for up to 3 days.
- Even Baking: Rotate the baking sheet halfway through baking to ensure even browning of the chicken tenders.
Serving & Storage Suggestions
Serve these cauliflower-crusted chicken tenders immediately while they are still hot and crispy. They pair perfectly with a variety of dipping sauces such as ranch, honey mustard, barbecue sauce, or a spicy aioli. For a complete meal, serve with a side of roasted vegetables or a fresh salad.
Leftover chicken tenders can be stored in an airtight container in the refrigerator for up to 3 days. To reheat, bake in a preheated oven at 350°F (175°C) for about 10 minutes, or until heated through. Reheating in the oven is preferable to microwaving, as it helps to maintain some of the crispiness. They can also be reheated in an air fryer.
Nutritional Information
| Nutrient | Amount per Serving | % Daily Value |
|---|---|---|
| Calories | 325 kcal | 16% |
| Total Fat | 14g | 22% |
| Saturated Fat | 5g | 25% |
| Cholesterol | 82mg | 27% |
| Sodium | 403mg | 17% |
| Total Carbohydrate | 13g | 4% |
| Dietary Fiber | 3g | 12% |
| Sugars | 2g | – |
| Protein | 35g | 70% |
Note: Nutritional information is an estimate and may vary based on specific ingredients and portion sizes.
Variations & Substitutions
- Dairy-Free: Omit the parmesan cheese or substitute with nutritional yeast for a cheesy flavor. Use a plant-based milk alternative like almond or oat milk in place of buttermilk.
- Spicy Kick: Add a pinch of cayenne pepper or red pepper flakes to the cauliflower breadcrumb mixture for a spicy kick.
- Herbaceous: Experiment with different herbs such as rosemary, thyme, or oregano in the cauliflower breadcrumbs.
- Almond Flour Crust: For a different texture and flavor, try using almond flour instead of cauliflower rice. Reduce the baking time for the crust accordingly.
FAQs (Frequently Asked Questions)
Q: Can I use pre-riced cauliflower instead of frozen cauliflower rice?
A: Yes, but be sure to squeeze out as much moisture as possible. Freshly riced cauliflower tends to be wetter than frozen.
Q: Why is it important to bake the cauliflower breadcrumbs first?
A: Baking the cauliflower breadcrumbs before coating the chicken helps to dry them out and create a crispy texture. It also ensures that the cauliflower is fully cooked.
Q: Can I use chicken breasts instead of chicken tenderloins?
A: Yes, you can use chicken breasts. Cut them into strips approximately the same size as tenderloins and adjust the cooking time accordingly.
Q: How do I know when the chicken tenders are cooked through?
A: The internal temperature of the chicken should reach 165°F (74°C). Use a meat thermometer to ensure accuracy.
Q: Can I freeze these chicken tenders?
A: Yes, you can freeze these chicken tenders after they have been cooked and cooled. Store them in an airtight container or freezer bag for up to 2 months. Reheat in the oven or air fryer for best results.
Final Thoughts
These cauliflower-crusted chicken tenders are a delightful and healthy twist on a beloved classic. The crispy, flavorful crust combined with the tender, juicy chicken makes for a satisfying and guilt-free meal. So, gather your ingredients, preheat your oven, and prepare to be amazed by this simple yet delicious recipe. I encourage you to experiment with different seasonings and dipping sauces to create your own unique version. Share your creations with friends and family, and let me know what you think! Perhaps pair it with a light citrus salad or some roasted asparagus for a balanced and delicious meal. Bon appétit!