
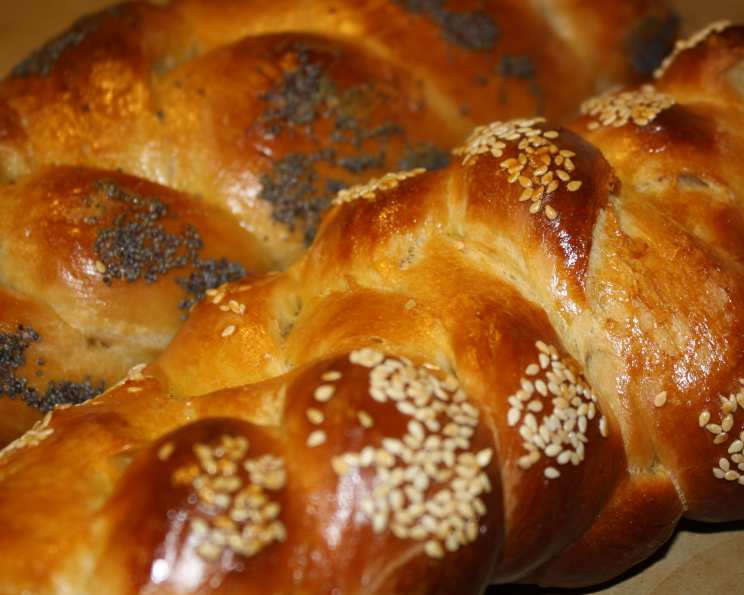
Baking Memories: My Journey with Challah
There’s a scent that instantly transports me back to my grandmother’s kitchen – the warm, yeasty aroma of challah baking. I can almost feel the flour dusting my cheeks as I stood on a stool, mesmerized by her nimble fingers transforming a simple dough into a golden, braided masterpiece. It wasn’t just bread; it was love, tradition, and a tangible connection to my heritage, all baked into one beautiful loaf. To this day, baking challah is more than just following a recipe; it’s a way for me to keep that memory alive and share it with those I love.
Recipe Overview
- Prep Time: 2-3 hours (including rising time)
- Cook Time: 1 hour
- Total Time: 3-4 hours
- Servings: Varies depending on challah size
- Yield: 4 medium challahs
- Dietary Type: Dairy
Ingredients
- 8-9 cups flour
- ¾ – 1 cup sugar (or ¾ cup honey)
- 1 tablespoon salt
- 1 (2 ounce) package yeast
- 2 ½ cups lukewarm water (or 2 cups only if using honey)
- ½ cup oil
- 5 eggs (4 for the dough, 1 for egg wash)
- Optional: ¼ cup raisins
Equipment Needed
- Large mixing bowl (or stand mixer)
- Measuring cups and spoons
- Baking sheets
- Parchment paper (optional)
- Clean kitchen towel
- Pastry brush
Instructions
- In a large mixing bowl, or the bowl of your stand mixer, combine 2 ½ cups of the flour with the sugar (or honey), salt, and yeast. It is not necessary to dissolve the yeast separately.
- Add the 2 ½ cups of lukewarm water (or 2 cups if using honey) and the ½ cup of oil.
- Add 4 of the eggs to the mixture.
- Using a stand mixer with a dough hook, or a sturdy spoon if mixing by hand, beat in another 1 ½ cups of flour very well until a shaggy dough begins to form.
- Gradually add 4-5 cups of flour, mixing until a very soft dough is formed. The dough should be slightly sticky, but still manageable. Be careful not to add too much flour, as this will result in a dry challah.
- Knead the dough for about 10 minutes by hand on a lightly floured surface. If using a dough hook, knead for about 7 minutes. The dough should become smooth and elastic.
- Place the dough in a lightly oiled bowl, turning to coat. Cover the bowl with a clean kitchen towel or plastic wrap.
- Let the dough rise in a warm place for 1-2 hours, or until doubled in size. For a richer flavor, you can also let the dough rise in the refrigerator overnight, then let it warm to room temperature for about 1 or 2 hours before proceeding.
- Once the dough has doubled, gently punch it down to release the air.
- Decide how many challahs you want to make and how many strands you want to braid each challah with (3, 4, or 6 strands are common).
- Divide the dough accordingly. For example, if you want to make 4 challahs with 6 strands each, divide the dough into 24 equal pieces.
- Roll each piece of dough into a rope about 12-14 inches long.
- Braid the ropes together to form the challahs. There are many braiding tutorials available online if you’re unfamiliar with braiding bread.
- Place the braided challahs on baking sheets lined with parchment paper (optional).
- Cover the challahs with a clean kitchen towel and let them rise for another ½-1 hour.
- Preheat your oven to 325°F (150°C).
- Beat the remaining egg and gently brush it over the challahs. This will give them a beautiful golden shine.
- Bake the challahs in the preheated oven at 325°F (150°C) for 30 minutes.
- Apply the egg wash once more and bake for another 30 minutes at 350°F (175°C), or until the challahs are golden brown and sound hollow when tapped on the bottom.
- Let the challahs cool completely on a wire rack before slicing and serving.
Expert Tips & Tricks
- For extra flavor: Add a teaspoon of vanilla extract or orange zest to the dough.
- For a richer color: Use an egg yolk only for the egg wash.
- To prevent the braids from unraveling: Pinch the ends of the ropes tightly together before and after braiding.
- If the dough is too sticky: Add a tablespoon of flour at a time until it becomes manageable.
- If the challah is browning too quickly: Tent it with foil during the last 15 minutes of baking.
- To ensure even baking: Rotate the baking sheets halfway through the baking time.
Serving & Storage Suggestions
Challah is delicious served warm or at room temperature. It’s perfect for sandwiches, French toast, or simply enjoying on its own with butter or jam.
- Storage: Store leftover challah in an airtight container at room temperature for up to 3 days. For longer storage, wrap the challah tightly in plastic wrap and freeze for up to 2 months.
- Reheating: To reheat frozen challah, thaw it overnight in the refrigerator or at room temperature. You can then warm it in a 350°F (175°C) oven for 10-15 minutes. A quick zap in the microwave also works, but can make the bread a little tougher.
Nutritional Information
Please note that these values are estimates and may vary based on specific ingredients and portion sizes.
| Nutrient | Amount per Serving | % Daily Value |
|---|---|---|
| Calories | 358 kcal | 18% |
| Total Fat | 15.2g | 23% |
| Saturated Fat | 3g | 15% |
| Cholesterol | 58mg | 19% |
| Sodium | 462mg | 19% |
| Total Carbohydrate | 46.5g | 16% |
| Dietary Fiber | 2.6g | 9% |
| Sugars | 9.6g | – |
| Protein | 9.9g | 20% |
Variations & Substitutions
- Honey Challah: Substitute the sugar with ¾ cup honey. Reduce the water by ½ cup.
- Raisin Challah: Add ¼ cup of raisins to the dough before the first rise. You can also use other dried fruits like currants or cranberries.
- Chocolate Chip Challah: Add ½ cup of chocolate chips to the dough before the first rise.
- Savory Challah: Omit the sugar and add herbs like rosemary, thyme, or garlic powder.
- Gluten-Free Challah: While challenging, you can adapt this recipe using a gluten-free all-purpose flour blend. Be sure to add a binding agent like xanthan gum. The texture will be different, but still delicious!
- Vegan Challah: Replace the eggs with flax eggs (1 tablespoon of ground flaxseed mixed with 3 tablespoons of water per egg). Use a plant-based oil and brush the challah with a mixture of maple syrup and plant-based milk for shine.
FAQs (Frequently Asked Questions)
Q: Why is my challah so dense?
A: This could be due to several factors, including not using enough yeast, not kneading the dough enough, or not letting it rise for long enough.
Q: Can I freeze the challah dough?
A: Yes, you can freeze the dough after the first rise. Thaw it overnight in the refrigerator before shaping and baking.
Q: How can I get a shiny crust on my challah?
A: Brushing the challah with an egg wash before and halfway through baking will give it a beautiful golden shine. You can also add a pinch of salt or sugar to the egg wash for extra shine.
Q: My challah is browning too quickly. What should I do?
A: Tent the challah with foil during the last 15 minutes of baking to prevent it from burning.
Q: Can I make challah without a stand mixer?
A: Absolutely! Kneading by hand is a great way to connect with the dough. Just make sure to knead it for a full 10 minutes until it becomes smooth and elastic.
Final Thoughts
Now it’s your turn to experience the joy of baking challah! Don’t be intimidated by the braiding – it’s easier than it looks, and even if it’s not perfect, it will still taste amazing. Share your creations with friends and family, and let the aroma of freshly baked challah fill your home with warmth and love. Pair a slice with a steaming bowl of chicken soup, a smear of your favorite preserves, or simply enjoy it on its own. Happy baking!