
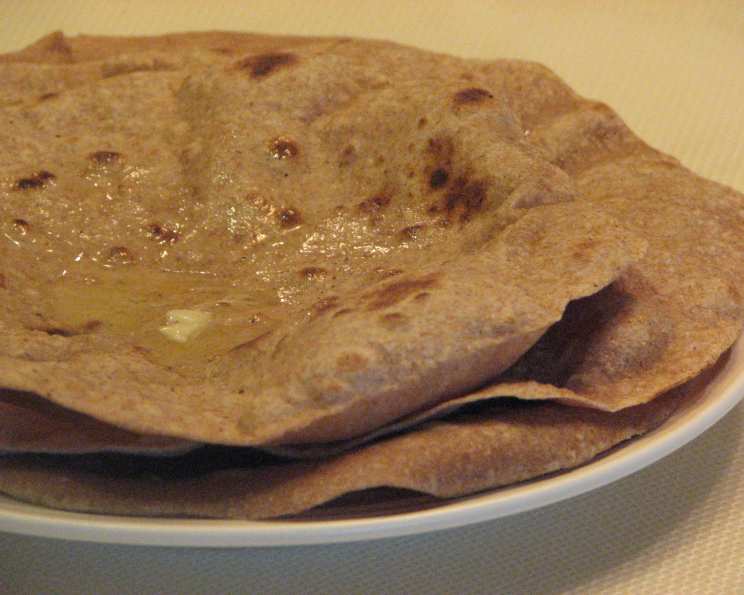
The Soul of Simplicity: Mastering the Art of Chapati
The aroma of freshly cooked chapati always transports me back to my grandmother’s kitchen. I can almost feel the warmth of the clay oven on my face and hear the rhythmic clap-clap-clap as she deftly patted out the dough. Those were simpler times, filled with the comforting scents and flavors of home. More than just sustenance, those chapatis were a symbol of love, a labor of care that nourished both body and soul. While my method may now involve a modern griddle instead of a traditional chulha, the essence remains the same: simple ingredients transformed into a delicious, satisfying staple.
Recipe Overview
- Prep Time: 20 minutes
- Cook Time: 20 minutes
- Total Time: 40 minutes
- Servings: 8
- Yield: 8 flatbreads
- Dietary Type: Vegan
Ingredients
- 1 ½ cups whole wheat flour, plus extra for kneading and rolling out dough
- 1 teaspoon salt
- 1 cup water
Equipment Needed
- Medium bowl
- Wooden spoon
- Clean, flat surface for kneading
- Rolling pin
- Griddle or flat skillet
- Clean kitchen towel
Instructions
- In a medium bowl, combine the whole wheat flour and salt. This ensures the salt is evenly distributed throughout the dough, which is essential for flavor.
- Using a wooden spoon, slowly stir in the water. Mix until a dough starts to form. Don’t add all the water at once; you may need slightly more or less depending on the humidity and the flour’s absorbency.
- Lightly flour a clean board or countertop. Turn the dough out onto the floured surface and knead it until it becomes smooth and elastic, approximately 10 minutes. Proper kneading develops the gluten in the flour, which gives the chapati its characteristic texture.
- Place the dough back into the bowl, cover it with a damp towel, and let it rest for 20 minutes. This resting period allows the gluten to relax, making the dough easier to roll out.
- Preheat a griddle or flat skillet over medium heat. You want the griddle hot enough to cook the chapati evenly but not so hot that it burns.
- Divide the dough into 8 equal balls. Aim for consistent sizing to ensure even cooking.
- Lightly flour your rolling surface. Using a floured rolling pin, roll out each ball of dough into a circle about 7 inches in diameter, and approximately 1/4-inch thick. Keep rotating the dough as you roll to maintain a circular shape.
- Carefully place the rolled-out dough onto the preheated griddle.
- Flip the chapati when raised bumps appear on the surface of the dough, usually after 1 to 2 minutes. These bumps indicate that the underside is cooking properly.
- Cook the second side until it turns golden brown in color. This should also take about 1 to 2 minutes. Be careful not to overcook the chapati, as it will become brittle and hard.
- Once cooked, immediately cover the chapati with a clean towel. This will keep them soft and pliable.
- Repeat steps 7-11 for the remaining dough balls.
- Serve the chapatis immediately or keep them covered with a towel for up to 20 minutes before serving.
Expert Tips & Tricks
- The Secret to Softness: The key to achieving soft chapatis lies in the kneading and resting process. Don’t skimp on either. Also, covering the cooked chapatis with a towel is crucial for trapping steam and preventing them from drying out.
- Adjusting the Water: The amount of water needed may vary depending on the type of whole wheat flour you use and the humidity. Start with a little less water and add more gradually until the dough comes together.
- Dealing with Sticky Dough: If the dough is too sticky, add a little more flour, one tablespoon at a time, until it becomes manageable.
- Puffing Up Your Chapati: For truly puffed-up chapatis (a sign of perfectly cooked bread!), you can briefly hold the cooked chapati directly over an open flame for a few seconds, using tongs. But be careful not to burn it! This is an advanced technique and not necessary for delicious results.
- Make-Ahead Tip: You can prepare the dough in advance and store it in the refrigerator for up to 24 hours. Just bring it to room temperature before rolling it out.
Serving & Storage Suggestions
Chapatis are incredibly versatile and can be served with a wide variety of dishes. They are a perfect accompaniment to curries, stews, dal, and even scrambled eggs. They can also be used to make wraps or simply enjoyed with butter and a sprinkle of salt.
Store leftover chapatis in an airtight container at room temperature for up to 2 days, or in the refrigerator for up to 5 days. To reheat, wrap them in a damp paper towel and microwave for a few seconds, or warm them in a dry skillet over low heat. For longer storage, freeze them in a single layer in a freezer bag for up to 2 months. Thaw completely before reheating.
Nutritional Information
| Nutrient | Amount per Serving | % Daily Value |
|---|---|---|
| Calories | 76.5 kcal | N/A |
| Calories from Fat | 5g | 7% |
| Total Fat | 0.6 g | 0% |
| Saturated Fat | 0.1 g | 0% |
| Cholesterol | 0 mg | 0% |
| Sodium | 292 mg | 12% |
| Total Carbohydrate | 16.2 g | 5% |
| Dietary Fiber | 2.4 g | 9% |
| Sugars | 0.1 g | 0% |
| Protein | 3 g | 5% |
Note: Nutritional information is an estimate and may vary based on specific ingredients and portion sizes.
Variations & Substitutions
- Gluten-Free Chapati: While traditionally made with whole wheat flour, you can experiment with gluten-free flour blends to create a gluten-free version. Be aware that the texture will be different, and you may need to adjust the amount of water.
- Flavored Chapati: Add herbs, spices, or even finely chopped vegetables to the dough for added flavor. Some popular additions include cumin seeds, coriander, fenugreek leaves, or grated carrots.
- Oil or Ghee: For a richer flavor and softer texture, you can add a tablespoon of oil or ghee (clarified butter) to the dough.
- Different Flours: While whole wheat flour is the standard, you can experiment with other types of flour, such as millet flour (bajra) or sorghum flour (jowar), for a unique flavor and nutritional profile.
FAQs (Frequently Asked Questions)
Q: Why are my chapatis hard and brittle?
A: This is usually due to overcooking or not kneading the dough enough. Make sure to knead the dough for at least 10 minutes and cook the chapatis over medium heat, flipping them when the first signs of bubbles appear. Covering them immediately after cooking is also essential.
Q: Can I use all-purpose flour instead of whole wheat flour?
A: While you can, the resulting chapati will be less nutritious and have a slightly different texture. Whole wheat flour provides more fiber and a nuttier flavor.
Q: How do I prevent the chapatis from sticking to the griddle?
A: Make sure your griddle is properly preheated and lightly greased with oil or ghee. Also, use enough flour when rolling out the dough to prevent it from sticking to the rolling pin or surface.
Q: Can I freeze chapati dough?
A: Yes, you can freeze the dough after kneading it. Wrap it tightly in plastic wrap and place it in a freezer bag. Thaw completely in the refrigerator before rolling out.
Q: Why aren’t my chapatis puffing up?
A: Puffing is a sign of even cooking. Ensure your griddle is hot enough, and press lightly around the edges of the chapati with a clean cloth or spatula as it cooks. However, even if they don’t puff up completely, they’ll still be delicious.
Final Thoughts
There’s a certain magic in taking simple ingredients and transforming them into something so nourishing and satisfying. Making chapatis from scratch is a deeply rewarding experience, and I encourage you to give it a try. Don’t be discouraged if your first attempt isn’t perfect; practice makes perfect! Serve these warm, homemade chapatis with your favorite curry or dal, and savor the simple pleasures of home cooking. And please, share your feedback – I’d love to hear about your chapati-making adventures!