
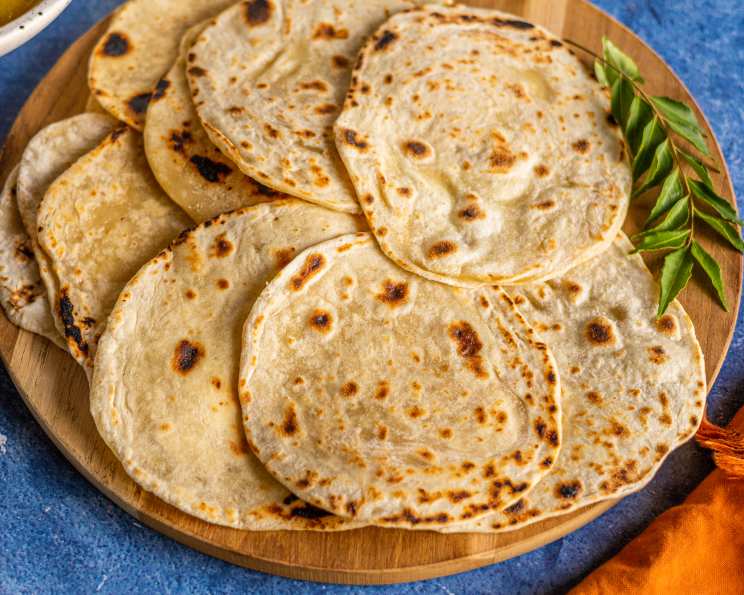
Mastering the Art of Chappati: A Taste of Home
The scent of chappatis toasting on a hot pan – that’s the smell of my grandmother’s kitchen, a place of warmth, laughter, and the most comforting food imaginable. I remember standing on a stool, mesmerized as she deftly rolled out the dough, her hands moving with a practiced grace that only years of love and tradition could instill. Those simple circles of unleavened bread were more than just food; they were a symbol of family, connection, and the enduring power of home. Recreating those chappatis in my own kitchen is a journey back to those cherished memories, a way to share that love with my own family.
Recipe Overview
- Prep Time: 1 hour 15 minutes (includes resting time)
- Cook Time: 30 minutes
- Total Time: 1 hour 45 minutes
- Yields: 15 chappatis
- Dietary Type: Vegetarian
Ingredients
- 6 cups all-purpose flour
- 2 cups water
- 1/2 cup milk
- 1 tablespoon salt
- 1/4 cup oil, plus extra for kneading
- Melted butter, for brushing
- Flour, for rolling out dough
Equipment Needed
- Large mixing bowl
- Clean kitchen cloth
- Rolling pin
- Flat cast iron disc (tawa) or large frying pan (cast iron is best)
- Tongs or spatula
- Paper towels or clean cloth
Instructions
-
Combine dry ingredients: In a large mixing bowl, thoroughly mix together the all-purpose flour and salt. This ensures even distribution of the salt throughout the dough.
-
Add water and begin kneading: Gradually add the water, a cup at a time, to the flour mixture, kneading as you go. The key here is to incorporate the water slowly to avoid a sticky dough.
-
The kneading technique: When kneading, form your hand into a fist and use your knuckles to push into the dough, folding the edges in continuously. This technique helps to develop the gluten and create a smooth, elastic dough. Work in all the flour, ensuring that no dry patches remain.
-
Create indentations: Once all the flour is kneaded into a ball, use your fingers to poke lots of holes into the ball of dough. This allows the oil to penetrate the dough more effectively.
-
Incorporate the oil: Pour a little oil into the dough and knead it in. Add the rest of the oil gradually. The dough will look quite oily, and that’s exactly what you want. The oil helps to create a soft and pliable texture.
-
Rest the dough: Cover the dough with a clean cloth and let it rest for at least an hour. This resting period is crucial for allowing the gluten to relax, which will result in softer and easier-to-roll chappatis. You can let it rest for even longer if you have the time; the longer it rests, the better the texture will be.
-
Prepare for rolling: After resting, roll the ball of dough in a little flour so it’s not sticky. This makes it easier to handle and roll out.
-
Divide the dough: Divide the dough into about 15-20 equal portions. The size of each portion will determine the size of your chappatis.
-
Roll out each chappati: Flour your counter or board generously to prevent sticking. Take one portion of dough and roll it out into a circle approximately 6 inches in diameter. Aim for a uniform thickness throughout the circle.
-
Brush with melted butter: Lightly brush the rolled-out chappati with melted butter. This will add flavor and help create flaky layers.
-
Fold in thirds: Fold the chappati into thirds, like you would fold a letter. This creates a long, narrow strip of dough.
-
Create the bundle: Take one end of the folded strip and fold it into the center, gently pressing it down. Then, take the other end of the strip and fold it over the seam. You should now have a small bundle of dough. The folding process helps to create layers within the chappati.
-
Rest the bundles: Flour a plate and place the dough bundles on it. This prevents them from sticking to each other.
-
Roll out the bundles: Roll each bundle out to about 6-8 inches in diameter, flouring the counter/board as needed to prevent sticking. Try to maintain a circular shape as you roll.
-
Heat the pan: Place a flat cast iron disc (tawa) or a large frying pan (cast iron is best) over medium-high heat. Allow the pan to heat up thoroughly before adding the chappati.
-
Cook the first side: Carefully place a rolled-out chappati onto the hot pan. Cook until the underside starts to look a bit translucent. This should take about 30-60 seconds.
-
Flip and cook the second side: Flip the chappati over and cook for another 30-60 seconds.
-
Brush with butter and puff: Brush the second side of the chappati with melted butter, shuffling it around the pan quickly to distribute the butter evenly. Flip the chappati over again and brush the other side with a bit of melted butter. The chappati should start puffing up into a pillow-like shape. If it doesn’t puff up, gently press down on it with a clean cloth or spatula.
-
Finish cooking: Continue cooking the chappati until it has small golden-brown dots on both sides. The cooking time will vary depending on the heat of your pan.
-
Serve and cover: Remove the cooked chappati from the pan and place it in a serving dish. Cover the dish with a clean cloth to keep the chappatis warm and soft as you prepare the rest.
-
Adjust the heat: You will need to adjust the heat during the whole frying process to prevent the chappatis from burning. If the pan gets too hot, reduce the heat slightly.
-
Clean the pan: Clean off the pan with paper towels or a clean cloth in between frying each chappati. This helps to prevent any burnt bits from sticking to the next chappati.
-
Avoid over-turning: Don’t turn the chappatis too much; just once or twice is enough. Over-turning can prevent them from puffing up properly.
Expert Tips & Tricks
- Dough Hydration: The amount of water needed can vary depending on the humidity and the type of flour used. Start with the stated amount and add more gradually if the dough seems too dry.
- Resting Time: Don’t skimp on the resting time! It makes a huge difference in the final texture.
- Puffing Power: If your chappatis aren’t puffing up, try pressing gently around the edges with a clean cloth or spatula while cooking.
- Butter Basting: Brushing with ghee (clarified butter) instead of regular butter will impart a richer, nuttier flavor.
- Preventing Sticking: If the dough is sticking to the rolling surface, use more flour liberally.
Serving & Storage Suggestions
Serve chappatis warm, ideally straight off the pan. They are delicious served with curries, stews, dals, or even enjoyed on their own with a dollop of yogurt or chutney.
Store leftover chappatis in an airtight container at room temperature for up to 2 days, or in the refrigerator for up to 5 days. To reheat, warm them on a dry pan for a few seconds per side or microwave them briefly. They can also be frozen for up to 2 months. Wrap them individually in plastic wrap or freezer bags to prevent them from sticking together. Reheat frozen chappatis directly on a pan or in the microwave.
Nutritional Information
| Nutrient | Amount per Serving | % Daily Value |
|---|---|---|
| Calories | 219 kcal | N/A |
| Total Fat | 4.4 g | 6% |
| Saturated Fat | 0.7 g | 3% |
| Cholesterol | 1.1 mg | 0% |
| Sodium | 471 mg | 19% |
| Total Carbohydrate | 38.5 g | 12% |
| Dietary Fiber | 1.4 g | 5% |
| Sugars | 0.1 g | 0% |
| Protein | 5.4 g | 10% |
Note: Nutritional information is an estimate and may vary based on specific ingredients and cooking methods.
Variations & Substitutions
- Whole Wheat Chappatis: Substitute some or all of the all-purpose flour with whole wheat flour for a more nutritious and fiber-rich version. The texture will be slightly denser.
- Gluten-Free Chappatis: Use a gluten-free flour blend specifically designed for flatbreads. You may need to adjust the amount of water to achieve the right consistency.
- Flavored Chappatis: Add finely chopped herbs like cilantro or mint to the dough for extra flavor. You could also add spices like cumin, coriander, or chili powder.
- Milk Substitute: If you are dairy-free, substitute the milk with any plant-based milk like almond milk, soy milk, or oat milk.
- Oil Substitute: Ghee (clarified butter) can be used instead of oil for a richer flavor.
FAQs (Frequently Asked Questions)
Q: Why aren’t my chappatis puffing up?
A: Ensure your pan is hot enough and that you’re using enough butter. Gently pressing down on the edges with a clean cloth can also help.
Q: My dough is too sticky. What should I do?
A: Add a little more flour, one tablespoon at a time, until the dough becomes manageable.
Q: Can I make the dough ahead of time?
A: Yes, you can make the dough up to 24 hours in advance and store it in the refrigerator. Let it come to room temperature before rolling.
Q: How do I prevent the chappatis from becoming hard?
A: Keep the cooked chappatis covered with a clean cloth to trap the steam and keep them soft.
Q: Can I freeze cooked chappatis?
A: Yes, allow them to cool completely, then wrap them individually in plastic wrap and store them in a freezer bag. Reheat them on a pan or in the microwave.
Final Thoughts
Making chappatis might seem daunting at first, but with a little practice and patience, you’ll be creating warm, delicious flatbreads in no time. Don’t be afraid to experiment with different flours, spices, and techniques to find what works best for you. So, gather your ingredients, roll up your sleeves, and embark on this culinary adventure. Your family will thank you for it, and you’ll have a taste of homemade comfort that will warm your heart and soul. Enjoy your chappatis with a flavorful curry or dal, and share the joy of homemade bread with your loved ones.