
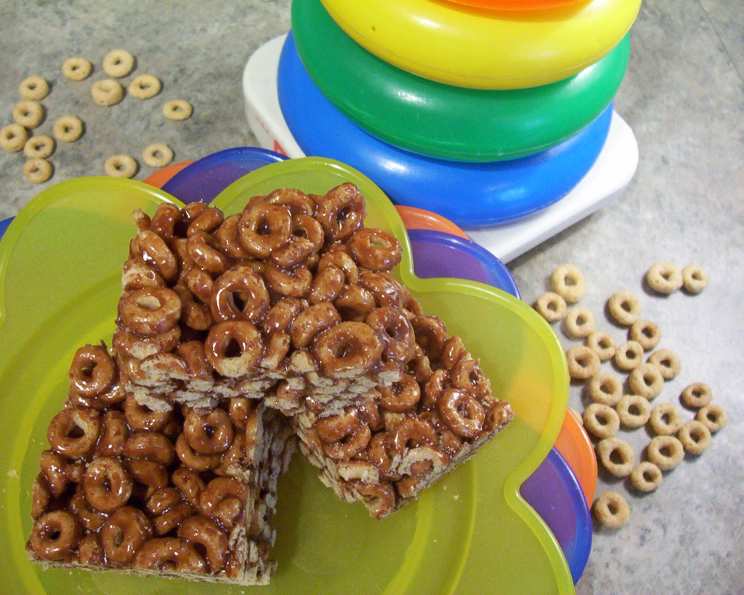
Cheerios Chocolate Dream Bars: A Nostalgic Treat with a Modern Twist
I remember the first time I made something completely on my own – it was a batch of these Cheerios treats. My mom had tacked the recipe onto our refrigerator, probably clipped from a cereal box. Armed with a saucepan and a slightly-too-big wooden spoon, I melted the chocolate, carefully stirred in the Cheerios (making sure not to crush them!), and proudly presented the sticky, sweet squares to my family. The slightly burnt edges were a testament to my inexperience, but the smiles on their faces made them taste like perfection. Now, decades later, I’ve refined the technique just a bit, but the simple joy of this childhood classic remains.
Recipe Overview
- Prep Time: 5 minutes
- Cook Time: 5 minutes
- Total Time: 10 minutes
- Yields: 16 squares
- Dietary Type: Vegetarian
Ingredients
- ½ cup light corn syrup
- 1 cup semi-sweet chocolate chips
- 1 teaspoon vanilla
- 4 cups Cheerios toasted oat cereal
Equipment Needed
- Large saucepan
- 8-inch square pan
- Rubber spatula
- Measuring cups and spoons
Instructions
- In a large saucepan, heat the light corn syrup over medium heat until it begins to gently boil. Watch carefully to prevent burning. As soon as it reaches a gentle boil, immediately remove the saucepan from the heat.
- Stir in the vanilla extract and the semi-sweet chocolate chips into the hot corn syrup. Continue to stir until all the chocolate chips are completely melted and the mixture is smooth and glossy. There should be no lumps remaining.
- Add the Cheerios toasted oat cereal to the melted chocolate mixture. Gently stir until the Cheerios are evenly coated with the chocolate. Be careful not to crush the Cheerios while stirring.
- Lightly butter an 8-inch square pan to prevent the treats from sticking.
- Press the Cheerios mixture firmly and evenly into the prepared buttered 8-inch square pan. Ensure the surface is compact for neat squares.
- Allow the treats to cool completely at room temperature. This usually takes about 30 minutes to an hour. Once cooled, cut the Cheerios treats into 2-inch squares.
Expert Tips & Tricks
- Preventing Sticking: Buttering the pan is crucial. For extra insurance, you can also line the pan with parchment paper, leaving an overhang on the sides to easily lift the treats out once cooled.
- Melting Chocolate Perfection: Don’t overheat the chocolate! If you’re worried about burning, you can melt the chocolate chips and corn syrup in a double boiler or in the microwave in 30-second intervals, stirring in between, until melted.
- Texture Control: For a chewier treat, use a higher ratio of corn syrup to Cheerios. For a crispier treat, slightly reduce the amount of corn syrup.
- Vanilla Bean Boost: For a more intense vanilla flavor, scrape the seeds from half a vanilla bean into the chocolate mixture.
- Even Cuts: Use a warm, sharp knife to slice the cooled treats for cleaner, more even squares. Run the knife under hot water and dry it before each cut.
Serving & Storage Suggestions
These Cheerios treats are best served at room temperature, allowing the chocolate to soften slightly for a more enjoyable bite. They make a fantastic snack, lunchbox addition, or a simple dessert after a meal.
To store, keep the treats in an airtight container at room temperature. They will stay fresh for up to 3 days. If you want to extend their shelf life, you can store them in the refrigerator for up to a week. However, the chocolate may harden slightly in the fridge.
Freezing is not recommended, as the texture of the Cheerios can become soggy upon thawing.
Nutritional Information
| Nutrient | Amount per Serving | % Daily Value |
|---|---|---|
| Calories | 108.9 kcal | N/A |
| Calories from Fat | N/A | 30% |
| Total Fat | 3.6 g | 5% |
| Saturated Fat | 1.9 g | 9% |
| Cholesterol | 0 mg | 0% |
| Sodium | 61.1 mg | 2% |
| Total Carbohydrate | 20.4 g | 6% |
| Dietary Fiber | 1.5 g | 6% |
| Sugars | 8.9 g | 35% |
| Protein | 1.3 g | 2% |
Note: Nutritional information is an estimate and may vary based on specific ingredients and portion sizes.
Variations & Substitutions
- Peanut Butter Bliss: Add ½ cup of peanut butter to the melted chocolate mixture for a peanut butter chocolate delight.
- Dark Chocolate Indulgence: Substitute dark chocolate chips for semi-sweet for a richer, more intense flavor.
- Marshmallow Magic: Stir in ½ cup of mini marshmallows after adding the Cheerios for a gooey, marshmallowy texture.
- Sprinkle Surprise: Top the treats with colorful sprinkles before they cool for a festive touch.
- Nutty Nibbles: Add ¼ cup of chopped nuts (such as almonds, walnuts, or pecans) to the Cheerios mixture for added crunch and flavor.
- Salted Caramel Dream: Add a pinch of sea salt to the melted chocolate mixture and drizzle with caramel sauce after pressing into the pan.
FAQs (Frequently Asked Questions)
Q: Can I use honey instead of corn syrup?
A: While you can substitute honey, it will result in a slightly different flavor and texture. The treats may be a bit stickier.
Q: What if I don’t have an 8-inch square pan?
A: You can use a similar-sized pan, like a 9-inch square pan. The treats will be slightly thinner.
Q: Can I use a different type of cereal?
A: Yes, you can experiment with other cereals like Rice Krispies, Corn Flakes, or even a mix of cereals. Adjust the amount of cereal as needed to achieve the desired consistency.
Q: How do I prevent the Cheerios from getting soggy?
A: Make sure not to overcook the corn syrup and chocolate mixture. Overcooking can lead to a wetter mixture that will soften the Cheerios. Also, stir the Cheerios in gently to avoid crushing them.
Q: Can I make these ahead of time?
A: Yes, you can make these a day or two in advance. Store them in an airtight container at room temperature until ready to serve.
Final Thoughts
These Cheerios Chocolate Dream Bars are a testament to the fact that the simplest recipes can often be the most satisfying. They’re a delightful combination of crunchy cereal, rich chocolate, and sweet nostalgia. Whether you’re looking for a quick and easy snack, a fun activity to do with kids, or simply a taste of childhood, these treats are sure to hit the spot. So go ahead, gather your ingredients, and whip up a batch of these irresistible bars. Don’t be afraid to experiment with variations and make them your own. And don’t forget to share the joy with friends and family – these treats are best enjoyed together!