
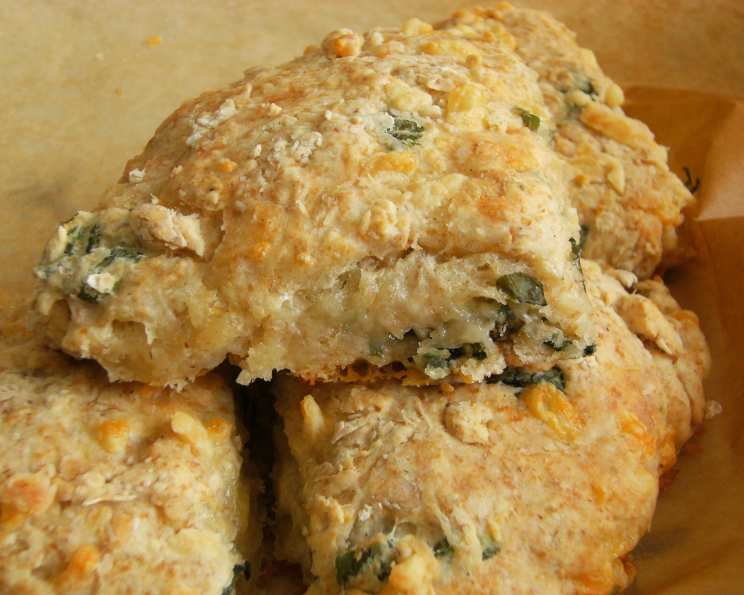
Cheese and Basil Giant Scones: A Savory Delight
My first encounter with these unexpectedly delightful scones was at a summer potluck, not long after I graduated culinary school. I was eager to show off my refined pastry skills, having spent weeks perfecting delicate croissants. Yet, it was a humble, slightly rustic-looking scone, radiating an enticing aroma of cheese and basil, that completely stole the show. Forget the fussy French pastries; this was honest, flavorful, and utterly satisfying. That day, I learned a valuable lesson: sometimes, the simplest things are the most memorable.
Recipe Overview
- Prep Time: 15 minutes
- Cook Time: 10-12 minutes
- Total Time: 32 minutes
- Servings: 12
- Yield: 2 large scones
- Dietary Type: Vegetarian
Ingredients
- 2 cups all-purpose flour, plus
- 1 tablespoon all-purpose flour
- ¼ cup freshly grated parmesan cheese or ¼ cup romano cheese
- 2 tablespoons chopped fresh basil or 2 teaspoons dried basil
- 2 teaspoons baking powder
- ½ teaspoon baking soda
- ¼ teaspoon fresh ground pepper
- ⅔ cup low-fat buttermilk (1-percent fat)
- 3 tablespoons extra virgin olive oil
- 1 tablespoon beaten eggs or 1 tablespoon egg substitute
Equipment Needed
- Cookie sheet
- Medium bowl
- Sharp knife
Instructions
-
Preheat your oven to 450 degrees Fahrenheit. This high temperature is crucial for achieving a golden-brown crust and a fluffy interior.
-
Prepare a cookie sheet with a generous amount of nonstick cooking spray. Ensure the entire surface is well-coated to prevent the scones from sticking. Parchment paper can also be used as an alternative.
-
In a medium bowl, combine the dry ingredients: 2 cups all-purpose flour, cheese (parmesan or romano), basil (fresh or dried), baking powder, baking soda, and fresh ground pepper. Whisk the ingredients together thoroughly to ensure even distribution of the leavening agents.
-
Add the wet ingredients: low-fat buttermilk and extra virgin olive oil. Mix the wet and dry ingredients only until the dry ingredients are moistened. Overmixing will result in tough scones. Some small lumps are perfectly acceptable.
-
Divide the dough into two equal balls.
-
Lightly flour a clean surface with the remaining 1 tablespoon of all-purpose flour. Gently knead each ball three times. The kneading should be minimal – just enough to bring the dough together. Avoid overworking it.
-
Place the kneaded dough balls onto the prepared cookie sheet. Pat each ball into a circle, approximately 7 to 8 inches in diameter. Aim for a uniform thickness to ensure even baking.
-
Using a sharp knife, score each disk ¼ inch deep into six wedges. Do not cut all the way through. Scoring allows the scones to break apart easily after baking.
-
Brush the tops of the disks with beaten egg (or egg substitute). This step contributes to a beautiful golden-brown finish.
-
Bake for 10 to 12 minutes, or until the scones are golden brown and cooked through. Keep a close eye on them towards the end of the baking time to prevent burning. A toothpick inserted into the center should come out clean.
-
Remove the scones from the oven and immediately cut each disk into six wedges while hot. This ensures clean and easy separation.
-
Serve warm or at room temperature.
Expert Tips & Tricks
- Cold Ingredients are Key: Using cold buttermilk and olive oil helps prevent the gluten in the flour from developing too much, resulting in a more tender scone. You can even chill your flour for 15 minutes before starting.
- Don’t Overmix: This is the golden rule of scone-making. Overmixing develops gluten, which leads to tough, dense scones. Mix just until the ingredients are combined.
- The “Drop Biscuit” Variation: If you’re short on time, skip the kneading and patting steps. Simply drop spoonfuls of the dough onto the prepared baking sheet for a more rustic, biscuit-like appearance.
- Make-Ahead Tip: You can prepare the dough ahead of time, shape it into disks, and store it in the refrigerator (wrapped tightly in plastic wrap) for up to 24 hours. Bake just before serving.
- Reheating Tip: To reheat leftover scones, wrap them in foil and warm them in a 350°F (175°C) oven for about 5-7 minutes, or until heated through.
Serving & Storage Suggestions
Serve these giant cheese and basil scones warm or at room temperature. They’re fantastic on their own as a snack or light meal. They also pair beautifully with soups, salads, or as a savory accompaniment to brunch. Leftovers can be stored in an airtight container at room temperature for up to 2 days, or in the refrigerator for up to 4 days. For longer storage, freeze them in a freezer-safe bag for up to 2 months. Reheat as described in the “Expert Tips & Tricks” section.
Nutritional Information
| Nutrient | Amount per Serving | % Daily Value |
|---|---|---|
| Calories | 124.7 kcal | N/A |
| Calories from Fat | 39g | 32% |
| Total Fat | 4.4 g | 6% |
| Saturated Fat | 1 g | 4% |
| Cholesterol | 6.9 mg | 2% |
| Sodium | 161.4 mg | 6% |
| Total Carbohydrate | 17.4 g | 5% |
| Dietary Fiber | 0.6 g | 2% |
| Sugars | 0.7 g | N/A |
| Protein | 3.6 g | 7% |
Note: Nutritional information is an estimate and may vary based on specific ingredients and preparation methods.
Variations & Substitutions
- Gluten-Free: Substitute a gluten-free all-purpose flour blend for the regular flour. Be sure to add a binder like xanthan gum if the blend doesn’t already contain it.
- Herby Heaven: Experiment with different herbs. Rosemary, thyme, or chives would all be delicious additions.
- Spicy Kick: Add a pinch of red pepper flakes to the dough for a little heat.
- Cheese Swap: Try using different types of cheese, such as cheddar, Gruyere, or feta.
- Dairy-Free: Use a dairy-free buttermilk alternative (mix plant-based milk with lemon juice or vinegar) and a dairy-free cheese substitute.
FAQs (Frequently Asked Questions)
Q: Can I use dried basil instead of fresh?
A: Yes, you can. Use 2 teaspoons of dried basil in place of the 2 tablespoons of fresh basil. Keep in mind that the flavor will be slightly more concentrated with dried herbs.
Q: Can I make these scones ahead of time and freeze them?
A: Absolutely! Prepare the scones up to the point of baking, then freeze them on the baking sheet. Once frozen solid, transfer them to a freezer bag. Bake directly from frozen, adding a few extra minutes to the baking time.
Q: What if I don’t have buttermilk?
A: You can make a simple buttermilk substitute by adding 1 tablespoon of lemon juice or white vinegar to a liquid measuring cup, then filling it with regular milk to reach ⅔ cup. Let it sit for 5 minutes before using.
Q: My scones are coming out dry. What am I doing wrong?
A: Overbaking or using too much flour can result in dry scones. Ensure you’re measuring your flour accurately (spooning and leveling) and that you’re not overbaking them. Start checking for doneness a minute or two before the recommended baking time.
Q: Can I add other ingredients to the dough?
A: Absolutely! Feel free to experiment with additions like sun-dried tomatoes, olives, or roasted red peppers.
Final Thoughts
These Cheese and Basil Giant Scones are more than just a recipe; they’re an invitation to experience the joy of simple, flavorful baking. Whether you’re a seasoned baker or just starting out, I encourage you to give this recipe a try. The aroma of cheese and basil filling your kitchen, the satisfyingly crumbly texture, and the delicious taste will undoubtedly make these scones a new favorite. Share them with friends and family, or simply savor them yourself – either way, I hope they bring a little bit of joy to your day! Let me know how they turn out – I’d love to hear about your baking adventures!