
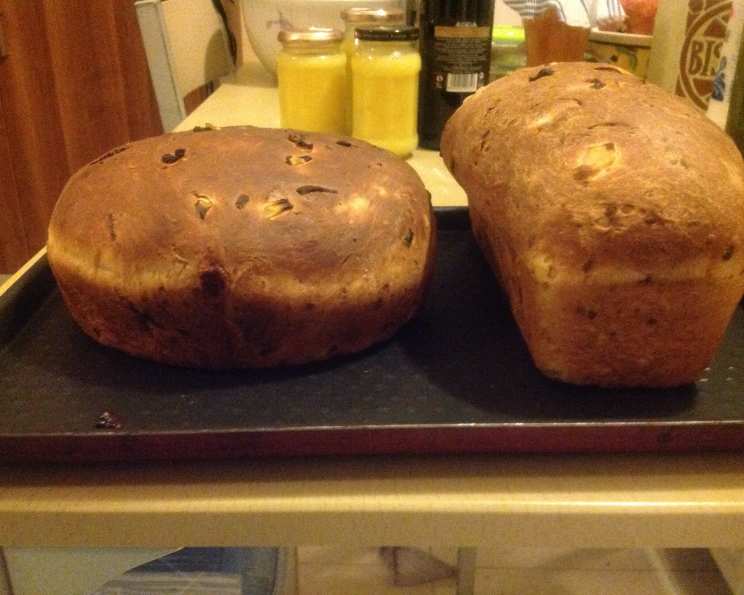
Cheese and Onion Bread: A Savory Slice of Comfort
The scent of baking bread has always transported me back to my grandmother’s kitchen. Her hands, weathered yet gentle, would knead dough with a rhythmic grace that seemed to infuse it with love. While she was known for her sweet rolls, my fondest memories are of her cheese and onion bread – a humble loaf that transformed into something extraordinary with the simple addition of sharp cheddar and pungent onions. The warm, cheesy aroma that filled the house on those baking days is a comfort I still crave. This recipe is my attempt to recreate that magic, to share a slice of that comforting memory with you.
Recipe Overview
- Prep Time: 20 minutes
- Rise Time: 1 hour 45 minutes
- Cook Time: 25-35 minutes
- Total Time: 3 hours 25 minutes
- Yields: 15 slices
- Dietary Type: Vegetarian
Ingredients
- 3 cups flour, plus more if needed
- 1 tablespoon active dry yeast
- 1 teaspoon salt
- 2 tablespoons sugar
- 1 cup milk, warmed
- 1 egg, beaten
- 1 cup sharp cheddar cheese, grated
- ½ cup onion, chopped
Equipment Needed
- Large mixing bowl
- Measuring cups and spoons
- Damp towel
- Loaf pan or baking tray
Instructions
- In a large mixing bowl, combine 1 cup of the flour with the active dry yeast, salt, and sugar.
- Pour in the warmed milk and mix well using a mixer on medium speed for 3 to 4 minutes. This creates a sponge, a pre-ferment that enhances flavor and texture.
- Let the mixture stand for about 10 minutes until it becomes bubbly, indicating that the yeast is active.
- Add the beaten egg, then the chopped onion and grated cheese to the mixture.
- Gradually add the remaining flour, mixing until the dough comes together and is only slightly sticky. You may need to adjust the amount of flour depending on the humidity and the type of flour used.
- Turn the dough out onto a lightly floured surface and knead for 5-7 minutes until smooth and elastic.
- Place the dough in a lightly oiled bowl, turning to coat. Cover the bowl with a damp towel and let it rise in a warm place for about 1 hour, or until doubled in size.
- Once the dough has doubled, punch it down to release the air.
- Shape the dough into a loaf or two smaller loaves. Place it in a greased loaf pan or onto a baking tray lined with parchment paper.
- Cover the shaped loaf with a damp towel and let it rise again for about 45 minutes, or until doubled in size.
- Preheat your oven to 350°F (175°C).
- Bake the loaf for 25 to 35 minutes, or until the crust is golden brown and the bottom sounds hollow when you tap on it. An internal temperature of 200°F (93°C) is ideal.
- Remove the bread from the oven and let it cool in the pan for a few minutes before transferring it to a wire rack to cool completely.
Expert Tips & Tricks
- Use quality ingredients: The better the cheese and onions, the better the bread will taste. Consider using a really sharp cheddar or even a blend of cheeses for a more complex flavor.
- Don’t overheat the milk: Milk that’s too hot can kill the yeast. It should be warm to the touch, but not scalding. Aim for around 110°F (43°C).
- The sponge method: This technique, used in this recipe, provides a more complex flavor and lighter texture to the bread. Don’t skip the 10-minute rest after mixing the first portion of flour with the milk, yeast, salt, and sugar.
- Adjust for humidity: On humid days, you may need to add more flour to prevent the dough from being too sticky. Add flour a tablespoon at a time until the dough reaches the desired consistency.
- Baking stone bonus: If you’re baking the loaf on a baking sheet instead of in a loaf pan, placing a baking stone in the oven preheating will give you a crispier crust.
- Egg wash: For an extra-golden crust, brush the top of the loaf with a beaten egg mixed with a tablespoon of milk before baking.
- Make ahead: The dough can be made ahead of time and stored in the refrigerator for up to 24 hours. This allows the flavors to develop even further. Just be sure to punch down the dough before shaping it.
- Troubleshooting: If the crust is browning too quickly, tent the loaf with aluminum foil during the last 10-15 minutes of baking.
Serving & Storage Suggestions
Serve this cheese and onion bread warm, sliced, and enjoyed on its own or with a pat of butter. It’s also fantastic as part of a sandwich or alongside a bowl of soup.
To store, wrap the cooled bread tightly in plastic wrap or place it in an airtight container. It will keep at room temperature for 2-3 days. For longer storage, freeze the bread for up to 2 months. To reheat, thaw the bread completely and then warm it in a 350°F (175°C) oven for about 10-15 minutes, or until heated through. You can also slice it and toast it.
Nutritional Information
| Nutrient | Amount per Serving | % Daily Value |
|---|---|---|
| Calories | 148 kcal | N/A |
| Total Fat | 3.7g | 5% |
| Saturated Fat | 2.1g | 10% |
| Cholesterol | 24mg | 8% |
| Sodium | 216mg | 8% |
| Total Carbohydrate | 23g | 7% |
| Dietary Fiber | 0.9g | 3% |
| Sugars | 2g | N/A |
| Protein | 6g | 11% |
Note: Nutritional information is an estimate and may vary based on specific ingredients and portion sizes.
Variations & Substitutions
- Gluten-Free: Substitute the all-purpose flour with a gluten-free blend designed for bread making. You may need to adjust the liquid slightly.
- Different Cheeses: Experiment with different types of cheese, such as Gruyere, pepper jack, or a smoked Gouda, for a unique flavor profile.
- Herb Infusion: Add fresh or dried herbs, such as rosemary, thyme, or oregano, to the dough for an extra layer of flavor. About a tablespoon of fresh herbs or a teaspoon of dried herbs should do the trick.
- Spice it Up: Add a pinch of red pepper flakes to the dough for a bit of heat.
- Onion Alternatives: If you’re not a fan of onions, try using chives or scallions instead. You can also caramelize the onions before adding them to the dough for a sweeter, more mellow flavor.
- Dairy-Free: Substitute the milk with a plant-based alternative like almond milk or soy milk. Use a dairy-free cheese alternative. Be aware that dairy-free cheese may not melt as well as traditional cheese.
FAQs (Frequently Asked Questions)
Q: Why is my bread dense and not rising properly?
A: Several factors can contribute to dense bread. Ensure your yeast is fresh and active. Also, make sure your milk isn’t too hot, as this can kill the yeast. Under-kneading or not allowing enough rise time can also result in dense bread.
Q: Can I use a different type of flour?
A: While all-purpose flour works well, you can substitute with bread flour for a chewier texture. White whole wheat flour can also be used for added nutritional value.
Q: How can I prevent the cheese from burning on top of the bread?
A: If the cheese is browning too quickly, tent the loaf with aluminum foil during the last 10-15 minutes of baking.
Q: Can I make this bread in a bread machine?
A: Yes, you can. Follow your bread machine’s instructions for adding ingredients and selecting the appropriate setting for a savory bread.
Q: How do I know when the bread is fully baked?
A: The bread is done when the crust is golden brown and the bottom sounds hollow when you tap on it. An internal temperature of 200°F (93°C) is also a good indicator.
Final Thoughts
This cheese and onion bread is more than just a recipe; it’s an invitation to create a warm and comforting memory in your own kitchen. Whether you’re a seasoned baker or just starting out, I encourage you to give this recipe a try. The simple act of baking can be incredibly rewarding, and the aroma of freshly baked bread is sure to bring a smile to everyone’s face. Experiment with different cheeses and herbs to create your own unique version. And most importantly, enjoy the process! I’d love to hear about your baking adventures and any variations you come up with. Consider pairing this bread with a hearty soup or a simple salad for a complete and satisfying meal. Happy baking!