
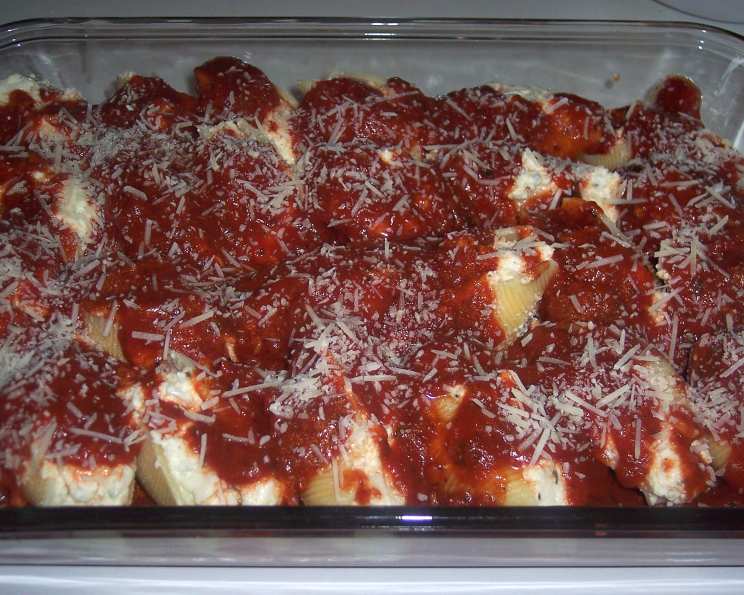
Cheese Filled Jumbo Shells: A Comfort Food Classic
My grandmother, Nonna Emilia, had a way of making even the simplest meals feel like a celebration. Her cheese-filled jumbo shells were a family favorite – each perfectly plump pasta pocket overflowing with a creamy, cheesy filling, swimming in a sea of her signature tomato sauce. The aroma alone could fill the entire house, drawing everyone to the table with eager anticipation. Every bite was a warm, comforting hug – a reminder of family, love, and the simple joys of life. I’m so excited to share my version of this recipe, adapted from a box of jumbo shells I found at the store.
Recipe Overview
- Prep Time: 20 minutes
- Cook Time: 45 minutes
- Total Time: 1 hour 5 minutes
- Servings: 10-12
- Yield: 1 baking dish
- Dietary Type: Vegetarian
Ingredients
- 1 (12 ounce) package jumbo pasta shells
- 4 cups ricotta cheese (I used light and it still tastes great!)
- 2 cups mozzarella cheese, shredded (I used a tomato mozzarella cheese for something different)
- ¾ cup Parmesan cheese, grated
- 3 eggs
- 1 tablespoon fresh parsley, chopped
- ¾ teaspoon dried oregano leaves
- ½ teaspoon salt
- ¼ teaspoon ground black pepper
- 3 cups spaghetti sauce (I used the same amount of tomato sauce and added tomato paste to thicken it up, and added seasonings)
Equipment Needed
- Large pot
- Colander
- Large mixing bowl
- 13×9 inch baking pan
- Aluminum foil
Instructions
-
Begin by cooking the jumbo pasta shells according to the package directions. Be careful not to overcook them, as they need to hold their shape for filling. They should be al dente – firm to the bite. Drain the cooked shells in a colander and gently rinse with cold water to stop the cooking process. Set aside to cool slightly.
-
While the pasta is cooking, prepare the cheese filling. In a large mixing bowl, combine the ricotta cheese, mozzarella cheese, Parmesan cheese, eggs, fresh parsley, dried oregano, salt, and black pepper. Mix well until all ingredients are thoroughly combined and the filling is smooth and homogenous. The eggs are critical in this recipe, as they bind the filling together during baking.
-
Once the pasta shells have cooled enough to handle, it’s time to fill them. Using a spoon, carefully fill each pasta shell with about 2 tablespoons of the cheese mixture. Make sure to pack the filling in gently, but firmly, so that the shells are nicely plump.
-
Preheat your oven to 350 degrees Fahrenheit (175 degrees Celsius). While the oven is heating, prepare the baking pan. Spread a thin layer of spaghetti sauce on the bottom of a 13×9 inch baking pan. This will prevent the pasta from sticking and add a layer of flavor to the bottom of the dish.
-
Arrange the filled pasta shells in the baking pan, placing them side-by-side in a single layer.
-
Pour the remaining spaghetti sauce over the pasta shells, ensuring that they are well-covered. This will keep the pasta moist and prevent it from drying out during baking.
-
If desired, sprinkle the top of the dish with additional Parmesan cheese for extra flavor and a golden-brown crust. This step is optional, but highly recommended for a beautiful finish.
-
Cover the baking pan tightly with aluminum foil. This will trap the steam and help the pasta cook evenly.
-
Bake in the preheated oven for about 35 minutes, or until the shells are hot and bubbly, and the cheese filling is melted and heated through.
-
Carefully remove the aluminum foil during the last 5 minutes of cooking to allow the top to brown slightly. Keep a close eye on it to prevent burning.
-
Remove the baking pan from the oven and let it rest for a few minutes before serving. This will allow the cheese filling to set slightly and make it easier to serve.
Expert Tips & Tricks
- Don’t overcook the pasta: Overcooked shells will be mushy and difficult to fill. Aim for al dente.
- Get creative with the cheese: Feel free to experiment with different types of cheese in the filling. Provolone, fontina, or even a little bit of crumbled goat cheese can add interesting flavors.
- Spice it up: Add a pinch of red pepper flakes to the cheese filling or the sauce for a little kick.
- Make-ahead magic: Assemble the dish ahead of time and store it in the refrigerator for up to 24 hours before baking. Add about 10-15 minutes to the baking time if baking from cold.
- Sauce consistency: If you find your sauce is too thin, simmer it on the stovetop for a few minutes to reduce it before pouring it over the pasta.
Serving & Storage Suggestions
Serve the cheese-filled jumbo shells hot, directly from the baking pan. Garnish with fresh basil or parsley for a pop of color. A side salad and some crusty bread make a perfect accompaniment.
Leftovers can be stored in an airtight container in the refrigerator for up to 3 days. To reheat, bake in a preheated oven at 350°F (175°C) until heated through, or microwave individual portions.
The baked shells can also be frozen for up to 2 months. Thaw completely in the refrigerator before reheating.
Nutritional Information
| Nutrient | Amount per Serving | % Daily Value |
|---|---|---|
| Calories | 453.1 kcal | N/A |
| Calories from Fat | 206 g | 46% |
| Total Fat | 22.9 g | 35% |
| Saturated Fat | 13.2 g | 66% |
| Cholesterol | 131.1 mg | 43% |
| Sodium | 635.1 mg | 26% |
| Total Carbohydrate | 34.9 g | 11% |
| Dietary Fiber | 2.2 g | 8% |
| Sugars | 4.9 g | 19% |
| Protein | 26 g | 51% |
Note: Nutritional information is an estimate and may vary based on specific ingredients and portion sizes.
Variations & Substitutions
- Meat Lovers: Add cooked ground beef, Italian sausage, or shredded chicken to the cheese filling for a heartier dish.
- Vegetarian Boost: Incorporate chopped vegetables like spinach, mushrooms, or zucchini into the filling for added nutrients and flavor.
- Gluten-Free: While difficult to find gluten-free jumbo shells, you can use gluten-free lasagna sheets, cut into squares, and roll them around the cheese mixture before baking.
- Vegan: To make this dish vegan, use vegan ricotta and mozzarella cheese substitutes, and replace the eggs with a flax egg (1 tablespoon ground flaxseed mixed with 3 tablespoons water, let sit for 5 minutes).
FAQs (Frequently Asked Questions)
Q: Can I use pre-made sauce to save time?
A: Absolutely! While homemade sauce adds a special touch, using a good quality store-bought sauce is perfectly acceptable. Just be sure to choose one that you enjoy the flavor of.
Q: What can I do if my cheese filling is too runny?
A: If your filling is too runny, add a tablespoon or two of breadcrumbs or additional Parmesan cheese to help absorb the excess moisture.
Q: Can I freeze the filled shells before baking?
A: Yes, you can freeze the filled shells before baking. Arrange them on a baking sheet lined with parchment paper and freeze until solid. Then, transfer them to a freezer-safe bag or container. When ready to bake, thaw completely in the refrigerator and bake as directed.
Q: How do I prevent the shells from drying out during baking?
A: Make sure to cover the shells completely with sauce and cover the baking dish tightly with aluminum foil. This will trap the steam and prevent the pasta from drying out.
Q: Can I use a different size baking dish?
A: You can, but you may need to adjust the baking time. A smaller dish will require a slightly longer baking time, while a larger dish may require a shorter baking time. Just be sure to check the internal temperature of the filling to ensure that it is heated through.
Final Thoughts
Cheese-filled jumbo shells are a truly satisfying dish that’s perfect for family dinners, potlucks, or any occasion where you want to serve up some comfort food goodness. Don’t be afraid to experiment with different flavors and variations to make this recipe your own. I encourage you to gather your ingredients, put on some music, and enjoy the process of creating this delicious meal. I would love to hear about your experiences and any variations you tried in the comments below! Buon appetito!