
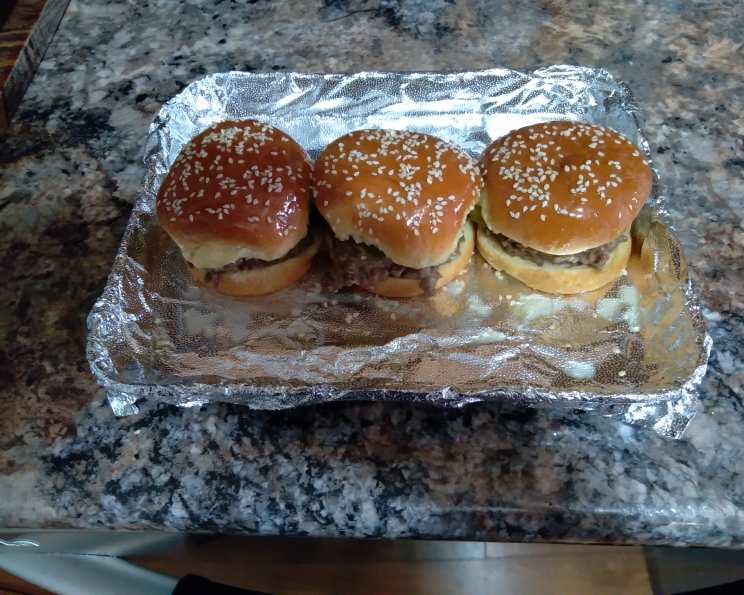
Cheese Mexi Melt: A Comfort Food Classic
The aroma of browning ground beef mingling with melting cheese – it’s a scent that instantly transports me back to childhood. I remember summer evenings, the screen door slamming shut as I raced inside, drawn by the promise of these simple, satisfying sandwiches. My mom would always make a big batch, and we’d devour them on the back porch, juice dribbling down our chins, utterly content. This Cheese Mexi Melt, while humble, is more than just a recipe; it’s a warm hug in a bun, a reminder of simpler times and shared meals.
Recipe Overview
- Prep Time: 5 minutes
- Cook Time: 30 minutes
- Total Time: 35 minutes
- Servings: 6-8 (depending on serving size)
- Yields: 6-8 sandwiches
- Dietary Type: Not Gluten-Free
Ingredients
- 1 lb ground beef
- Velveeta cheese, sliced
- American cheese or mild Mexican cheese, sliced
- Hamburger buns
Equipment Needed
- Large skillet or frying pan
- Spatula
- Lid for skillet
Instructions
- Begin by placing your large skillet or frying pan on the stovetop over medium-high heat. Add the ground beef and begin to brown it, breaking it apart with a spatula as it cooks.
- Once the ground beef is fully browned, carefully drain off any excess fat. This step is crucial to prevent the sandwiches from becoming greasy.
- Reduce the heat to low. Now, the cheesy goodness begins! Add slices of Velveeta cheese. The amount is entirely up to your preference – use as much or as little as you desire for the perfect cheese-to-meat ratio.
- Next, add slices of American cheese or a mild Mexican cheese blend. Again, tailor the quantity to your liking. The combination of Velveeta and another cheese adds depth and flavor to the melt.
- Once all the cheese has been added, place a lid on the skillet. This traps the heat and helps the cheese to melt evenly and quickly.
- Allow the cheese to melt completely, which should take approximately 5-10 minutes, depending on the heat and the thickness of the cheese slices. Stir occasionally to prevent sticking and to ensure the cheese melts uniformly.
- Once the cheese is melted and gooey, it’s time to assemble your Cheese Mexi Melts. Spoon the cheesy ground beef mixture onto the hamburger buns. Serve immediately and enjoy!
- We love serving these with Lay’s chips and cottage cheese!
Expert Tips & Tricks
- For extra flavor, consider adding a packet of taco seasoning to the ground beef while browning. This will give it a delicious Tex-Mex twist.
- Don’t overcrowd the pan with too much cheese at once. Add it in batches to ensure even melting.
- If you don’t have a lid for your skillet, you can use a large baking sheet to cover it temporarily.
- For a spicier kick, add a pinch of red pepper flakes or a dash of your favorite hot sauce to the ground beef mixture.
- Toasting the hamburger buns lightly before adding the filling will prevent them from becoming soggy and add a pleasant textural contrast.
- If you’re making a large batch, you can keep the cheesy ground beef mixture warm in a slow cooker on the “warm” setting until ready to serve.
- For a richer flavor, try using a blend of ground beef and ground pork.
Serving & Storage Suggestions
Serve these Cheese Mexi Melts immediately while the cheese is hot and melty. They are best enjoyed fresh.
- Leftovers: If you have any leftover cheesy ground beef mixture, store it in an airtight container in the refrigerator. It will keep for up to 3 days.
- Reheating: To reheat the leftovers, you can microwave them in short bursts, stirring occasionally, until heated through. Alternatively, you can reheat them in a skillet over low heat. Add a splash of water or beef broth to prevent them from drying out.
- Freezing: While not ideal, you can freeze the cheesy ground beef mixture for up to 2 months. Thaw it in the refrigerator overnight before reheating. Be aware that the texture of the cheese may change slightly after freezing and thawing.
- Reheating Assembled Sandwiches: We do not recommend storing already-assembled sandwiches. Buns will become soggy and unappetizing.
Nutritional Information
(Estimated values; will vary based on specific ingredients and serving size)
| Nutrient | Amount per Serving | % Daily Value |
|---|---|---|
| Calories | 450 kcal | 23% |
| Total Fat | 30g | 46% |
| Saturated Fat | 15g | 75% |
| Cholesterol | 100mg | 33% |
| Sodium | 800mg | 35% |
| Total Carbohydrate | 25g | 8% |
| Dietary Fiber | 2g | 8% |
| Sugars | 5g | |
| Protein | 25g | 50% |
Variations & Substitutions
- Spicy Melt: Add diced jalapeños or a can of diced green chilies to the ground beef mixture for a spicy kick.
- Pizza Melt: Add a jar of your favorite pizza sauce and some pepperoni slices to the ground beef mixture for a pizza-inspired melt.
- Vegetarian Melt: Substitute the ground beef with a plant-based ground meat alternative or cooked lentils.
- Different Cheese: Experiment with different cheese combinations, such as cheddar, Monterey Jack, or provolone.
- Toppings: Add your favorite burger toppings, such as lettuce, tomato, onion, pickles, or avocado.
- Bun Variations: Use pretzel buns, brioche buns, or even Texas toast instead of hamburger buns.
FAQs (Frequently Asked Questions)
Q: Can I use a different type of ground meat?
A: Absolutely! Ground turkey or ground chicken would also work well in this recipe. Just be sure to adjust the cooking time accordingly.
Q: Can I make this ahead of time?
A: You can brown the ground beef and melt the cheese ahead of time and store it in the refrigerator. However, it’s best to assemble the sandwiches just before serving to prevent the buns from getting soggy.
Q: What kind of cheese is best for melting?
A: Velveeta is known for its excellent melting properties, but other good options include American cheese, cheddar cheese, Monterey Jack cheese, and provolone cheese.
Q: Can I add vegetables to this?
A: Definitely! Diced onions, bell peppers, or mushrooms would be a great addition to the ground beef mixture.
Q: How do I prevent the cheese from burning?
A: Keep the heat on low and stir the mixture occasionally while the cheese is melting. This will help to prevent the cheese from sticking and burning.
Final Thoughts
This Cheese Mexi Melt is a simple yet incredibly satisfying recipe that’s perfect for a quick weeknight meal or a casual gathering. It’s a versatile dish that can be easily customized to your liking, so don’t be afraid to experiment with different ingredients and flavors. I encourage you to give this recipe a try and share your feedback! And remember, these melts pair perfectly with a side of crispy fries, a refreshing salad, or your favorite cold beverage. Enjoy!