
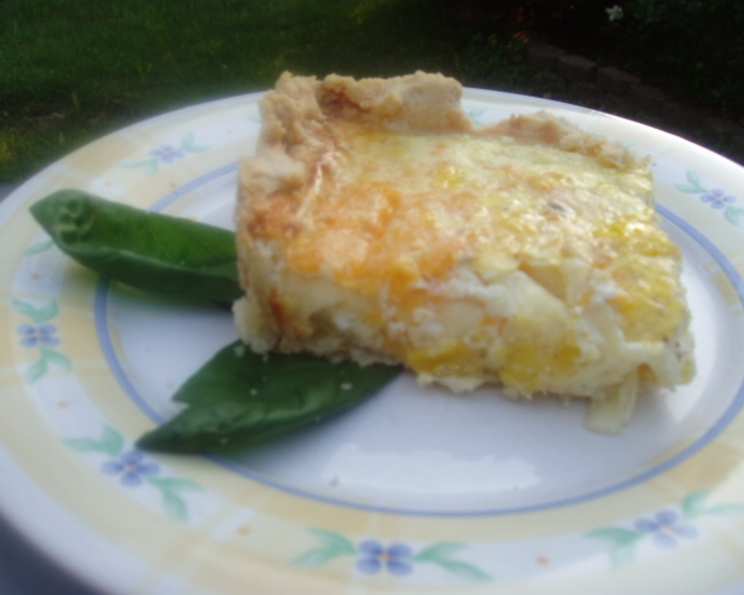
The Quintessential Cheese Quiche: A Slice of Comfort
I can almost smell it now – the delicate aroma of warm, buttery crust mingling with the savory scent of cheese and nutmeg. Cheese quiche wasn’t just a dish in my childhood home; it was an event. Every Christmas morning, as the rest of the world unwrapped presents, my family gathered around the table for a leisurely brunch, and the centerpiece was always a golden-brown cheese quiche, its creamy filling practically begging to be devoured. It wasn’t fancy, but it was perfect – a simple, satisfying reminder of togetherness and the joy of good food.
Recipe Overview
- Prep Time: 20 minutes
- Cook Time: 30-40 minutes
- Total Time: 50-60 minutes
- Servings: 4-6
- Yield: 1 pie
- Dietary Type: Vegetarian
Ingredients
- 1 9-inch pie shell, pre-made or homemade
- 1 egg yolk, beaten
- 1 1/2 cups shredded cheddar cheese or shredded Swiss cheese
- 1 cup heavy cream
- 3 eggs
- 1/2 small onion, grated
- 1/8 teaspoon ground nutmeg
- 1/2 teaspoon salt
- 1/4 teaspoon pepper
Equipment Needed
- 9-inch pie dish
- Whisk
- Mixing bowl
- Grater
- Oven
Instructions
-
Preheat your oven to 375°F (190°C). Bake the pie shell until it’s lightly golden and set. This might take around 10-15 minutes, but keep a close eye on it to prevent burning. You can also use a pre-baked pie shell to save time.
-
While the pie shell is still warm from the oven, brush it evenly with the beaten egg yolk. This step acts as a sealant, preventing the filling from soaking into the crust and making it soggy.
-
Sprinkle the shredded cheese evenly across the bottom of the prepared pie crust. Ensure it’s distributed well for a consistent cheesy flavor in every slice. You can use either cheddar or swiss cheese, or even a mix of both for a more complex flavor profile.
-
In a medium-sized mixing bowl, whisk together the heavy cream, eggs, grated onion, ground nutmeg, salt, and pepper until well combined and no streaks of egg white remain. Whisking thoroughly is key to achieving a smooth, creamy filling.
-
Pour the egg mixture carefully and evenly over the cheese in the pastry shell. Avoid overfilling the shell, leaving about 1/4 inch of space at the top.
-
Bake in the preheated oven until the filling is puffed up around the edges and a knife inserted into the center comes out clean, approximately 30 to 40 minutes. If the crust starts to brown too quickly, you can loosely tent the quiche with foil during the last 10-15 minutes of baking.
-
Let the quiche stand for 10 minutes before slicing and serving. This allows the filling to set up a bit more and makes it easier to cut clean slices.
Expert Tips & Tricks
- Preventing a Soggy Crust: Blind baking the crust and brushing it with egg yolk are crucial steps to keep the crust crisp. For an extra layer of protection, you can also brush the crust with a thin layer of melted butter or chocolate (for a sweet quiche!).
- Flavor Boost: Sautéing the grated onion in a little butter before adding it to the egg mixture will mellow its flavor and add a touch of sweetness. You can also add other vegetables like mushrooms, spinach, or bell peppers, but be sure to sauté them first to remove excess moisture.
- Even Baking: To ensure even baking, place the quiche on the center rack of the oven. If your oven tends to bake unevenly, rotate the quiche halfway through the baking time.
- The Perfect Nutmeg Note: Don’t be shy with the nutmeg! It adds a warm, comforting flavor that complements the cheese beautifully. However, a little goes a long way, so start with the recommended amount and adjust to your taste.
- Make-Ahead Magic: You can prepare the quiche filling ahead of time and store it in the refrigerator for up to 24 hours. Just whisk it again before pouring it into the crust. You can also bake the quiche ahead of time and reheat it gently in the oven or microwave before serving.
Serving & Storage Suggestions
This cheese quiche is delicious served warm or at room temperature. It makes a wonderful brunch dish, a light lunch, or a satisfying dinner. Pair it with a simple green salad, a bowl of soup, or a side of roasted vegetables.
Leftover quiche can be stored in the refrigerator for up to 3-4 days. To reheat, you can microwave individual slices for a quick and easy meal, or reheat the entire quiche in a preheated oven at 350°F (175°C) until warmed through. You can also freeze the quiche for longer storage. Wrap it tightly in plastic wrap and then in aluminum foil, and it will keep for up to 2-3 months. Thaw it overnight in the refrigerator before reheating.
Nutritional Information
| Nutrient | Amount per Serving | % Daily Value |
|---|---|---|
| Calories | 550 kcal | 28% |
| Total Fat | 40g | 62% |
| Saturated Fat | 25g | 125% |
| Cholesterol | 250mg | 83% |
| Sodium | 700mg | 29% |
| Total Carbohydrate | 20g | 7% |
| Dietary Fiber | 1g | 4% |
| Sugars | 2g | N/A |
| Protein | 20g | 40% |
Nutritional information is an estimate and may vary based on specific ingredients and portion sizes.
Variations & Substitutions
- Crustless Quiche: For a lighter, gluten-free option, skip the crust altogether! Simply grease a pie dish and pour the filling directly into it. Reduce the baking time by about 10 minutes.
- Gluten-Free Crust: Use a store-bought or homemade gluten-free pie crust.
- Dairy-Free Quiche: Substitute the heavy cream with full-fat coconut milk or a dairy-free cream alternative. Use dairy-free cheese or omit it altogether.
- Vegetable Medley: Add sautéed vegetables like mushrooms, spinach, asparagus, bell peppers, or broccoli for a heartier and more nutritious quiche.
- Meat Lover’s Quiche: Incorporate cooked bacon, ham, sausage, or shredded chicken for a protein boost.
- Spice It Up: Add a pinch of red pepper flakes or a dash of hot sauce for a spicy kick.
FAQs (Frequently Asked Questions)
Q: Can I use milk instead of heavy cream?
A: While you can use milk, the quiche won’t be as rich and creamy. Heavy cream provides a luxurious texture that’s hard to replicate.
Q: How do I prevent the quiche from cracking?
A: Avoid overbaking the quiche. Once the filling is set and a knife inserted in the center comes out clean, it’s done. Letting it cool slowly also helps prevent cracking.
Q: Can I freeze the leftover quiche?
A: Yes, you can freeze leftover quiche. Wrap it tightly in plastic wrap and then in aluminum foil for best results. Thaw overnight in the refrigerator before reheating.
Q: What kind of cheese is best for quiche?
A: Cheddar and Swiss are classic choices, but you can use any cheese that melts well, such as Gruyere, Monterey Jack, or even a blend of cheeses.
Q: How do I know when the quiche is done?
A: The quiche is done when the filling is puffed up around the edges and a knife inserted in the center comes out clean. It should also be slightly wobbly, but not liquid.
Final Thoughts
Now that you have the secrets to creating the perfect cheese quiche, it’s time to gather your ingredients, preheat your oven, and embark on this culinary adventure. Whether you’re making it for a special occasion or a simple weeknight meal, this recipe is sure to impress. Don’t be afraid to experiment with different flavors and ingredients to create your own signature quiche. And most importantly, enjoy the process and savor every delicious bite! Feel free to share your quiche creations and feedback! This dish is a blank canvas ready to become your masterpiece.