
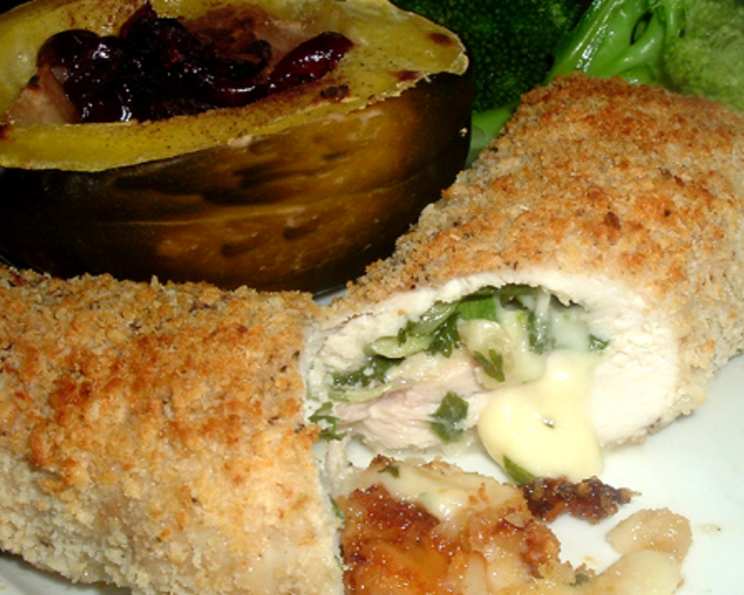
Cheese-Stuffed Chicken Breasts: A Culinary Comfort Classic
My grandmother, bless her heart, wasn’t the most adventurous cook. But she had a handful of dishes she absolutely nailed, and this cheese-stuffed chicken was one of them. I remember being a kid, the anticipation building as the aroma of melting cheese and savory herbs filled her cozy kitchen. Each bite was a symphony of textures – the crisp, golden crust giving way to tender chicken and a molten cheese core. It was simple comfort food, elevated by her loving touch, and it always felt like a special occasion.
Recipe Overview
- Prep Time: 20 minutes
- Cook Time: 30-35 minutes
- Total Time: 50-55 minutes
- Servings: 4
- Yield: 4 chicken breasts
- Dietary Type: Not Gluten-Free
Ingredients
- 1 teaspoon dried parsley flakes
- 1⁄8 teaspoon salt
- 1⁄8 teaspoon pepper
- 1⁄8 teaspoon garlic powder
- 4 boneless chicken breasts, pounded to 1/4-inch thickness and frozen for 15-20 minutes for ease in handling
- 4 slices Swiss cheese
- 1⁄4 cup all-purpose flour
- 1⁄2 cup seasoned dry bread crumbs
- 2 tablespoons grated Parmesan cheese
- 1⁄8 teaspoon salt
- 1⁄8 teaspoon pepper
- 2 eggs, slightly beaten
- Crisco nonstick cooking spray
Equipment Needed
- Small mixing bowl
- Shallow dishes for dredging
- 9 x 9 x 2-inch baking pan
- Meat mallet (for pounding chicken)
Instructions
-
Preheat your oven to 375ºF (190°C). Make sure your oven rack is positioned in the center.
-
In a small mixing bowl, combine the dried parsley flakes, 1/8 teaspoon salt, 1/8 teaspoon pepper, and 1/8 teaspoon garlic powder. Mix well to ensure even distribution of the seasonings. This herbaceous blend will add a delightful aromatic layer to your chicken.
-
Set the parsley flake mixture aside. This is your flavor bomb that will elevate the stuffed chicken.
-
Place one slice of Swiss cheese in the center of each chicken breast. Remember that the chicken breasts should already be pounded to 1/4-inch thickness and have been in the freezer for 15-20 minutes to firm up, making them easier to handle and roll.
-
Top each slice of Swiss cheese with one-fourth of the parsley flake mixture, distributing it evenly over the cheese. This ensures that every bite is bursting with flavor.
-
Starting at the narrow edge, carefully roll each chicken breast tightly. As you roll, gently tuck in the sides to fully enclose the cheese and onion mixture. Securing the contents is key to prevent cheese from leaking during baking.
-
Place the all-purpose flour in a shallow dish. Dredge each rolled chicken breast in the flour, ensuring that it’s completely coated. This will help the egg mixture adhere better and create a beautiful golden crust.
-
In a separate small bowl, combine the seasoned dry bread crumbs, grated Parmesan cheese, 1/8 teaspoon salt, and 1/8 teaspoon pepper. Mix thoroughly to create a flavorful coating.
-
In another shallow dish, pour the 2 eggs that have been slightly beaten.
-
Dip each rolled chicken breast in the beaten egg, allowing any excess to drip off. Make sure the entire roll is coated with the egg.
-
Immediately transfer the egg-coated chicken breast to the breadcrumb mixture. Press gently to ensure the breadcrumbs adhere evenly and completely coat the chicken. The breadcrumbs provide that satisfying crunch and golden hue.
-
Spray a 9 x 9 x 2-inch baking pan with Crisco nonstick cooking spray. This prevents the chicken from sticking and ensures easy cleanup.
-
Generously spray each of the coated chicken breasts with Crisco nonstick cooking spray and arrange them in the prepared pan. This helps them to achieve a beautiful golden-brown color.
-
Bake for 30 to 35 minutes, or until the chicken is cooked through and golden brown. To ensure doneness, use a meat thermometer inserted into the thickest part of the chicken; it should register 165°F (74°C). If the chicken is browning too quickly, you can loosely tent the pan with foil for the last 10 minutes of baking.
Expert Tips & Tricks
- Pounding the Chicken: Pounding the chicken to an even thickness is crucial for even cooking. It also makes it easier to roll. If you don’t have a meat mallet, you can use a rolling pin or even the bottom of a heavy pan.
- Freezing the Chicken: Freezing the chicken breasts for a short period makes them much easier to handle and roll. They won’t slip and slide as much.
- Cheese Leakage: To minimize cheese leakage, ensure the chicken is tightly rolled and the sides are well-tucked.
- Breadcrumb Adhesion: Press the breadcrumbs firmly onto the chicken to ensure they adhere well. You can also chill the breaded chicken breasts in the refrigerator for 15-20 minutes before baking; this helps the breadcrumbs set.
- Adding Ham: For a Cordon Bleu variation, add a thin slice of ham along with the Swiss cheese before rolling.
- Flavor Boost: Experiment with different cheeses and herbs. Provolone, mozzarella, or Gruyere would also work well. Try adding some chopped fresh rosemary or thyme to the parsley flake mixture.
- Make-Ahead Tip: You can assemble the chicken breasts ahead of time and store them in the refrigerator (covered) for up to 24 hours before baking. Add the breadcrumb coating right before baking to ensure the crust stays crisp.
Serving & Storage Suggestions
Serve these cheese-stuffed chicken breasts immediately after baking for the best flavor and texture. They pair beautifully with a simple side salad, roasted vegetables (like asparagus or broccoli), or mashed potatoes.
Leftovers can be stored in an airtight container in the refrigerator for up to 3 days. To reheat, bake in a preheated oven at 350°F (175°C) until heated through, or microwave on medium power. Be aware that microwaving may cause the crust to soften. For best results, reheat in the oven to maintain crispness. Freezing is not recommended as it can affect the texture of the chicken and cheese.
Nutritional Information
| Nutrient | Amount per Serving | % Daily Value |
|---|---|---|
| Calories | 490 kcal | N/A |
| Calories from Fat | 227 g | 46% |
| Total Fat | 25.3 g | 38% |
| Saturated Fat | 10.3 g | 51% |
| Cholesterol | 226.7 mg | 75% |
| Sodium | 628.1 mg | 26% |
| Total Carbohydrate | 18.2 g | 6% |
| Dietary Fiber | 1 g | 4% |
| Sugars | 1.5 g | 5% |
| Protein | 44.9 g | 89% |
Variations & Substitutions
- Gluten-Free: Use gluten-free bread crumbs and a gluten-free flour blend for dredging.
- Cheese Variations: Experiment with different cheeses like mozzarella, provolone, or Gruyere.
- Herb Variations: Add fresh herbs like rosemary, thyme, or oregano to the parsley flake mixture.
- Spicy Kick: Add a pinch of red pepper flakes to the parsley flake mixture for a hint of heat.
- Vegetarian Option: While this recipe is inherently not vegetarian, you could potentially adapt it using firm tofu “breasts” in place of chicken, but the flavor profile would be significantly different.
FAQs (Frequently Asked Questions)
Q: Can I prepare these ahead of time?
A: Yes, you can assemble the chicken breasts, dredge in flour, dip in egg, and then cover with breadcrumbs. Store them in the refrigerator for up to 24 hours before baking.
Q: How do I prevent the cheese from leaking out?
A: Make sure to roll the chicken breasts tightly and tuck in the sides securely. You can also chill the breaded chicken breasts in the refrigerator for a short time before baking to help the breadcrumbs set.
Q: How do I know when the chicken is done?
A: The chicken is done when a meat thermometer inserted into the thickest part registers 165°F (74°C). The chicken should also be golden brown on the outside.
Q: Can I use different types of cheese?
A: Absolutely! Swiss, mozzarella, provolone, and Gruyere are all great options. Choose your favorite cheese or experiment with different combinations.
Q: Can I freeze the leftovers?
A: Freezing is not recommended as it can affect the texture of the chicken and cheese, making it less appealing upon reheating.
Final Thoughts
This cheese-stuffed chicken breast recipe is a true crowd-pleaser, perfect for a weeknight dinner or a special occasion. It’s simple to make, satisfying to eat, and endlessly adaptable to your personal preferences. Don’t be afraid to experiment with different cheeses, herbs, and seasonings to create your own signature version. I encourage you to give this recipe a try and share your creations and feedback with me. Pair it with a crisp white wine for a truly delightful meal. Happy cooking!