
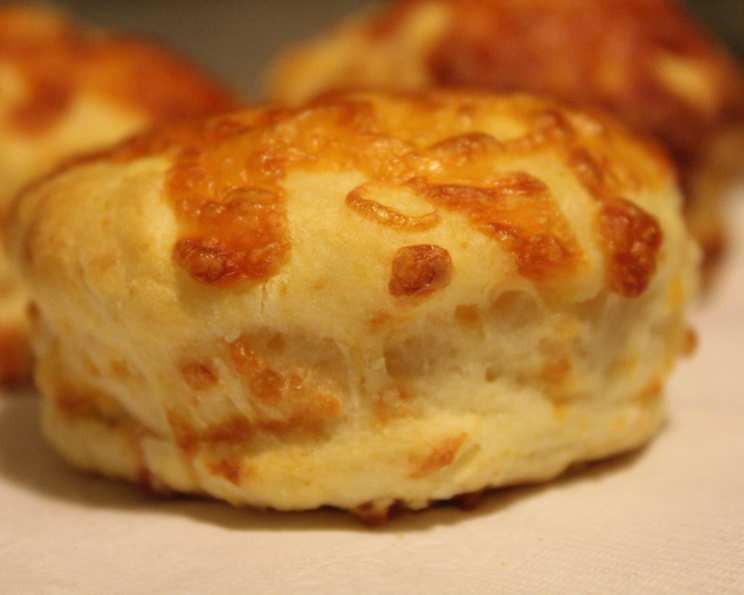
Cheese Tea Biscuits: A Taste of Home
There’s something utterly comforting about a warm biscuit, fresh from the oven. I remember my grandmother, apron dusted with flour, always had a batch ready when we visited. The aroma alone was enough to make you feel loved and welcome. Though she usually made them plain, occasionally, she’d surprise us with a batch of these cheese biscuits. The sharp cheddar mingling with the soft, crumbly texture was an absolute treat, a little bite of cheesy sunshine that made every cup of tea feel like a special occasion. To this day, that smell transports me straight back to her kitchen.
Recipe Overview
- Prep Time: 15 minutes
- Cook Time: 12-15 minutes
- Total Time: 27-30 minutes
- Yields: 18-20 biscuits
- Dietary Type: Vegetarian
Ingredients
- 2 1⁄4 cups all-purpose flour
- 4 teaspoons baking powder
- 1 teaspoon salt
- 2 cups cheddar cheese, grated (optional)
- 1⁄2 cup shortening, cut up
- 1 cup milk
Equipment Needed
- Large mixing bowl
- Measuring cups and spoons
- Pastry blender or fork (optional, for cutting in shortening)
- Lightly floured surface
- Rolling pin
- Biscuit cutter or floured glass
- Baking sheet
Instructions
-
Preheat your oven to 450°F (232°C). It’s important to have a hot oven for these biscuits to rise properly.
-
In a large mixing bowl, sift and measure the all-purpose flour. Sifting ensures a lighter, more tender biscuit.
-
Add the baking powder and salt to the flour. Whisk these dry ingredients together to ensure they are evenly distributed. This helps the biscuits rise uniformly.
-
If you’re making cheese biscuits, now is the time to stir in the grated cheddar cheese. Gently fold it into the flour mixture until it’s well combined. The cheese adds a lovely flavor and texture.
-
Cut up the shortening into small pieces and add them to the flour mixture.
-
Using a pastry blender or your fingertips, cut the shortening into the flour until the mixture resembles coarse crumbs. You can also pulse the flour and shortening in a food processor for about 10 seconds. The key is to keep the shortening cold. If it gets too warm, the biscuits will be greasy and not rise as well.
-
Pour in the milk.
-
Mix until the dough just comes together and is slightly sticky. Be careful not to overmix! Overmixing develops the gluten in the flour, resulting in tough biscuits. A few streaks of flour are okay.
-
Turn the dough out onto a lightly floured surface.
-
Knead the dough gently 8-10 times. This helps to bring the dough together and create a slightly smoother texture. Don’t over-knead it.
-
Roll out or pat the dough until it’s about half an inch thick. Use a rolling pin for a more even thickness.
-
Cut out the biscuits using a floured biscuit cutter or a floured glass. Dip the cutter in flour each time to prevent sticking. Press straight down and avoid twisting the cutter, as this seals the edges and prevents the biscuits from rising properly.
-
Place the biscuits on an ungreased baking sheet, leaving a small space between them.
-
Bake for 12-15 minutes, or until they are light golden brown. Keep an eye on them, as oven temperatures can vary. The biscuits are done when they are puffed up and golden brown on top and the bottoms are lightly browned.
Expert Tips & Tricks
- For extra flaky biscuits, chill the shortening and milk before using.
- If you don’t have shortening, you can substitute cold butter, cut into small pieces.
- Brush the tops of the biscuits with melted butter or milk before baking for a richer flavor and golden color.
- To achieve a higher rise, place the cut biscuits close together on the baking sheet.
- For softer sides, bake the biscuits with a little space between them.
- If you want to make these ahead of time, you can prepare the dough, cut out the biscuits, and freeze them on a baking sheet. Once frozen, transfer them to a freezer bag. When ready to bake, place them directly on a baking sheet and bake as directed, adding a few extra minutes to the baking time.
Serving & Storage Suggestions
Serve these cheese tea biscuits warm, straight from the oven. They are delicious with butter, jam, honey, or even as a side to a savory soup or stew.
Store leftover biscuits in an airtight container at room temperature for up to 2 days. For longer storage, refrigerate them for up to a week or freeze them for up to 2 months. To reheat, warm them in a preheated oven at 350°F (175°C) for a few minutes, or microwave them for a short time.
Nutritional Information
| Nutrient | Amount per Serving | % Daily Value |
|---|---|---|
| Calories | 116.4 kcal | N/A |
| Calories from Fat | 57 kcal | 49% |
| Total Fat | 6.3 g | 9% |
| Saturated Fat | 1.8 g | 8% |
| Cholesterol | 1.9 mg | 0% |
| Sodium | 216.8 mg | 9% |
| Total Carbohydrate | 12.8 g | 4% |
| Dietary Fiber | 0.4 g | 1% |
| Sugars | 0 g | 0% |
| Protein | 2.1 g | 4% |
Variations & Substitutions
- Herb & Garlic: Add 1-2 tablespoons of chopped fresh herbs (such as rosemary, thyme, or chives) and 1 teaspoon of garlic powder to the flour mixture.
- Jalapeño Cheddar: Add 1-2 finely chopped jalapeños (seeds removed for less heat) along with the cheddar cheese.
- Sweet Biscuits: Reduce the salt to 1/2 teaspoon and add 2-3 tablespoons of sugar to the flour mixture. Consider adding a touch of cinnamon or nutmeg.
- Gluten-Free: Use a gluten-free all-purpose flour blend instead of regular flour. You may need to add a little extra milk to achieve the right consistency.
- Vegan: Substitute the milk with your favorite non-dairy milk (such as almond, soy, or oat milk) and use vegan shortening or chilled vegan butter. You can also use a vegan cheddar cheese alternative.
FAQs (Frequently Asked Questions)
Q: Can I use self-rising flour instead of all-purpose flour and baking powder?
A: Yes, you can. Omit the baking powder and salt from the recipe if using self-rising flour.
Q: My biscuits are flat and dense. What did I do wrong?
A: This is often caused by overmixing the dough or using warm ingredients. Make sure to use cold ingredients and mix only until just combined.
Q: Can I make these biscuits without cheese?
A: Absolutely! Simply omit the cheese from the recipe for a more traditional tea biscuit.
Q: How do I prevent the biscuits from sticking to the baking sheet?
A: Use an ungreased baking sheet. Alternatively, you can line it with parchment paper or a silicone baking mat.
Q: Can I use a stand mixer to make the dough?
A: Yes, you can. Use the paddle attachment and mix on low speed to avoid overmixing.
Final Thoughts
I hope you enjoy these cheese tea biscuits as much as I do. They are a simple yet satisfying treat that’s perfect for any occasion. Whether you serve them with a cup of tea, a bowl of soup, or simply enjoy them on their own, I’m sure they’ll become a family favorite. Don’t be afraid to experiment with different variations and make them your own. And if you have any tips or tricks of your own, I’d love to hear them! Happy baking!