
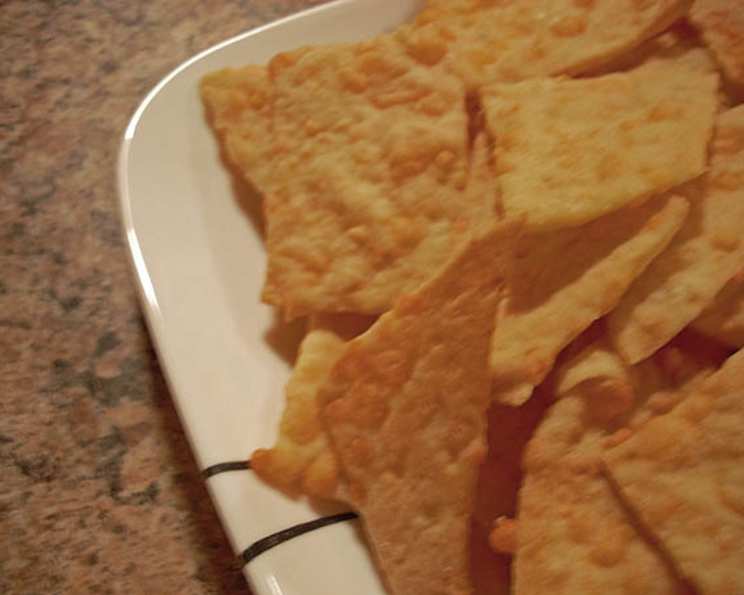
Cheese Thins: A Culinary Journey
I’ll never forget the first time I tasted these crispy cheese thins. My grandmother, a woman whose kitchen always smelled of warm spices and comforting secrets, would make them every year for our family’s holiday gatherings. The aroma alone—sharp cheddar mingling with a hint of cayenne—was enough to make my mouth water. Watching her carefully roll out the dough, so thin you could almost see through it, was mesmerizing. Each batch was a testament to her love and a tradition I’ve proudly carried on in my own kitchen.
Recipe Overview
- Prep Time: 30 minutes
- Cook Time: 10 minutes
- Total Time: 40 minutes
- Yields: 32 wedges
- Dietary Type: Vegetarian
Ingredients
- 500 ml all-purpose flour
- 250 ml grated sharp cheddar cheese
- 15 ml granulated sugar
- 2 ml baking soda
- 2 ml salt
- 1 ml onion powder
- ½ ml cayenne pepper (Adjust to taste for heat preference)
- 60 ml cooking oil (Vegetable or canola oil works well)
- 125 ml water
Equipment Needed
- Large mixing bowl
- Measuring cups and spoons
- Rolling pin
- Baking sheets
- Pizza cutter or knife
- Wire rack
Instructions
- Combine Dry Ingredients: In a large mixing bowl, measure and combine the all-purpose flour, grated sharp cheddar cheese, granulated sugar, baking soda, salt, onion powder, and cayenne pepper.
- Incorporate Wet Ingredients: Stir the dry ingredients thoroughly to ensure they are well mixed. Add the cooking oil and water to the bowl.
- Form the Dough: Mix the ingredients until a dough forms that you can shape into a ball. The dough might seem a little dry at first, but it will come together as you mix.
- Rest the Dough: Cover the dough and let it stand for 20 minutes. This allows the gluten to relax, making it easier to roll out.
- Divide the Dough: After resting, divide the dough into 4 equal portions. This makes it more manageable to roll out thinly.
- Roll Out the Dough: On a lightly floured surface, roll out one portion of the dough until it’s paper-thin. The thinner you roll it, the crispier the cheese thins will be.
- Cut into Wedges: Using a pizza cutter or sharp knife, cut the rolled-out dough into 8 wedges.
- Arrange on Baking Sheet: Carefully arrange the wedges on an ungreased baking sheet, leaving a little space between each wedge.
- Bake: Bake in a preheated oven at 375°F (190°C) for about 10 minutes, or until the cheese thins are browned and crisp. Keep a close eye on them, as they can burn quickly.
- Repeat: Repeat the rolling, cutting, and baking process for the remaining portions of dough.
- Cool: Once baked, transfer the cheese thins to a wire rack to cool completely. This will help them retain their crispness.
Expert Tips & Tricks
- Cheese Choice: While sharp cheddar provides the best flavor, experiment with other hard cheeses like Gruyere or Parmesan for different flavor profiles.
- Spice Level: Adjust the amount of cayenne pepper to suit your preferred heat level. A pinch of smoked paprika can also add a delicious smoky dimension.
- Rolling Technique: For even thinner cheese thins, roll the dough between two sheets of parchment paper. This prevents sticking and makes it easier to achieve a uniform thickness.
- Baking Time: Baking time can vary depending on your oven. Start checking for doneness around 8 minutes and adjust accordingly. The edges should be golden brown.
- Make-Ahead Tip: The dough can be made ahead of time and stored in the refrigerator for up to 2 days. Bring it to room temperature before rolling out.
- Troubleshooting: If the dough is too dry, add a teaspoon of water at a time until it comes together. If it’s too sticky, add a little more flour.
Serving & Storage Suggestions
Serve these delightful cheese thins as a snack, appetizer, or alongside soups and salads. They are especially delicious with dips like a creamy dill dip, French onion dip, or even a simple hummus.
To store, place the cooled cheese thins in an airtight container at room temperature. They will stay crisp for up to 3 days. For longer storage, you can freeze them in a single layer on a baking sheet, then transfer them to a freezer bag. They can be reheated in a low oven (250°F or 120°C) for a few minutes to restore their crispness.
Nutritional Information
| Nutrient | Amount per Serving | % Daily Value |
|---|---|---|
| Calories | 74 kcal | 4% |
| Total Fat | 4.2 g | 6% |
| Saturated Fat | 1.8 g | 9% |
| Cholesterol | 7.9 mg | 2% |
| Sodium | 92.8 mg | 4% |
| Total Carbohydrate | 6.2 g | 2% |
| Dietary Fiber | 0.2 g | 1% |
| Sugars | 0.1 g | 0% |
| Protein | 2.7 g | 5% |
Note: Nutritional information is an estimate and may vary based on specific ingredients and portion sizes.
Variations & Substitutions
- Gluten-Free: Substitute the all-purpose flour with a gluten-free all-purpose blend. Add a teaspoon of xanthan gum for better texture.
- Herbed Cheese Thins: Add dried herbs like rosemary, thyme, or oregano to the dough for an aromatic twist.
- Spicy Cheese Thins: Increase the amount of cayenne pepper or add a pinch of red pepper flakes for extra heat.
- Garlic Cheese Thins: Add a teaspoon of garlic powder to the dough for a savory flavor.
- Seed Topped: Sprinkle sesame seeds, poppy seeds, or everything bagel seasoning on top of the cheese thins before baking.
- Different Cheese: Try using pepper jack, Monterey Jack, or a combination of cheeses for different flavors.
FAQs (Frequently Asked Questions)
Q: Can I use pre-shredded cheese?
A: While pre-shredded cheese is convenient, freshly grated cheese melts better and provides a smoother texture in the dough.
Q: How thin should I roll the dough?
A: The thinner, the better! Aim for paper-thin, so they become extra crispy. If the dough is too thick, they will be more like crackers than thins.
Q: Can I make these ahead of time?
A: Yes, you can make the dough ahead of time and store it in the refrigerator for up to 2 days. Or, you can bake the cheese thins and store them in an airtight container for up to 3 days.
Q: My cheese thins are burning. What am I doing wrong?
A: Your oven temperature might be too high, or the cheese thins might be rolled too thinly. Reduce the oven temperature by 25 degrees or check for doneness a minute or two earlier.
Q: Can I freeze these cheese thins?
A: Yes, you can freeze them! Lay them in a single layer on a baking sheet until frozen, then transfer them to a freezer bag. Reheat in a low oven to restore crispness.
Final Thoughts
These cheese thins are more than just a snack; they’re a taste of tradition and a testament to the simple joy of homemade goodness. I encourage you to try this recipe and create your own memories with these delicious, crispy wafers. Feel free to experiment with different cheeses and spices to find your perfect flavor combination. Share your creations and feedback—I’d love to hear how they turn out for you. Pair them with a glass of crisp white wine for an elegant appetizer, or simply enjoy them as a satisfying snack any time of day. Happy baking!