
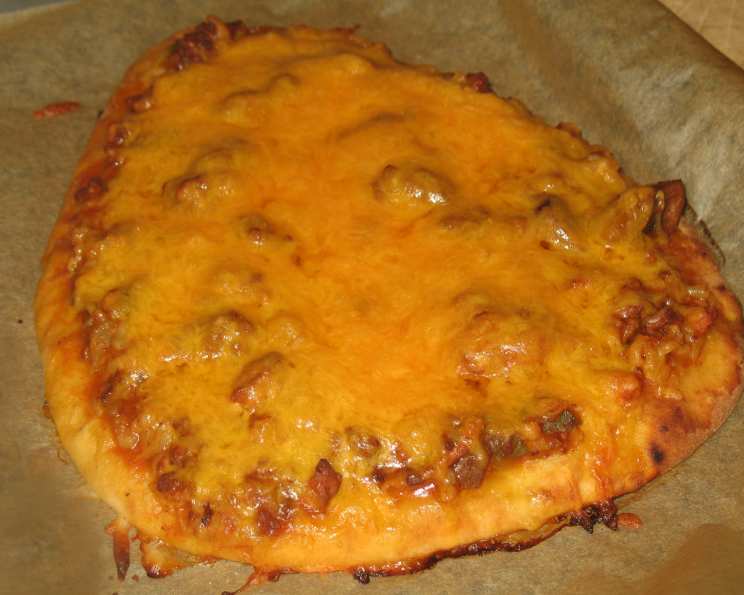
Cheeseburger Pitas: A Delicious Twist on a Classic
I remember my college days, desperately seeking cheap and easy meals between classes. One of my go-to creations was a cheeseburger pita – a culinary Frankenstein born of limited funds and even more limited cooking skills. It wasn’t pretty, but it was satisfying. Now, years later and with a few more culinary tricks up my sleeve, I’ve elevated that humble student staple into something truly special, a cheeseburger pita that’s bursting with flavor and surprisingly elegant. This isn’t just survival food; it’s a delicious, quick, and fun meal for any occasion.
Recipe Overview
- Prep Time: 15 minutes
- Cook Time: 20 minutes
- Total Time: 35 minutes
- Servings: 4
- Yield: 8 pita halves
- Dietary Type: Not specified (easily adaptable)
Ingredients
- 1 lb ground beef
- ½ cup onion, chopped
- ½ cup green pepper, chopped
- 1 cup long grain rice, cooked
- 1 (8 ounce) can tomato sauce
- 2 teaspoons Worcestershire sauce
- ½ teaspoon salt
- ¼ teaspoon pepper
- 2 cups cheddar cheese, shredded
- 4 pita breads, halved (6 inches)
Equipment Needed
- Large skillet
- Measuring cups and spoons
- Wooden spoon or spatula
Instructions
-
In a large skillet, cook the ground beef, chopped onion, and chopped green pepper over medium heat. Cook until the meat is no longer pink, making sure to break it up into small pieces with a spoon or spatula as it cooks. Thoroughly drain off any excess fat from the skillet. Leaving the grease will make the pitas soggy.
-
Add the cooked long grain rice, tomato sauce, Worcestershire sauce, salt, and pepper to the skillet. Stir well to combine all the ingredients evenly.
-
Bring the mixture to a boil. Once boiling, immediately reduce the heat to low, cover the skillet, and simmer for 10-15 minutes. This allows the flavors to meld together beautifully and the sauce to thicken slightly.
-
Remove the skillet from the heat. Stir in the shredded cheddar cheese. Cover the skillet again and cook for 2-3 minutes longer, or until the cheese is completely melted and gooey. This is the perfect moment to peek and stir gently to ensure an even melt.
-
Open the pita breads in half, creating pockets. Spoon approximately ½ cup of the cheeseburger mixture into each pita half. Be careful not to overfill them, as this can make them difficult to handle and prone to spilling.
-
Serve immediately, enjoying the warm, cheesy goodness.
Expert Tips & Tricks
- Beef up the flavor: For an even richer taste, try using a blend of ground beef and ground pork.
- Spice it up: Add a pinch of red pepper flakes or a dash of your favorite hot sauce to the meat mixture for a spicy kick.
- Cheese variations: Experiment with different types of cheese, such as Monterey Jack, pepper jack, or a combination of cheeses, for a unique flavor profile.
- Prep ahead: The meat mixture can be made ahead of time and stored in the refrigerator for up to 2 days. Simply reheat it before stuffing the pitas.
- Toasting for texture: For a crisper pita, lightly toast the stuffed pitas in a toaster oven or under the broiler for a minute or two, being careful not to burn them.
Serving & Storage Suggestions
Serve these cheeseburger pitas immediately while they are warm and the cheese is melted. They are fantastic on their own as a quick lunch or dinner, or you can serve them with a side of crispy French fries, a fresh garden salad, or some crunchy coleslaw.
Leftover cheeseburger pitas should be stored in an airtight container in the refrigerator. They will keep for up to 3 days. To reheat, you can microwave them for a minute or two, but the pita may become a little soggy. For a crispier result, reheat them in a toaster oven or skillet.
Nutritional Information
| Nutrient | Amount per Serving | % Daily Value |
|---|---|---|
| Calories | 833.3 kcal | N/A |
| Calories from Fat | 332 g | 40% |
| Total Fat | 36.9 g | 56% |
| Saturated Fat | 18.8 g | 93% |
| Cholesterol | 136.4 mg | 45% |
| Sodium | 1368.9 mg | 57% |
| Total Carbohydrate | 77.6 g | 25% |
| Dietary Fiber | 3.5 g | 13% |
| Sugars | 5.1 g | N/A |
| Protein | 45.1 g | 90% |
Note: Nutritional information is an estimate and may vary depending on specific ingredients and preparation methods.
Variations & Substitutions
- Vegetarian: Substitute the ground beef with plant-based ground meat or crumbled tofu. You can also add black beans or lentils for extra protein.
- Gluten-Free: Use gluten-free pita bread.
- Dairy-Free: Use dairy-free cheese alternatives.
- Mediterranean Twist: Add some chopped olives, feta cheese, and a drizzle of olive oil to the meat mixture for a Mediterranean-inspired flavor.
- Italian Flair: Mix in some Italian seasoning, garlic powder, and a pinch of oregano. Use mozzarella cheese instead of cheddar.
- Spicy Southwest: Add a can of diced tomatoes and green chilies (Rotel) to the meat mixture for a southwestern kick. Use Monterey Jack cheese for an extra layer of flavor.
FAQs (Frequently Asked Questions)
Q: Can I use a different type of meat?
A: Absolutely! Ground turkey or ground chicken are excellent alternatives to ground beef. Just be sure to cook them thoroughly.
Q: Can I freeze the cheeseburger pitas?
A: It’s best to freeze the meat mixture separately from the pita bread. Once the mixture is cooled, store it in an airtight container in the freezer for up to 2 months. Thaw it overnight in the refrigerator before reheating and stuffing the pitas.
Q: What kind of rice works best in this recipe?
A: Long grain rice is recommended, but you can also use medium grain or short grain rice. Cooked quinoa or brown rice are also healthy alternatives.
Q: Can I add vegetables other than onion and green pepper?
A: Yes, feel free to add other vegetables such as mushrooms, bell peppers (red, yellow, or orange), or zucchini. Add them to the skillet along with the onion and green pepper.
Q: How do I prevent the pita bread from becoming soggy?
A: Be sure to drain the ground beef thoroughly after cooking it. Also, don’t overfill the pitas with the meat mixture. If you’re making them ahead of time, consider toasting the pita bread lightly before stuffing them.
Final Thoughts
These Cheeseburger Pitas are more than just a quick meal; they’re a blank canvas for your culinary creativity. Feel free to experiment with different flavors, cheeses, and toppings to create your own signature version. Whether you’re looking for a simple weeknight dinner or a fun party snack, these pitas are sure to be a crowd-pleaser. Don’t hesitate to share your own variations and feedback – I’m always eager to hear how you’ve made this recipe your own! Enjoy!