
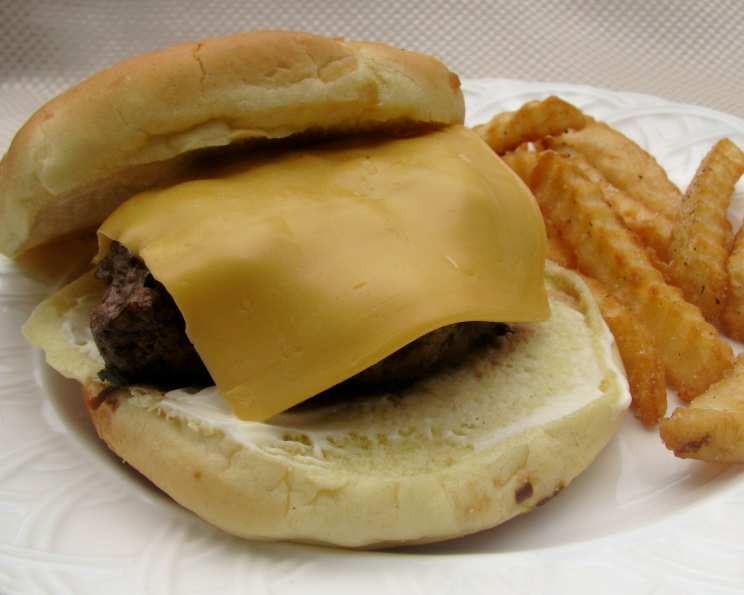
The Quintessential Cheeseburger: A Culinary Ode to Simplicity
There’s a distinct memory etched in my mind: the scent of sizzling beef drifting from a roadside diner during a family road trip. Sunlight glinted off the chrome bumpers of classic cars parked outside, and inside, the air buzzed with conversation and the rhythmic clatter of plates. It was there, at the tender age of six, that I encountered my first true cheeseburger – a revelation of juicy, savory perfection nestled within a soft, yielding bun. This recipe aims to recapture that pure, unadulterated joy, a celebration of simplicity elevated to an art form.
Recipe Overview
- Prep Time: 5 minutes
- Cook Time: 7 minutes
- Total Time: 12 minutes
- Servings: 1
- Yield: 1 burger
- Dietary Type: Not Gluten-Free
Ingredients
- 1/3 lb ground beef
- 1 bun
- 1 slice American cheese
- 1 tablespoon mayonnaise
Equipment Needed
- Frying pan
- Spatula
Instructions
-
Begin by preparing your patty. Gently form the 1/3 lb of ground beef into a round patty, about 3/4 inch thick. Avoid overworking the meat, as this can result in a tough burger. A light touch is key.
-
Heat a frying pan over medium-high heat. There’s no need to add oil unless your pan is prone to sticking. The fat from the beef will render out as it cooks.
-
Carefully place the ground beef patty in the hot pan. Fry for approximately 3-4 minutes per side, or until cooked to your desired level of doneness. For a medium burger (slightly pink in the center), aim for an internal temperature of 145°F (63°C) using a meat thermometer. For well-done, cook to 160°F (71°C).
-
During the last minute of cooking, place the slice of American cheese on top of the patty. Allow it to melt and become gloriously gooey. A lid can be placed over the pan to trap heat and speed up the melting process if desired.
-
While the cheese melts, lightly toast the bun. This step is optional but highly recommended, as it adds a pleasant textural contrast and prevents the bun from becoming soggy. You can toast it in a toaster, under the broiler, or even in the same pan you cooked the burger in.
-
Spread the 1 tablespoon of mayonnaise on the top or bottom bun (or both, if you’re feeling decadent!).
-
Carefully transfer the cheeseburger patty, now draped in melted American cheese, from the pan to the prepared bun.
-
Serve immediately and enjoy!
Expert Tips & Tricks
- Beef Selection: While this recipe calls for standard ground beef, consider experimenting with different fat percentages. A higher fat content (e.g., 80/20) will result in a juicier and more flavorful burger. Ground chuck is an excellent choice.
- Seasoning: Don’t be afraid to season your beef! A simple combination of salt, pepper, and garlic powder can elevate the flavor profile. Mix the seasonings into the ground beef before forming the patty.
- Smash Burger Technique: For a crispy, caramelized crust, try the “smash burger” technique. Press down firmly on the patty with a spatula in the first few minutes of cooking. This maximizes surface area contact with the hot pan.
- Doneness: Use a meat thermometer for accurate doneness. Insert the thermometer into the thickest part of the patty, avoiding contact with the pan.
- Bun Choice: The bun is crucial! A soft, slightly sweet brioche bun complements the savory burger perfectly. Potato buns are another excellent option.
Serving & Storage Suggestions
Serve your cheeseburger immediately while it’s hot and juicy. Classic accompaniments include french fries, onion rings, coleslaw, and pickles. If you have any leftover cheeseburger, wrap it tightly in plastic wrap or aluminum foil and store it in the refrigerator for up to 2 days. Reheat in a microwave, oven, or frying pan. Note that the bun may become slightly soggy upon reheating. Freezing is not recommended, as it will significantly alter the texture of the bun and patty.
Nutritional Information
| Nutrient | Amount per Serving | % Daily Value |
|---|---|---|
| Calories | 572.4 kcal | N/A |
| Calories from Fat | 311 g | 54% |
| Total Fat | 34.6 g | 53% |
| Saturated Fat | 13.3 g | 66% |
| Cholesterol | 120.1 mg | 40% |
| Sodium | 615.6 mg | 25% |
| Total Carbohydrate | 26.6 g | 8% |
| Dietary Fiber | 0.9 g | 3% |
| Sugars | 3.6 g | 14% |
| Protein | 36.5 g | 72% |
Variations & Substitutions
- Cheese Variations: Experiment with different cheeses! Cheddar, Swiss, provolone, and Monterey Jack are all delicious alternatives to American cheese.
- Bun Alternatives: For a gluten-free option, use gluten-free buns or serve the burger open-faced on lettuce wraps.
- Meat Substitutions: Try ground turkey, chicken, or plant-based patties for a lighter or vegetarian option.
- Toppings Galore: Customize your cheeseburger with your favorite toppings! Lettuce, tomato, onion, pickles, bacon, avocado, and various sauces are all excellent additions. Consider adding grilled mushrooms or caramelized onions for an extra layer of flavor.
- Spice it Up: Add a pinch of red pepper flakes to the ground beef or use a spicy mayonnaise for a fiery kick.
FAQs (Frequently Asked Questions)
Q: Can I cook the burger in the oven instead of a frying pan?
A: Yes, you can bake the burger in a preheated oven at 375°F (190°C) for about 15-20 minutes, or until cooked through. However, pan-frying typically yields a better crust and more even cooking.
Q: How do I prevent the burger from shrinking while cooking?
A: Avoid overworking the meat when forming the patty. Also, make a small indentation in the center of the patty before cooking to help prevent it from puffing up and shrinking.
Q: What’s the best way to melt the cheese evenly?
A: Covering the pan with a lid during the last minute of cooking will trap heat and help the cheese melt quickly and evenly.
Q: Can I use frozen ground beef?
A: Yes, but be sure to thaw it completely before cooking for even cooking and optimal flavor. Thawing in the refrigerator overnight is the safest and most recommended method.
Q: Is it okay to use pre-shredded cheese instead of sliced cheese?
A: While you can, sliced cheese will melt more smoothly and evenly than pre-shredded cheese, which often contains cellulose to prevent clumping.
Final Thoughts
There’s a reason the cheeseburger is a timeless classic. Its simple combination of flavors and textures is undeniably satisfying. This recipe, a tribute to the fundamentals, is your passport to burger bliss. Don’t hesitate to experiment with different cheeses, toppings, and sauces to create your own signature cheeseburger. Share your creations and feedback, and remember, the best cheeseburger is the one you enjoy the most. Consider pairing your masterpiece with a crisp, cold beer or a classic milkshake for the ultimate diner experience. Happy cooking!