
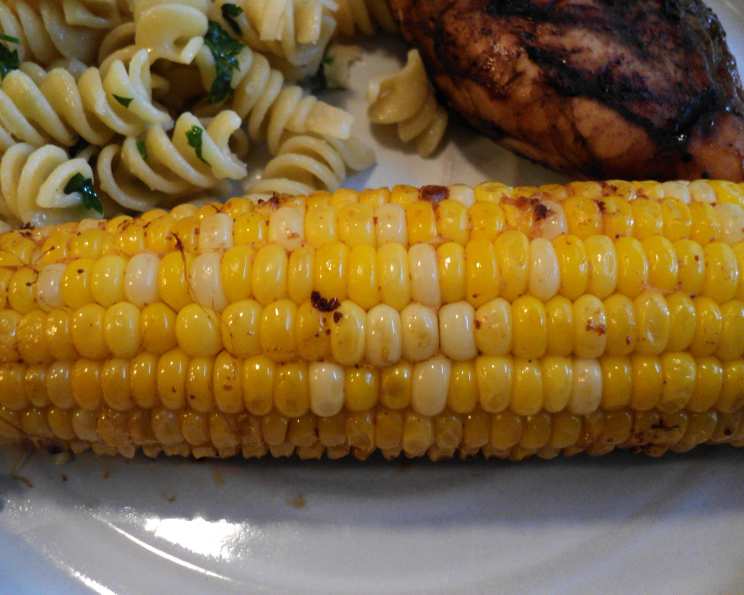
Cheesy Barbecued Corn on the Cob
There’s something magical about the first whiff of barbecue smoke in the air, signaling the start of summer gatherings. But for me, it’s not just the burgers and hot dogs that evoke those nostalgic feelings – it’s the humble corn on the cob, transformed into something extraordinary. My grandpa, a true grill master, used to slather his corn with a secret concoction of butter, chili powder, and that mysterious cheesy dust from the boxed mac ‘n’ cheese my grandma always had on hand. He’d grill it until the kernels were bursting with sweet, smoky, cheesy goodness, and that’s the corn that always tasted like summer to me.
Recipe Overview
- Prep Time: 10 minutes
- Cook Time: 25-30 minutes
- Total Time: 35-40 minutes
- Servings: 6
- Yield: 6 ears of corn
- Dietary Type: Vegetarian
Ingredients
- 6 ears corn
- ½ cup butter, softened
- 1 teaspoon chili powder
- ½ (1 ½ ounce) packet cheddar cheese powder, from boxed macaroni and cheese mix (or ½ creamy cheese sauce packet)
Equipment Needed
- Outdoor grill or oven
- Small bowl
- Aluminum foil
Instructions
-
Preheat your outdoor grill to medium heat, or preheat your oven to 400°F (200°C).
-
Prepare the corn: Shuck the corn, removing all the outer green leaves and silky threads. If desired, leave the innermost husks attached to the cob, as these can be used as natural holders once the corn is cooked.
-
Make the cheese butter: In a small bowl, thoroughly combine the softened butter, chili powder, and cheddar cheese powder (or creamy cheese sauce packet). Ensure all ingredients are evenly distributed for the best flavor.
-
Butter the corn: Generously spread the cheese butter mixture all over each ear of corn, making sure to get between all the kernels.
-
Wrap in foil: Wrap each ear of corn individually in aluminum foil. This will help steam the corn, locking in moisture and flavor.
-
Grill or bake:
- Grilling: Place the foil-wrapped corn directly on the grill grates. Close the lid and cook for 25 to 30 minutes, turning the corn every 5 minutes to ensure even cooking.
- Baking: Place the foil-wrapped corn on a baking sheet and put it in the preheated oven. Bake for 25 to 30 minutes, turning the corn every 5 minutes to ensure even cooking.
-
Check for doneness: The corn is done when the kernels are tender and easily pierced with a fork.
-
Remove foil: Carefully remove the foil from each ear of corn, being cautious of escaping steam.
-
Serve immediately: Serve the Cheesy Barbecued Corn on the Cob immediately while it’s hot and the cheesy butter is still melted and gooey.
Expert Tips & Tricks
-
Softening Butter Quickly: If you forget to take the butter out in advance, you can quickly soften it by microwaving it for 10-15 seconds at a time, checking in between to avoid melting. You can also place the stick of butter in a ziplock bag and submerge it in a bowl of hot water for 5-10 minutes.
-
Grill Basket: For easier grilling, consider using a grill basket. This helps keep the corn from rolling around and ensures even cooking.
-
Cheese Powder Alternatives: If you don’t have a boxed mac and cheese mix, you can use a powdered cheese seasoning blend or even finely grated Parmesan or Romano cheese. For a smoky flavor, try smoked paprika instead of, or in addition to, the chili powder.
-
Don’t Overcook: Overcooking the corn will result in dry, tough kernels. Keep a close eye on it and test for doneness after 25 minutes.
-
Char for Flavor: After the corn is cooked through in the foil, you can unwrap it and place it directly on the grill grates for a few minutes per side to get a nice char. This adds a delicious smoky flavor.
Serving & Storage Suggestions
Serve the Cheesy Barbecued Corn on the Cob as a side dish to any grilled meats, salads, or vegetarian mains. It pairs particularly well with burgers, ribs, grilled chicken, and barbecued tofu.
For leftovers, remove the kernels from the cob and store them in an airtight container in the refrigerator for up to 3 days. Reheat in a skillet with a little butter or olive oil over medium heat, or microwave in 30-second intervals until warmed through. The cooked corn can also be frozen for longer storage. Spread the kernels in a single layer on a baking sheet and freeze. Once frozen, transfer them to a freezer bag for up to 2 months. Reheat from frozen in a skillet or microwave. Reheating the cob itself is not recommended as it tends to dry out the kernels.
Nutritional Information
| Nutrient | Amount per Serving | % Daily Value |
|---|---|---|
| Calories | 264.4 kcal | N/A |
| Calories from Fat | 152 g | 58% |
| Total Fat | 16.9 g | 26% |
| Saturated Fat | 10 g | 49% |
| Cholesterol | 40.7 mg | 13% |
| Sodium | 133.4 mg | 5% |
| Total Carbohydrate | 29.9 g | 9% |
| Dietary Fiber | 3.5 g | 13% |
| Sugars | 3.8 g | 15% |
| Protein | 4.1 g | 8% |
Note: Nutritional information is an estimate and can vary based on specific ingredients and preparation methods.
Variations & Substitutions
-
Spicy Corn: Add a pinch of cayenne pepper or a dash of hot sauce to the butter mixture for a spicy kick.
-
Herbaceous Corn: Mix in fresh herbs like chopped cilantro, parsley, or chives to the butter for a fresh, vibrant flavor.
-
Mexican Street Corn (Elote) Inspired: After grilling, brush with mayonnaise, sprinkle with cotija cheese, and a squeeze of lime juice.
-
Vegan Option: Use vegan butter and nutritional yeast instead of cheese powder for a dairy-free alternative.
-
Smoked Paprika & Garlic: Add 1/2 teaspoon smoked paprika and 1/4 teaspoon garlic powder to the butter mixture for a smoky, savory flavor.
-
Maple-Chili Glaze: Omit the cheese powder and add 1 tablespoon of maple syrup to the butter and chili powder mixture for a sweet and spicy glaze.
FAQs (Frequently Asked Questions)
Q: Can I use frozen corn on the cob for this recipe?
A: Yes, you can use frozen corn on the cob, but you may need to increase the cooking time by 5-10 minutes to ensure it’s fully cooked through. Make sure to thaw the corn slightly before applying the butter mixture.
Q: Can I make this recipe ahead of time?
A: You can prepare the corn by shucking it and applying the butter mixture ahead of time, then wrap it in foil and refrigerate for up to 24 hours before grilling or baking. However, cooking it in advance is not recommended as the corn will lose its freshness and moisture.
Q: What if I don’t have an outdoor grill?
A: No problem! You can easily bake the corn in the oven, as detailed in the instructions. The taste will be very similar.
Q: My cheese powder packet is larger/smaller. How should I adjust the recipe?
A: The recipe calls for approximately 1 1/2 ounces of cheese powder. If your packet is significantly larger, start with half of it and add more to taste. If it’s smaller, you may need to supplement with a little grated Parmesan or Romano cheese.
Q: How do I prevent the foil from sticking to the corn?
A: Make sure the corn is well-coated with the butter mixture before wrapping it in foil. You can also lightly grease the foil with cooking spray before wrapping the corn.
Final Thoughts
This Cheesy Barbecued Corn on the Cob is more than just a side dish; it’s a taste of summer, a memory of shared meals, and a celebration of simple ingredients transformed into something truly special. Don’t be afraid to experiment with different flavors and spice levels to create your own signature version. So fire up the grill or preheat your oven, gather your loved ones, and enjoy this delicious, cheesy, and unforgettable corn on the cob. Let me know in the comments how this recipe turned out for you, and what variations you tried!