
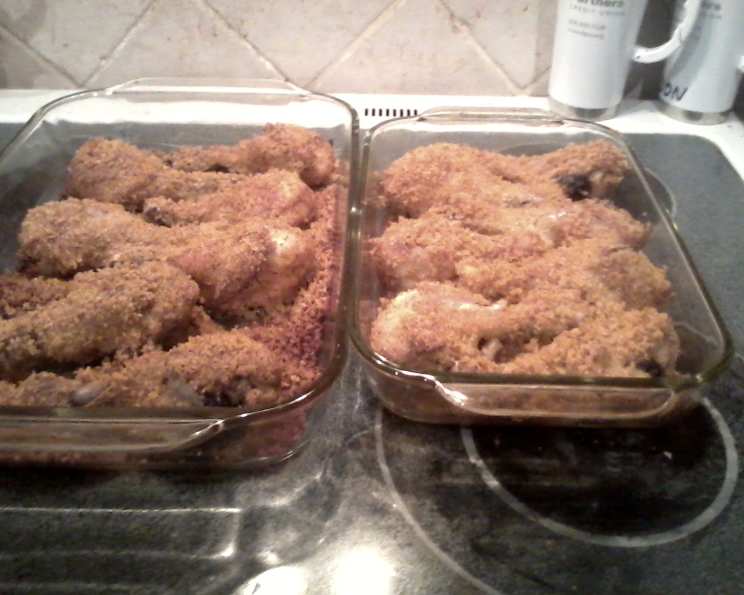
Cheesy Chicken Legs: A Comfort Food Classic
I can still picture my grandmother’s kitchen, sunlight streaming through the floral curtains, the air thick with the savory aroma of herbs and baking chicken. Her “shake and bake” chicken, as she called it, wasn’t just a meal; it was an experience. The crispy, cheesy coating, the tender chicken falling off the bone – it was pure comfort food, simple yet satisfying. While she always bought the pre-made coating, I’ve discovered the joy of creating a homemade version, customizing the flavors to my heart’s content. This Cheesy Chicken Legs recipe is my homage to those cherished memories, a dish that brings warmth and nostalgia to every bite.
Recipe Overview
- Prep Time: 10 minutes
- Cook Time: 60 minutes
- Total Time: 1 hour 10 minutes
- Servings: 4
- Dietary Type: Comfort Food
Ingredients
- 4 chicken legs (Perdue preferred)
- 1/4 cup olive oil
- 1 large ziploc bag
- 1/2 cup dry breadcrumbs (Panko preferred)
- 1/4 cup parmesan cheese, grated (I’ve used reduced fat Kraft parmesan, too!)
- 1/2 teaspoon salt (optional)
- 1/4 teaspoon paprika
- 1/4 teaspoon garlic powder
- 1/4 teaspoon black pepper
Equipment Needed
- Oven
- Cookie sheet (ungreased)
- Ziploc bag
- Brush
Instructions
-
Preheat the oven to 375°F (190°C). This is crucial for even cooking and achieving that golden-brown crust. Make sure your oven is properly calibrated for the best results.
-
In the ziploc bag, combine the dry breadcrumbs, parmesan cheese, salt (if using), pepper, paprika, and garlic powder. Seal the bag and shake well to thoroughly mix the ingredients. This ensures each chicken leg gets an even coating of flavor.
-
Brush each chicken leg with the olive oil. This helps the breadcrumb mixture adhere to the chicken and contributes to a crispier finish. Use a pastry brush or simply drizzle the oil over the chicken and rub it in with your hands.
-
Drop each oiled chicken leg one at a time into the crumb mix in the ziploc bag. Seal the bag, leaving some air inside, and shake well to coat. Ensure each piece is completely covered in the breadcrumb mixture. If needed, you can add more breadcrumbs for better coverage.
-
Place each coated chicken leg side-by-side on an ungreased cookie sheet. Arrange them so they are not touching to allow for even browning.
-
Bake in the preheated 375°F (190°C) oven for 1 hour, or until the chicken is 170°F (77°C) and the juices run clear when pierced with a fork or knife. Using a meat thermometer is the most accurate way to ensure the chicken is fully cooked and safe to eat. The juices should run clear, not pink, when the chicken is done. Cooking time may vary slightly depending on your oven, so check the internal temperature regularly after 50 minutes.
-
Rest chicken for 5-10 minutes before serving to allow the juices to redistribute.
Expert Tips & Tricks
- Crispy Skin Secret: For extra crispy skin, place the chicken legs under the broiler for the last 2-3 minutes of cooking, but watch carefully to prevent burning.
- Even Cooking: Ensure all chicken legs are roughly the same size for even cooking. If there’s a significant size difference, the smaller ones might cook faster, drying out while you wait for the larger ones to finish.
- Flavor Boost: Add a pinch of red pepper flakes to the breadcrumb mixture for a subtle kick of heat.
- Make-Ahead Prep: You can prepare the breadcrumb mixture ahead of time and store it in an airtight container at room temperature for up to a week. You can also coat the chicken legs in the breadcrumb mixture and store them in the refrigerator for up to 24 hours before baking.
Serving & Storage Suggestions
Serve the Cheesy Chicken Legs immediately after baking for the best flavor and texture. They pair perfectly with a simple tossed green salad, roasted vegetables, mashed potatoes, or a baked potato. For a complete meal, consider adding a side of coleslaw or corn on the cob.
Leftovers: Store leftover chicken legs in an airtight container in the refrigerator for up to 3-4 days.
Reheating: Reheat leftover chicken legs in the oven at 350°F (175°C) for 15-20 minutes, or until heated through. You can also microwave them, but the crust may lose some of its crispness. To retain some crispness, try reheating in an air fryer.
Freezing: You can freeze cooked chicken legs for up to 2-3 months. Wrap them individually in plastic wrap, then place them in a freezer-safe bag. Thaw overnight in the refrigerator before reheating.
Nutritional Information
| Nutrient | Amount per Serving | % Daily Value |
|---|---|---|
| Calories | 513 kcal | N/A |
| Total Fat | 36 g | 55% |
| Saturated Fat | 9 g | 44% |
| Cholesterol | 144 mg | 48% |
| Sodium | 327 mg | 13% |
| Total Carbohydrate | 10 g | 3% |
| Dietary Fiber | 1 g | 2% |
| Sugars | 1 g | N/A |
| Protein | 35 g | 69% |
Note: Nutritional information is an estimate and may vary based on specific ingredients and preparation methods.
Variations & Substitutions
- Gluten-Free: Use gluten-free breadcrumbs for a gluten-free version of this recipe.
- Dairy-Free: Substitute the parmesan cheese with nutritional yeast for a dairy-free option.
- Spice It Up: Add a pinch of cayenne pepper to the breadcrumb mixture for a spicier flavor.
- Herbaceous: Add dried herbs like oregano, thyme, or rosemary to the breadcrumb mixture for an herbaceous twist.
- Different Cuts of Chicken: While this recipe is written for chicken legs, you can easily adapt it for other cuts of chicken, such as chicken thighs or chicken breasts. Adjust the cooking time accordingly.
FAQs (Frequently Asked Questions)
Q: Can I use pre-shredded parmesan cheese?
A: Yes, pre-shredded parmesan cheese works fine, but freshly grated parmesan will offer a better flavor and texture.
Q: Can I use other types of breadcrumbs?
A: Yes, you can use any type of breadcrumbs you prefer. Panko breadcrumbs provide a particularly crispy coating, but regular breadcrumbs will also work well.
Q: Do I have to use a ziploc bag to coat the chicken?
A: No, you can also use a shallow dish to coat the chicken. Just make sure to press the breadcrumb mixture onto the chicken to ensure it adheres well.
Q: How do I know when the chicken is done?
A: The best way to determine if the chicken is done is to use a meat thermometer. Insert the thermometer into the thickest part of the chicken leg, avoiding the bone. The internal temperature should reach 170°F (77°C).
Q: Can I bake these chicken legs on a rack?
A: Baking on a rack elevates the chicken and allows air to circulate, resulting in a crispier bottom. If you prefer, place a wire rack on the cookie sheet before arranging the chicken.
Final Thoughts
This Cheesy Chicken Legs recipe is more than just a simple dish; it’s a celebration of comfort, flavor, and the joy of home cooking. Feel free to experiment with different seasonings and variations to create your own signature version. I encourage you to gather your ingredients, preheat your oven, and embark on a culinary adventure that will tantalize your taste buds and warm your soul. Don’t forget to share your creations and feedback – I’m always eager to hear how you make this recipe your own! Serve these with a crisp glass of chilled white wine, like Pinot Grigio, for a delightful pairing.