
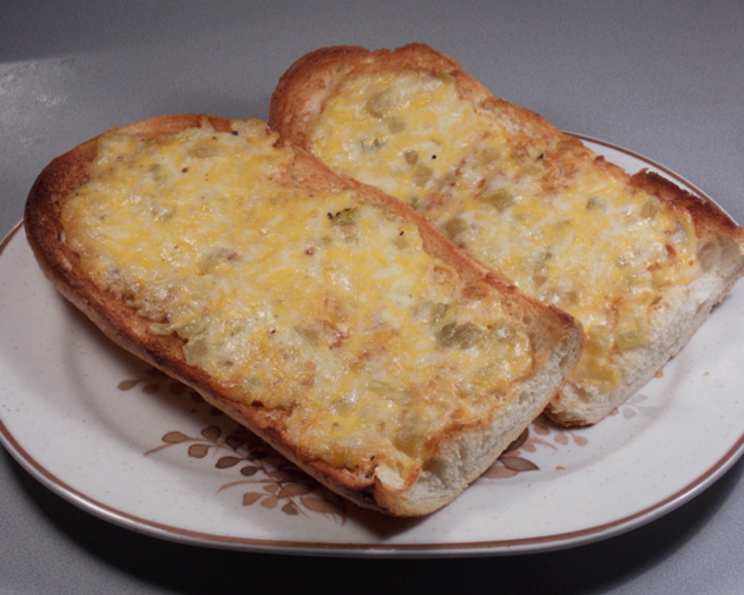
Cheesy Chile Bread: A Taste of Home
The aroma of toasted bread mingling with melted cheese and the subtle kick of green chiles – it instantly transports me back to countless summer evenings grilling with my family. This Cheesy Chile Bread wasn’t just a side dish; it was the star. We’d gather around the picnic table, the warm bread passing from hand to hand, each bite a perfect blend of comfort and spice. More than the flavors, it was about shared laughter and the feeling of togetherness that this simple bread always seemed to spark.
Recipe Overview
- Prep Time: 10 minutes
- Cook Time: 13-20 minutes
- Total Time: 23-30 minutes
- Servings: 6
- Yield: 1 loaf
- Dietary Type: Vegetarian
Ingredients
- ¼ cup mayonnaise
- 4 ounces shredded Monterey Jack cheese
- ¼ cup chopped green chile
- 1 dash hot pepper sauce
- 1 loaf French bread, cut in half lengthwise
Equipment Needed
- Small bowl
- Gas or charcoal grill
Instructions
- Preheat your grill. If using a gas grill, set it to medium-low heat. For a charcoal grill, arrange the coals so they are 4 to 6 inches from the cooking grate to achieve medium heat.
- In a small bowl, combine the mayonnaise, shredded Monterey Jack cheese, chopped green chile, and hot pepper sauce. Mix well until all ingredients are evenly incorporated. This cheesy mixture will be the delicious topping for your bread.
- Place the French bread halves, cut side down, directly on the preheated grill grate.
- Cook the bread for 3 to 5 minutes, or until the cut side is lightly toasted. Keep a close eye on it to prevent burning. The toasting process adds a delightful crunch that complements the cheesy topping.
- Remove the toasted bread from the grill and spread the cheese mixture evenly over the toasted sides of both bread halves.
- Return the bread to the grill, cheese side up. Cook for 10 to 15 minutes, or until the cheese is completely melted, bubbly, and begins to brown slightly. Monitor the bread carefully to ensure the bottom doesn’t burn while the cheese melts.
- Once the cheese is melted and golden brown, carefully remove the Cheesy Chile Bread from the grill. Allow it to cool slightly before slicing and serving.
Expert Tips & Tricks
- For an even cheesier experience, use a blend of Monterey Jack and cheddar cheese.
- If you don’t have a grill, you can easily make this Cheesy Chile Bread in the broiler. Simply preheat your broiler and place the bread on a baking sheet. Broil for a few minutes, watching closely, until the cheese is melted and bubbly.
- To prevent the bread from burning on the grill, consider using a grill basket or placing a sheet of aluminum foil underneath.
- If you like a spicier kick, add a pinch of cayenne pepper or use a hotter variety of green chile.
- Prepare the cheese mixture ahead of time and store it in the refrigerator until you’re ready to grill the bread. This makes it a quick and easy appetizer for impromptu gatherings.
- Don’t overcrowd the grill. Work in batches if necessary to ensure even cooking.
- For best results, use day-old French bread. It holds its shape better and toasts more evenly.
- If the cheese is browning too quickly, move the bread to a cooler part of the grill or lower the heat.
Serving & Storage Suggestions
Serve the Cheesy Chile Bread immediately while it’s warm and the cheese is melted and gooey. It’s fantastic as an appetizer, a side dish with soups or salads, or even as a snack on its own.
Leftovers can be stored in an airtight container in the refrigerator for up to 2 days. To reheat, wrap the bread in aluminum foil and warm it in a preheated oven at 350°F (175°C) for about 10 minutes, or until heated through. You can also reheat it in a microwave, but the bread may become slightly softer. I do not recommend freezing.
Nutritional Information
| Nutrient | Amount per Serving | % Daily Value |
|---|---|---|
| Calories | 608.8 kcal | N/A |
| Calories from Fat | 112 g | 18% |
| Total Fat | 12.5 g | 19% |
| Saturated Fat | 5.2 g | 25% |
| Cholesterol | 20.4 mg | 6% |
| Sodium | 1054.4 mg | 43% |
| Total Carbohydrate | 99.4 g | 33% |
| Dietary Fiber | 4.2 g | 16% |
| Sugars | 5.4 g | N/A |
| Protein | 25.2 g | 50% |
Note: Nutritional information is an estimate and may vary based on specific ingredients and preparation methods.
Variations & Substitutions
- Spicy Cheesy Chile Bread: Add a pinch of cayenne pepper to the cheese mixture or use jalapeños instead of green chiles.
- Garlic Cheesy Chile Bread: Mix some minced garlic or garlic powder into the mayonnaise mixture for a boost of flavor.
- Italian Cheesy Bread: Use mozzarella cheese instead of Monterey Jack, and add some Italian seasoning to the cheese mixture.
- Different Cheeses: Experiment with different types of cheese, such as pepper jack for extra spice, or a blend of cheddar and Gruyere for a richer flavor.
- Herbaceous Cheesy Chile Bread: Incorporate fresh herbs like cilantro, parsley, or oregano into the cheese mixture.
- Gluten-Free: Use a gluten-free baguette instead of French bread.
- Vegan Version: Although this recipe relies heavily on dairy cheese, a vegan option would require sourcing convincing vegan cheese shreds, and a vegan mayonnaise alternative, of which the quality may vary.
FAQs (Frequently Asked Questions)
Q: Can I make this Cheesy Chile Bread ahead of time?
A: You can prepare the cheese mixture ahead of time and store it in the refrigerator. However, it’s best to assemble and grill the bread just before serving to ensure the cheese is melted and the bread is warm.
Q: What if I don’t have a grill?
A: You can easily make this Cheesy Chile Bread in the broiler. Place the bread on a baking sheet and broil for a few minutes until the cheese is melted and bubbly. Watch carefully to prevent burning.
Q: Can I use a different type of bread?
A: Yes, you can use other types of bread, such as sourdough or Italian bread. Just adjust the cooking time as needed.
Q: How do I prevent the bread from burning on the grill?
A: Use medium-low heat and monitor the bread closely while it’s grilling. You can also use a grill basket or place a sheet of aluminum foil underneath to protect the bread.
Q: Can I add other ingredients to the cheese mixture?
A: Absolutely! Feel free to add other ingredients like diced tomatoes, onions, or your favorite herbs and spices to customize the flavor.
Final Thoughts
This Cheesy Chile Bread is more than just a recipe; it’s a taste of comfort, a reminder of warm summer evenings, and an invitation to create your own memories around the grill. I encourage you to try this recipe and make it your own by experimenting with different cheeses, spices, and toppings. Whether you’re grilling for a crowd or simply looking for a quick and delicious snack, this Cheesy Chile Bread is sure to be a hit. Don’t hesitate to share your creations and feedback – I can’t wait to hear how you’ve made this classic recipe your own! Pair it with a cold Mexican beer or a crisp Sauvignon Blanc for the perfect complement.