
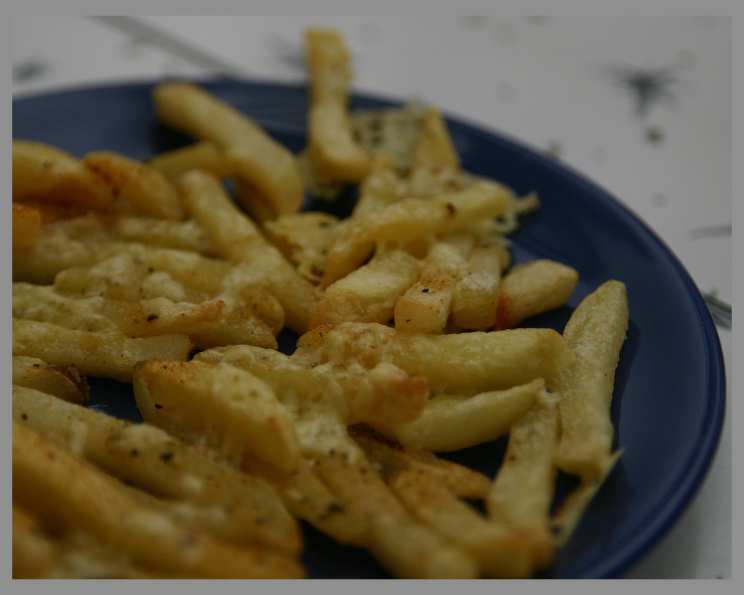
Cheesy Garlic and Herb Chips: The Ultimate Comfort Food
I still remember those Friday nights as a kid, huddled around the TV with my family, the aroma of freshly baked, cheesy, garlic-infused chips filling the air. My mom had this knack for elevating the humble frozen fry into something truly special. Each bite was an explosion of crispy potatoes, savory herbs, pungent garlic, and gooey, melted cheese – a perfect symphony of flavors that turned ordinary evenings into cherished memories. To this day, that simple dish brings a wave of nostalgia and pure comfort.
Recipe Overview
- Prep Time: 5 minutes
- Cook Time: 30 minutes
- Total Time: 35 minutes
- Servings: 4
- Yield: Variable, depending on chip size
- Dietary Type: Vegetarian (easily adaptable to Gluten-Free by choosing appropriate fries)
Ingredients
- 1 kg frozen french fries
- 1 1⁄2 cups grated cheese (cheddar, mozzarella, or a blend work well)
- 1 tablespoon herbs (such as dried oregano, thyme, rosemary, or a mix of Italian herbs) or 1 tablespoon spices (such as garlic powder, onion powder, paprika, or chili powder)
Equipment Needed
- Baking tray
- Oven
- Measuring spoons and cups
Instructions
- Preheat your oven according to the instructions on the frozen french fries packaging. This typically ranges from 200°C (400°F) to 220°C (425°F). Make sure your oven is fully preheated before adding the chips for optimal crispness.
- Evenly spread the frozen french fries on a baking tray. Avoid overcrowding the tray; the chips should be in a single layer to ensure they cook evenly and become crispy. If necessary, use two baking trays.
- Sprinkle the herbs or spices evenly over the fries. For a more intense garlic flavor, consider using a garlic press to mince fresh garlic and then toss it with a little olive oil before sprinkling it over the fries. Be careful not to overdo it, as too much garlic can burn.
- Place the baking tray in the preheated oven and cook for approximately half an hour, or for the time specified on the frozen french fries packaging. Cooking times may vary depending on your oven and the type of fries you are using.
- Check the fries after about 20 minutes. If they are browning too quickly, reduce the oven temperature slightly. If they are not browning enough, increase the temperature slightly. Rotate the tray halfway through the cooking time to ensure even browning.
- About 5 minutes before the fries are finished cooking (as indicated by their golden-brown color and crispy texture), remove the tray from the oven.
- Sprinkle the grated cheese evenly over the fries. Make sure to distribute the cheese evenly so that every fry gets a good amount of cheesy goodness.
- Return the baking tray to the oven and continue baking until the cheese is melted and bubbly. This should take approximately 5 minutes, but keep a close eye on it to prevent the cheese from burning. The cheese should be nicely melted and starting to brown slightly.
- Remove the baking tray from the oven and let the cheesy garlic and herb chips cool for a few minutes before serving. This will allow the cheese to set slightly and make them easier to handle.
Expert Tips & Tricks
- For extra crispy fries, consider parboiling them before baking. Toss the frozen fries in boiling water for a few minutes, then drain and pat them dry before proceeding with the recipe.
- Experiment with different types of cheese. A combination of cheddar and mozzarella provides a good balance of flavor and meltability. Gruyere, Parmesan, or pepper jack cheese can also add interesting flavor profiles.
- If you want to add some heat, sprinkle a pinch of red pepper flakes over the fries along with the herbs and spices.
- For a more gourmet touch, drizzle a bit of truffle oil over the fries after they come out of the oven.
- Don’t have frozen fries? You can use fresh potatoes, cut into fry shapes. Toss them with a little olive oil, salt, and pepper before baking.
- If the cheese isn’t melting properly, try broiling the fries for a minute or two at the end of cooking, keeping a very close eye to prevent burning.
Serving & Storage Suggestions
Serve the cheesy garlic and herb chips immediately while they are still hot and the cheese is melted and gooey. They make a great appetizer, side dish, or snack. Pair them with your favorite dipping sauce, such as ketchup, ranch dressing, or aioli.
Leftover chips can be stored in an airtight container in the refrigerator for up to 2 days. Reheat them in the oven or microwave until warmed through. Note that the fries will lose some of their crispness upon reheating. For best results, reheat them in a preheated oven at 180°C (350°F) for about 5-10 minutes. They are best consumed within 24 hours. I do not recommend freezing the leftovers.
Nutritional Information
Here’s the approximate nutritional information per serving (based on estimations and may vary):
| Nutrient | Amount per Serving | % Daily Value |
|---|---|---|
| Calories | 510.9 kcal | N/A |
| Calories from Fat | 198 g | 39% |
| Total Fat | 22 g | 33% |
| Saturated Fat | 9 g | 45% |
| Cholesterol | 27.1 mg | 9% |
| Sodium | 1239.7 mg | 51% |
| Total Carbohydrate | 66.2 g | 22% |
| Dietary Fiber | 4.8 g | 19% |
| Sugars | 0.5 g | 2% |
| Protein | 14.1 g | 28% |
Note: Nutritional information is an estimate and can vary based on specific ingredients and portion sizes.
Variations & Substitutions
- Vegan Cheesy Garlic & Herb Chips: Use vegan frozen fries and top with your favorite brand of shredded vegan cheese. Nutritional yeast can also add a cheesy flavor.
- Spicy Cheesy Garlic & Herb Chips: Add a pinch of cayenne pepper or some chili flakes to the herb mixture for a spicy kick. You can also use a spicy cheese like pepper jack.
- Mediterranean Cheesy Garlic & Herb Chips: Use feta cheese, oregano, and a drizzle of olive oil for a Mediterranean twist.
- Italian Cheesy Garlic & Herb Chips: Use mozzarella cheese, basil, and oregano for an Italian-inspired flavor.
- Gluten-Free Option: Ensure your frozen fries are certified gluten-free. Many brands offer gluten-free options.
FAQs (Frequently Asked Questions)
Q: Can I use fresh herbs instead of dried herbs?
A: Yes, you can use fresh herbs. Use about twice the amount of fresh herbs as you would dried herbs. Chop the fresh herbs finely before sprinkling them over the fries.
Q: What kind of cheese works best for this recipe?
A: Cheddar and mozzarella are classic choices, but you can use any cheese that melts well, such as Gruyere, Monterey Jack, or a blend of cheeses.
Q: Can I make these ahead of time?
A: It’s best to make these chips fresh, as they are at their best when the cheese is melted and the fries are crispy. However, you can prep the ingredients ahead of time by grating the cheese and mixing the herbs and spices.
Q: My cheese isn’t melting properly. What can I do?
A: Make sure your oven is hot enough and that the cheese is evenly distributed over the fries. If the cheese still isn’t melting, try broiling the fries for a minute or two, keeping a close eye to prevent burning.
Q: Can I use an air fryer instead of an oven?
A: Yes, you can use an air fryer. Cook the fries according to the air fryer’s instructions, then add the cheese during the last few minutes of cooking.
Final Thoughts
These cheesy garlic and herb chips are more than just a snack; they’re a hug in food form. The perfect balance of salty, savory, and cheesy makes them incredibly addictive, and the ease of preparation makes them a go-to for any occasion. Don’t be afraid to get creative with your herbs, spices, and cheeses to create your own signature version. Gather your ingredients, preheat your oven, and get ready to experience a delicious explosion of flavor that will bring joy to your taste buds and smiles to your face. I hope you enjoy them as much as my family and I do! Let me know what you think!