
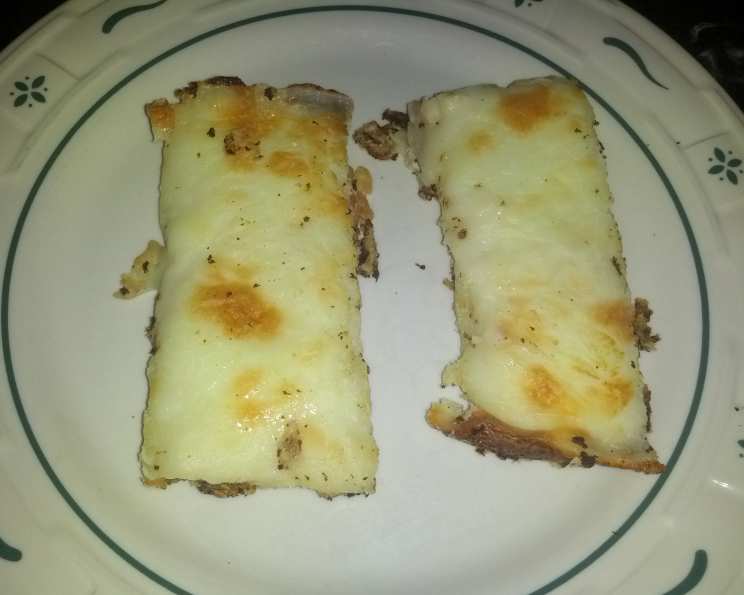
Cheesy Garlic Cauliflower Mock Breadsticks (Low Carb)
When I first transitioned to a low-carb lifestyle, I thought I’d have to bid farewell to some of my favorite comfort foods. The idea of never again enjoying a warm, cheesy breadstick was genuinely heartbreaking. But necessity is the mother of invention, and after some kitchen experimentation (and a few less-than-stellar attempts), I landed on these cheesy garlic cauliflower mock breadsticks – a revelation! They’re delightfully savory, surprisingly satisfying, and completely guilt-free. I can still remember the look of pure joy on my daughter’s face when she took her first bite and declared, “These are even better than the real thing, Mom!”
Recipe Overview
- Prep Time: 15 minutes
- Cook Time: 25 minutes
- Total Time: 40 minutes
- Servings: 8
- Yield: 1 pan
- Dietary Type: Low Carb
Ingredients
- 1 head cauliflower
- 4 garlic cloves, minced
- 1 tablespoon olive oil
- 3 eggs, beaten
- 1 cup mozzarella cheese, divided
- ½ teaspoon onion powder
- ¼ teaspoon salt
- 1 dash pepper
Equipment Needed
- Microwave-safe bowl
- Food processor
- Large bowl
- Baking pan (approximately 11.5″ x 7″)
- Cooking spray
Instructions
-
Begin by preparing the cauliflower. Chop the cauliflower into small chunks and place them in a microwave-safe bowl. Microwave for approximately 8 minutes, or until the cauliflower is soft. This step is crucial for creating a smooth and manageable base for your breadsticks. Allow the cauliflower to cool slightly before proceeding – it will be much easier to handle.
-
Preheat your oven to 450°F (232°C). Making sure your oven is fully heated to the correct temperature is critical for even cooking and browning.
-
In a food processor, combine the cooked cauliflower and minced garlic. Blend until the mixture is finely ground. While the food processor is running, slowly drizzle in the olive oil. Continue blending until the cauliflower reaches a mashed potato-like consistency. Be careful not to over-process; you want a smooth texture, but not a watery purée.
-
Transfer the cauliflower mixture to a large bowl. Add the beaten eggs, ½ cup of the mozzarella cheese, onion powder, salt, and pepper. Stir everything together thoroughly until all ingredients are evenly distributed. This is where the flavor really starts to come together!
-
Spray your baking pan (approximately 11.5″ x 7″) generously with cooking spray. This will prevent the breadsticks from sticking and make them easier to remove after baking. Pour the cauliflower mixture into the prepared pan and use a spatula or your hands to pat it down evenly. The mixture should be about ½ inch thick. A consistent thickness will ensure even baking.
-
Bake in the preheated oven at 450°F (232°C) for 25 minutes, or until the top begins to brown. Keep a close eye on the breadsticks during the last few minutes of baking to prevent them from burning. The edges should be nicely golden.
-
Remove the baking pan from the oven and sprinkle the remaining ½ cup of mozzarella cheese evenly over the top. Return the pan to the oven and bake for another few minutes, or until the cheese is melted and bubbly.
-
Let the cauliflower breadsticks cool slightly in the pan before cutting them into desired sizes. Using a pizza cutter or a sharp knife works well. Serve warm and enjoy!
Expert Tips & Tricks
- Roasting the Cauliflower: For a deeper, more caramelized flavor, consider roasting the cauliflower florets instead of microwaving them. Toss them with olive oil, salt, and pepper, then roast at 400°F (200°C) until tender and slightly browned before processing.
- Spice it Up: Add a pinch of red pepper flakes to the cauliflower mixture for a hint of heat.
- Don’t Overcrowd: Ensure the cauliflower mixture is spread in a thin, even layer in the baking pan for the best texture. Overcrowding will lead to a soggy result.
- Make-Ahead Tip: The cauliflower mixture can be prepared ahead of time and stored in the refrigerator for up to 24 hours before baking. This makes it a convenient option for busy weeknights.
- Cheese Perfection: For extra browning, try broiling the breadsticks for the last minute or two of baking, keeping a close watch to prevent burning.
Serving & Storage Suggestions
These Cheesy Garlic Cauliflower Mock Breadsticks are best served warm, straight from the oven. They make a fantastic appetizer, side dish, or even a light meal. Consider pairing them with a marinara sauce, pesto, or a creamy garlic dip.
To store leftovers, allow the breadsticks to cool completely before placing them in an airtight container. They can be stored in the refrigerator for up to 3 days. Reheat them in the oven at 350°F (175°C) for about 10 minutes, or until warmed through and the cheese is melted. You can also reheat them in the microwave, but be aware that they may become slightly softer. Freezing is not recommended as it can affect the texture.
Nutritional Information
| Nutrient | Amount per Serving | % Daily Value |
|---|---|---|
| Calories | 104.9 kcal | N/A |
| Calories from Fat | 61 g | 58% |
| Total Fat | 6.8 g | 10% |
| Saturated Fat | 2.7 g | 13% |
| Cholesterol | 80.8 mg | 26% |
| Sodium | 209.5 mg | 8% |
| Total Carbohydrate | 4.7 g | 1% |
| Dietary Fiber | 1.5 g | 6% |
| Sugars | 1.6 g | N/A |
| Protein | 7 g | 13% |
Note: Nutritional information is an estimate and may vary based on specific ingredients and portion sizes.
Variations & Substitutions
- Dairy-Free: Substitute the mozzarella cheese with a dairy-free alternative, such as vegan mozzarella shreds. Be aware that the flavor and texture may differ slightly.
- Herb Infusion: Add fresh herbs, such as chopped rosemary, thyme, or oregano, to the cauliflower mixture for a more aromatic breadstick.
- Different Cheeses: Experiment with different types of cheese, such as Parmesan, cheddar, or provolone, for a unique flavor profile.
- Vegetarian Option: Make sure that any cheese used is vegetarian-friendly (some cheeses use animal rennet).
- Spicy Version: Add a pinch of cayenne pepper or a dash of hot sauce to the cauliflower mixture for a spicy kick.
FAQs (Frequently Asked Questions)
Q: Can I use frozen cauliflower for this recipe?
A: Yes, you can use frozen cauliflower. Just make sure to thaw it completely and squeeze out any excess moisture before blending it in the food processor.
Q: How do I prevent the breadsticks from being soggy?
A: Ensure that you cook the cauliflower until it’s soft but not mushy. Also, make sure to spread the cauliflower mixture in a thin, even layer in the baking pan.
Q: Can I add other vegetables to the mixture?
A: Yes, you can experiment with adding other finely chopped vegetables, such as spinach or zucchini, to the cauliflower mixture. Just be mindful of the added moisture content.
Q: Can I make these breadsticks ahead of time and freeze them?
A: While you can freeze them, the texture might change slightly upon thawing and reheating. It’s best to enjoy them fresh or store them in the refrigerator for a few days.
Q: What if I don’t have a food processor?
A: If you don’t have a food processor, you can use a blender or even a potato masher to break down the cauliflower. However, the texture might not be as smooth.
Final Thoughts
These Cheesy Garlic Cauliflower Mock Breadsticks are a testament to the fact that you don’t have to sacrifice flavor when embracing a low-carb lifestyle. They’re incredibly versatile, easy to make, and sure to become a family favorite. I encourage you to give this recipe a try and let me know what you think! Feel free to experiment with different cheeses, herbs, and spices to create your own unique version. Pair them with a comforting bowl of tomato soup for a satisfying and guilt-free meal.